Send E-mails
You can send e-mails.
Depending on your settings configured by system administrators, you may not be able to send HTML e-mails.
-
Click the app icon
 in the header.
 -
Click E-mail.
-
Open the "Compose E-mail" screen.
The steps to display the "Compose E-mail" screen vary depending on the view that you are using.
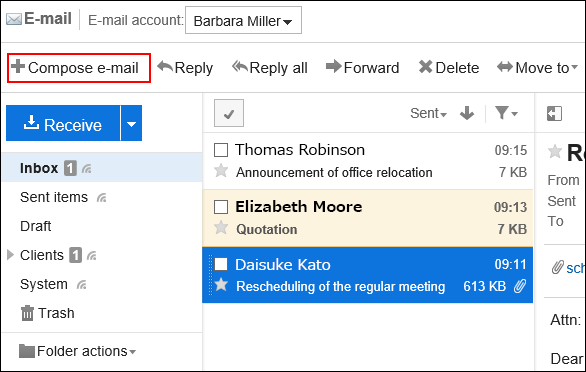
- When preview is shown
- Click Compose.
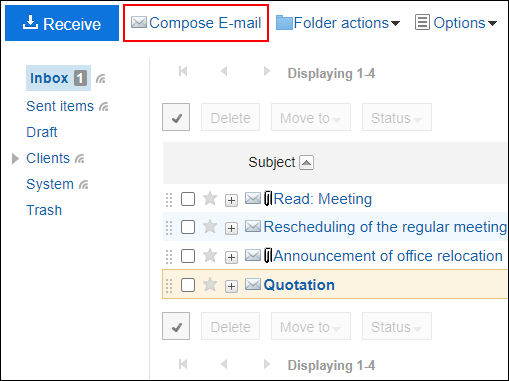
- When preview is hidden
- Click "Compose E-mail".
-
On the "Compose E-mail" screen, set the required items.
Items on The "Compose E-Mail" ScreenThis section use a window without preview as an example.
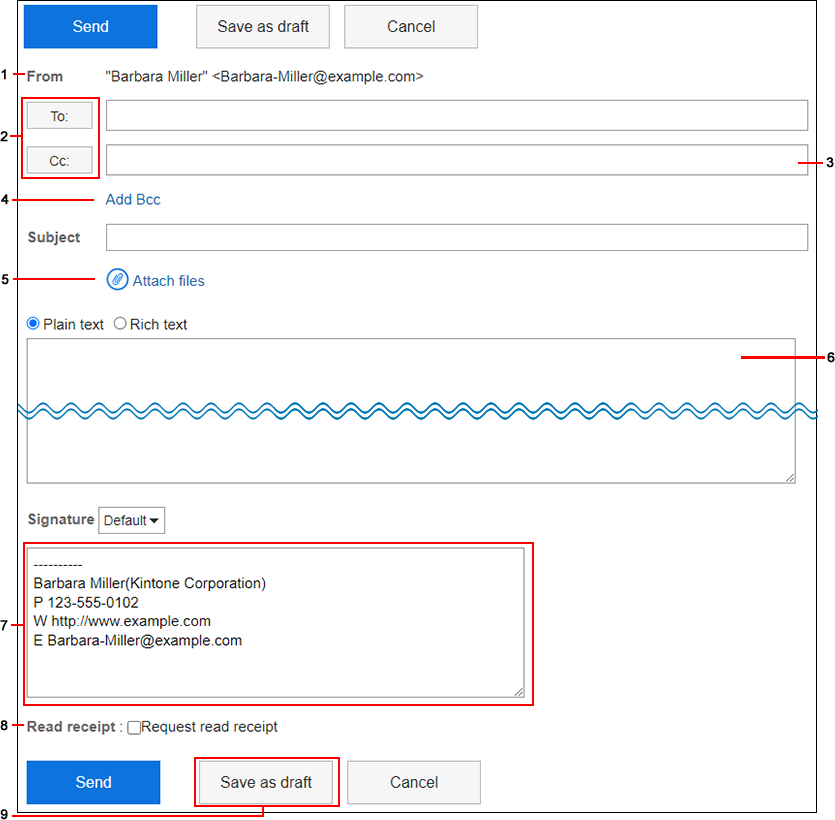
Number Description 1 From:
Select the account you want to use for the sender if all of the following conditions are met.- You are using multiple e-mail accounts.
- The preview pane is hidden in the "E-mail" screen.
2 "To:" and "Cc:" button:
When clicked, the "Select e-mail address" screen is displayed in a new window.
Finds recipients from the following data in the Address Book.- My address groups
- User list
- Personal Address Book
- My Group
- Shared Address Book
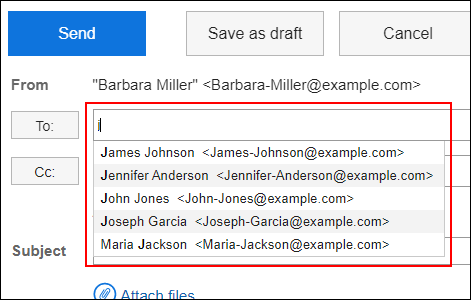
3 Address field:
Enter the e-mail address of the recipient.
If your system administrator has allowed you to use the incremental search, you can enter the address using the incremental search. For details on the incremental search, refer to Incremental search.
If you entered an invalid e-mail address, the background is displayed in red.4 Link for adding Bcc:
When clicked, the "Bcc:" field is displayed.
The e-mail address that is set to "Bcc:" are not shown to other recipients in "To:", "Cc:", and "BCC:".5 Attachments Link:
Attach a file if necessary.
You can also attach files by drag and drop.
For details, refer to When you use drag and drop function.6 Body:
You can use plain text e-mail or text formatting.
For details, refer to Working with Rich Text Formatting.7 Signature:
This is displayed if you have set a signature.
Selected signature is inserted at the end of the e-mail body.8 Request for Read receipts:
To know whether or not the e-mail has been opened by the recipient, select the checkbox for requesting a read receipt.
You may not be able to use the read receipt feature, depending on the settings configured by your system administrator.9 Save as draft button:
Save the e-mail as a draft. The draft e-mail is saved in the Drafts folder. -
Check your entries, and then click Send.
The confirmation screen is displayed according to the user's settings.
- If you have disabled "Confirmation before sending e-mail" in your personal settings:
Sending e-mail is completed in step 5. - If you have enabled "Confirmation before sending e-mail" in your personal settings:
Proceed to step 6.
For confirmation before sending, refer to General Settings of E-mails.
- If you have disabled "Confirmation before sending e-mail" in your personal settings:
-
Click Send on the "Confirm E-mail sending" screen.
To change the contents of the e-mail, click Reedit".
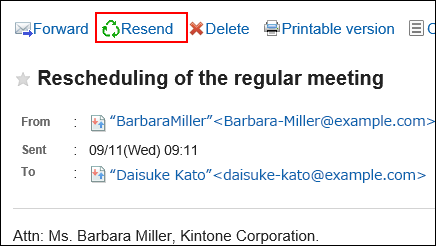
Resending E-mails
Users can resend the e-mails only which they sent by themselves.
-
Click the app icon
in the header. -
Click E-mail.
-
On the "E-mail" screen, select the Sent items folder and display the screen for resending e-mails.
The steps to display the screen for resending e-mails vary depending on the view that you are using.
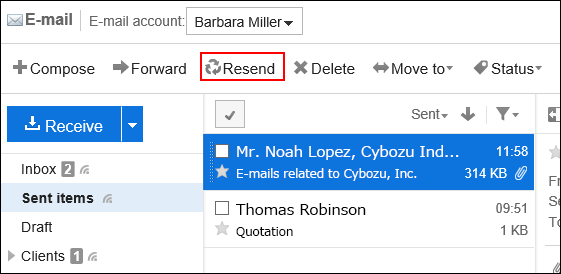
- When preview is shown
- Select the e-mail you want to resend.
- Click "Resend".
- When preview is hidden
- Click the subject of the e-mail you want to resend.
- Click "Resend" on the "E-mail Details" screen.
-
On the screen for resending e-mails, set the required items.
For details on the settings, refer to the Settings on the "Compose E-mail" screen. -
Check your entries, and then click Send.
The confirmation screen is displayed according to the user's settings.
- If you have disabled "Confirmation before sending e-mail" in your personal settings:
Sending e-mail is completed in step 5. - If you have enabled "Confirmation before sending e-mail" in your personal settings:
Proceed to step 6.
For confirmation before sending, refer to General Settings of E-mails.
- If you have disabled "Confirmation before sending e-mail" in your personal settings:
-
Click Send on the "Confirm E-mail sending" screen.
Incremental Search Specification
While typing in part of an e-mail address in the e-mail destination field, user display names and e-mail address that start with the typed characters are displayed as suggestions.
Suggestions are sorted by display names and e-mail addresses, and up to ten suggestions appear in ascending order.
The recipients of the sent e-mail are displayed in the suggestions.
Addresses registered in the following address books are also displayed as suggestions.
- User list
- Personal Address Book
-
- Shared address book to which the user has access rights
Search Priority
The order of items to be searched is as follows.
- Display Name
If the display name contains a space, the string before the space will be the search target.
Search will be done in the order of personal address books, shared address books, user list, and sent e-mail addresses, and will be performed until finding the up to 10 results. - Text after the space of the display name
If the search results of 1 are less than 10, the text after the space in display name will also be searched.
Search will be done in the order of personal address books, shared address books, user list, and sent e-mail addresses, and will be performed until finding 10 total results. - E-mail address
If the total search results for 1 and 2 are less than 10, e-mail addresses will become the target of search.
Search will be done in the order of personal address books, shared address books, user list, and sent e-mail addresses, and will be performed until finding 10 total results.
Display Order of Search Results
If "aiko" is searched, the search results of the incremental search will be displayed in the following order.
| Display order | Display name | E-mail address | Items to be searched |
|---|---|---|---|
| 1 | aiko1 sato | aiko1-sato@example.com | The display name in the Personal Address Book |
| 2 | aiko2 sato | aiko2-sato@example.com | The display name in the Shared Address Book |
| 3 | aiko tanaka | aiko-tanaka@example.com | The display name in the user list |
| 4 | aiko yamada | aiko-yamada@example.com | The display name in the sent e-mail address |
| 5 | suzuki aiko | aiko-suzuki@example.com | Text after the space in the display name in the Personal Address Book |
| 6 | suzuki aiko | aiko@example.com | Text after the space in the display name in the Shared Address Book |
| 7 | suzuki aiko | aiko.s@example.com | Text after the space in the display name in the user list |
| 8 | suzuki aiko | aikosuzuki@example.com | Text after the space in the display name in sent addresses |
| 9 | 佐藤 愛子 | aiko3@example.com | E-mail address in Personal Address Book |
| 10 | 佐藤 愛子 | aiko2@example.com | E-mail address in Shared Address Book |