Forward e-mails
You can forward received e-mails.
In Garoon version 5.9.0 or later, you can also forward e-mails you already sent.
-
Click the app icon
 in the header.
 -
Click E-mail.
-
On the "E-mail" screen, select a folder and display the screen for forwarding e-mails.
The steps to display the screen for forwarding e-mails vary depending on the view that you are using.
- When preview is shown
-
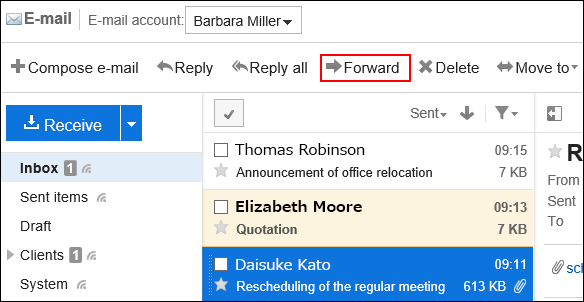
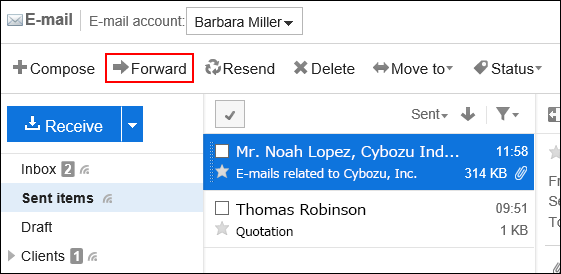
Select the e-mail that you want to forward.
-
Click "Forward".
- When using a received e-mail
- When using a sent e-mail
- When using a received e-mail
- When preview is hidden
-
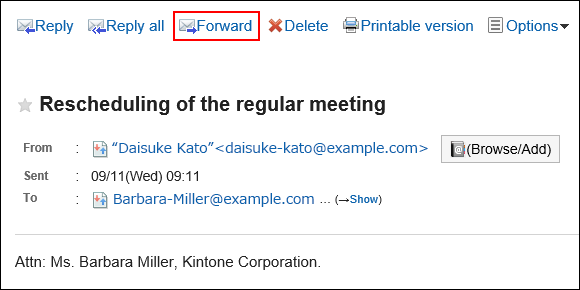
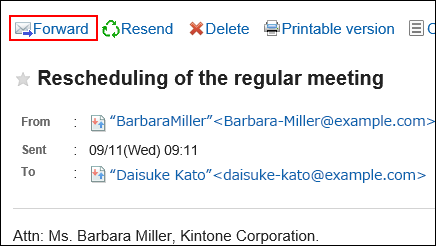
Click the subject of the e-mail that you want to forward.
-
On the "E-mail Details" screen, click "Forward".
- When using a received e-mail
- When using a sent e-mail
- When using a received e-mail
-
On the screen for forwarding e-mails, set the required items.
"Fwd:" is inserted in the subject of the e-mail that you forward.
The body text contains the text "----- Original Message -----", followed by the original e-mail content.
Attachments are also forwarded.
For details on the settings, refer to the Settings on the "Compose E-mail" screen.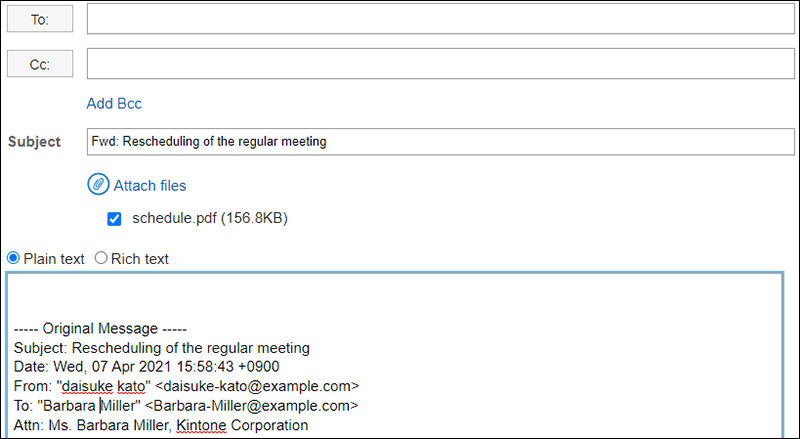
-
Check your entries, and then click Send.
The confirmation screen is displayed according to the user's settings.
- If you have disabled "Confirmation before sending e-mail" in your personal settings:
Sending e-mail is completed in step 5. - If you have enabled "Confirmation before sending e-mail" in your personal settings:
Proceed to step 6.
For confirmation before sending, refer to General Settings of E-mails.
- If you have disabled "Confirmation before sending e-mail" in your personal settings:
-
Click Send on the "Confirm E-mail sending" screen.
To change the contents of the e-mail, click Reedit".