How to Use Mentions
This section describes how to use the mention feature.
With mention feature, you can specify specific users as the recipients of your comment.
You can use the mention feature in the following situations.
- When you want the users who receive many update notifications not to miss your comment.
- When you want the users to read comments who disabled the notification or who are not the recipients of the notifications.
Users who are not specified as recipients can also view the comments. As a result, even non-recipient users can easily distinguish the recipients of posted comments.
Moreover, when specified as a recipient, "@ To me" notifications are displayed in "Notifications" in addition to regular update notifications.

You can use this feature in the comment field of the following applications.
If you want to specify recipients individually, you can select users, organizations, and roles.
- Space discussions
- Scheduler:
Available in Garoon version 5.5.0 or later.
In Scheduler, in Garoon version 5.15.0 and later, you can specify all attendees as recipients using "@Attendees". - Messages
- MultiReport:
Available in Garoon version 5.15.0 or later.
Mentioning the Recipients
Specify recipients individually.
This section describes the steps using the screenshots of the application other than Scheduler.
-
Display the comment field of applications where you can use the mention feature.
-
Click "@Mention" to display the recipients field.

-
Enter the user name in the recipient field and specify the recipients.
When you start entering the recipient information, the suggestions for recipients are displayed.
For details, refer to Conditions under Which Suggestions of Recipients Are Displayed.
-
Confirm the specified recipients and the display order.
You can change the order of recipients by drag and drop. You can delete the specified recipients by mousing over the specified recipients and clicking
 .
.
-
Enter a comment and click "Post".
When you start entering a part of the following information in the recipients field, the suggestions for recipients are displayed. Up to 20 suggestions for recipients are displayed in the following order: users, organizations, and roles.
- If the recipient is a user:
- Name (Standard)
- English spelling
- Pronunciation
- Login name
- E-mail address
- If the recipient is an organization:
- Organization name data
- Localized display names
- If the recipient is a role:
- Group (role) name
Mention feature requires you to specify the recipients from the suggestions based on the characters you entered.

Addresses that are not specified correctly, such as users who do not have accounts in Garoon, are deleted from the input field and cannot be used as the recipients.
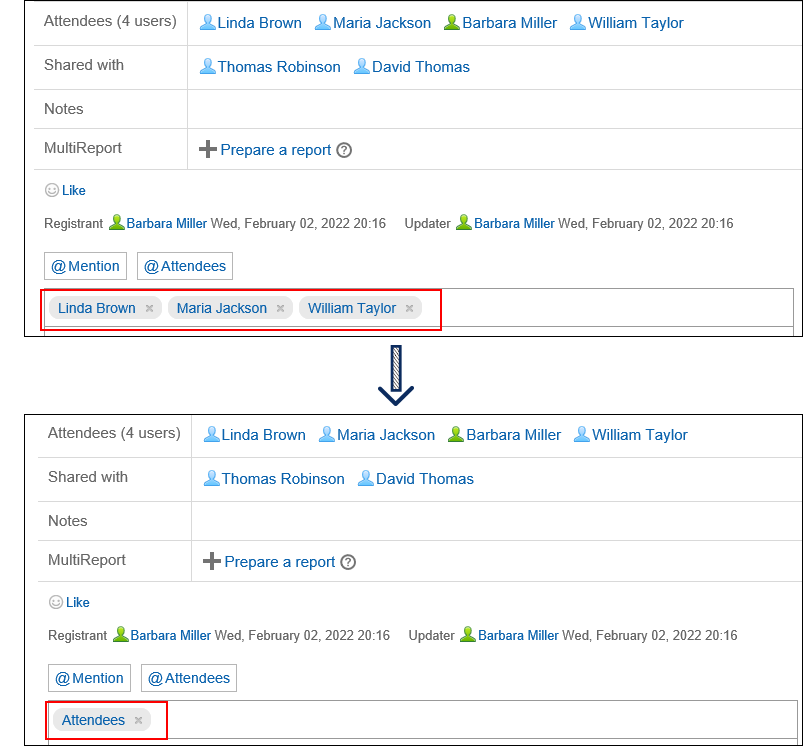
Specifying All Attendees as Recipients
In Scheduler, you can specify all attendees for an appointment by using "@Attendees".
With this, you do not need to type each attendee as a recipient one by one.
- Notifications:
All appointment attendees will receive "@To me" notification.
However, if an organization is included in the appointment attendees, users who belong to the organization will not receive notifications. - Attendance:
In the case of appointments with response requests enabled, attendees who already chose not to attend or have not answered yet will also be included in the "@Attendees" recipients. - Shared with:
The "Shared with" users are not included in the "@Attendees" recipients.
-
Display the comment field in Scheduler.
-
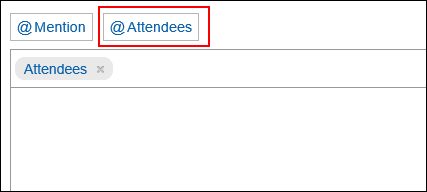
Click @Attendees.
-
Enter a comment and click "Post".
Checking the Mentioned Notifications
You will be notified when you are mentioned using one of the following.
- Name
- Organizations you belong to
- Roles that you have set
- Participants:
When "@Attendees" is specified for the appointment you participate.
Notifications that you have mentioned yourself are not notified.
"Notifications" is an application that allows you to check notifications on updates for each application.
By writing a comment by mentioning the recipient, the users specified as the recipients can filter only the notifications addressed to them in the list.
For details on the "Notifications", refer to the explanation on checking the notifications.
If your system administrator or users have set up the "Notifications" portlet in the portal, you can check the notifications on the top page.
For details of the "Notifications" portlet, refer to "Notifications" Portlet.