Responding to Attendance Request
When you create an appointment with the attendance request feature, you can ask attendees to respond whether they will attend the appointment or not.
When attendees reply to the attendance request, only the creator of the appointment receives the notifications.
You may not be able to use the attendance request feature, depending on the settings configured by your system administrator. For details, refer to Allowing Users to Use the Attendance Feature.
Responding to Attendance Response Requests
You can respond to an appointment with the attendance request.
Responding from the "Appointment Details" Screen
From the "Appointment details" screen, you can respond to the attendance request.
-
Display an appointment to respond to the attendance request.
- To view from the scheduler:
- Click the app icon
 in the header.
 - Click Scheduler.
- On the "Scheduler" screen, click the title of the appointment with the icon of
 .
.
- To display from the "Notifications" portlet:
- In the "Notifications" portlet, click "You have X appointments with pending status".
- In the "My attendance requested" on the "Response request list" screen, click the title for the appointment you want to respond.
The "Response request list" screen displays the appointments with response requests that you are invited as an attendee, which you haven't answered yet.
It only displays the appointments whose end times are scheduled after the current time. If the appointments do not have end times configured, it only displays appointments whose start times are later than the current time.
-
On the "Appointment details" screen, enter your message then click Accept or Decline.
You can click Accept or Decline without entering your message.
If you select "Decline", the appointment will not appear on your "Scheduler" screen.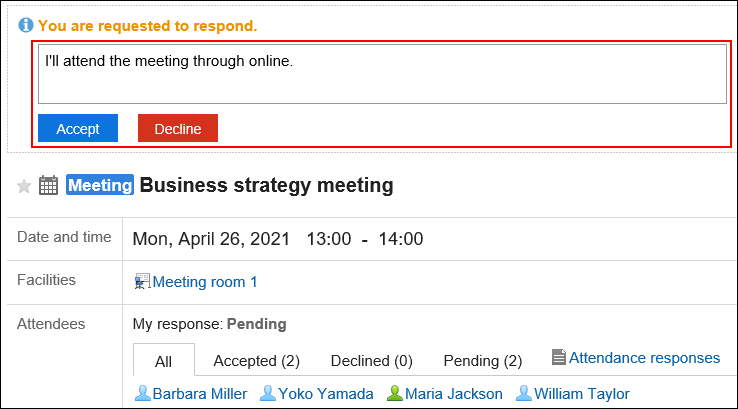
Responding Through the "Response request list" Screen
Through the "Response request list" screen, you can respond to attendance requests.
You can respond to all attendance requests that you have not yet responded to.
-
Display the "Response request list" screen.
- To view from the scheduler:
- Click the app icon in the header.
- Click Scheduler.
- On the "Scheduler" screen, click Response request list.

- To display from the "Notifications" portlet:
- In the "Notifications" portlet, click "You have X appointments with pending status".
-
In the "My attendance requested" on the "Response request list" screen, click Change for the appointment you want to respond.
- If you view from the Scheduler:
Displays a list of all appointments with attendance requests that you are invited as an attendee. - If you view from "Notifications" portlet:
Displays a list of appointments with attendance requests that you are invited as an attendee, which you haven't answered yet.
The "Response request list" screen only displays the appointments whose end times are scheduled after the current time. If the appointments do not have end times configured, it only displays appointments whose start times are later than the current time.
- If you view from the Scheduler:
-
Select Accept or Decline, enter your message, then click Save.
You can click Accept or Decline without entering your message.
If you select "Decline", the appointment will not appear on your "Scheduler" screen.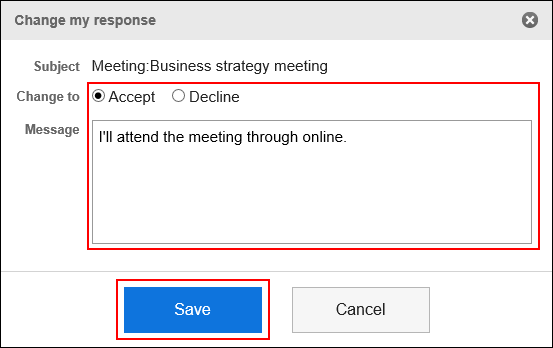
Confirming Attendance Responses
Check the appointments with attendance requests that you are invited as an attendee, or the response status for the appointments with attendance requests you have created.
Confirming from the "Appointment Details" Screen
Check the status of attendee responses for attendance requests on the "Appointment Details" screen.
-
In the "Notifications" Portlet, click the title of the appointment where the "Responded to attendance" is displayed.
-
On the "Appointment details" screen, click "Attendance responses" in the "Attendees" field.
If a new response has been added, "( Updated)" is displayed on the right of "Attendance responses".
-
On the "Attendance responses" screen, check the status and messages of the attendees of the appointment.
Confirming from the "Response request list" Screen
Check the status of all attendee responses for response requests on the "Response request list" screen.
-
Click the app icon
in the header. -
Click Scheduler.
-
On the "Scheduler" screen, click Response request list.
-
Confirm the status on the "Response request list" screen.
The "Response request list" screen only displays the appointments whose end times are scheduled after the current time. If the appointments do not have end times configured, it only displays appointments whose start times are later than the current time.
By clicking "Filter", you can filter the appointments using your responses.- To check the status of your responses for attendance requests:
In the "My attendance requested", check the status of your responses.
Displays all appointments with attendance requests that you are invited as an attendee.
- To check the status of attendee responses to appointments you have created:
-
Click Organized by me.
-
In "Organized by me", confirm the status of attendance.
The number in the "Responded" is "The number of users who have responded/The number of all attendees".
By clicking the link of the number in the "Responded" column, you can check the status of attendee responses and messages in the "Attendance responses" screen.
- To check the status of your responses for attendance requests:
Changing the Date and Time of an Appointment with the Attendance Request
Change the date and time of an appointment with attendance request.
-
Click the app icon
in the header. -
Click Scheduler.
-
On the "Scheduler" screen, click the title of the appointment with attendance request for which you want to change the date and time of the appointment.
-
On the "Edit appointment" screen, change the "Date and time" field.
-
Confirm your changes and click Save.
-
On the "Edit appointment" dialog, you can set whether to reset all attendance responses.
- When you want to keep the attendance responses:
Clear the checkbox for "Clear all attendance responses" and click Save. The attendees' attendance responses are taken over and only the date and time of the appointment will be changed. - When you want to reset the attendance responses:
Select the checkbox for "Clear all attendance responses" and click Save. If you reset the attendance responses, responses from all attendees will become "Pending". The attendees need to check the new date and time and respond to the attendance requests.
- When you want to keep the attendance responses: