Automatic forwarding settings
The automatic forwarding setting is used to automatically forward e-mails received in Garoon.
When you set automatic forwarding, incoming e-mails that match the specified conditions can be forwarded to another e-mail address.
For example, you can set the e-mail to be forwarded to other recipients when you are out of the office.
Note that e-mail will not be forwarded when the To address of the original e-mail and the forwarding address that is specified in the Forward e-mails automatically settings are the same.
You may not be able to use automatic forwarding depending on the configurations by your system administrator.
Adding Automatic Forwarding Settings
You can set the conditions for Forward e-mails automatically and e-mail addresses of recipients.
Automatic forwarding is set for each e-mail account.
-
Click the app icon
 in the header.
 -
Click E-mail.
-
The "Automatic forwarding settings" screen appears.
The steps to display the screen for automatic forwarding settings vary depending on the view that you are using.
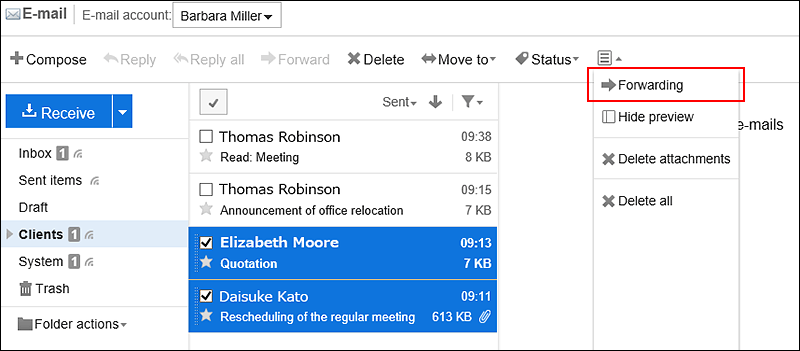
- When preview is shown
- On the "E-mail" screen, click Forwarding in the
 icon.
icon.
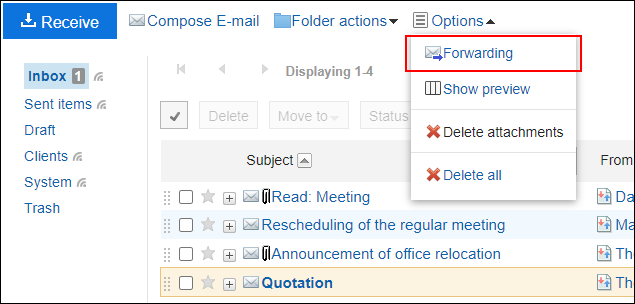
- When preview is hidden
- On the "E-mail" screen, click the item for automatic forwarding settings under "Options".
-
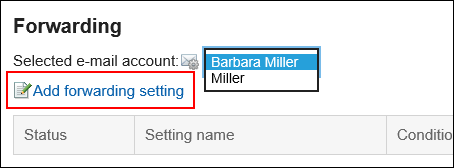
On the screen for automatic forwarding settings, select the e-mail account from the dropdown list, and click the item to add automatic forwarding settings.
-
On the page to add automatic forwarding settings, enter the name of the forwarding setting.
You must set the forwarding name.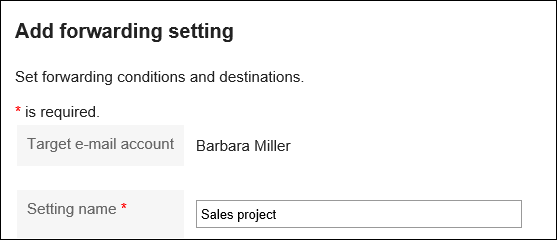
-
Set the transfer conditions field.
Set up conditions for forwarding e-mails.
You can combine each condition using the following methods.- All the following conditions are met
- Any of the following conditions are met
The conditions can be e-mail subjects, the e-mail address in "From" field, e-mail addresses in "To" field, and e-mail addresses in "Cc" field.
The following operators can be set for each item.- includes
- does not include
- is the same as
- is different from
- starts with
If you want to add conditions, click the item to add conditions.
To delete the added conditions, click "Delete".
If you click "Delete all", you can delete all conditions.
-
In the "Forwarding address" field, set the e-mail addresses of the recipients.
Use one of the following methods.
- Enter directly
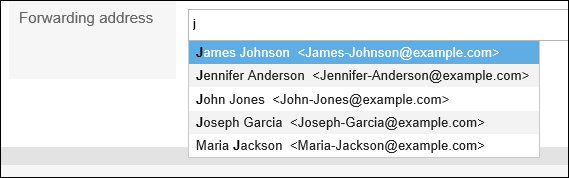
If your system administrator has enabled the incremental search, you can enter the address using the incremental search.
While typing in part of an e-mail address, user display names and e-mail address that start with the inputted portion are displayed as suggestions. They come from the following data.- User list
- Personal Address Book
-
- Shared address book to which the user has access rights
- E-mail recipients sent in the past
- Select from an e-mail address that has been added to the Address book
After you've decided to select from address books, on the screen for selecting e-mail addresses, select an address, click the item for suggestions, and click "Apply".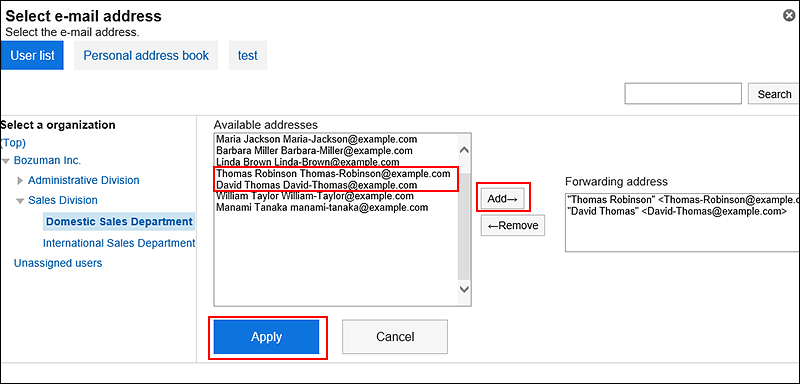
- Enter directly
-
Confirm your settings and click Add.
Changing Automatic Forwarding Settings
Change the forwarding conditions and recipient addresses of automatic forwarding.
-
Click the app icon
in the header. -
Click E-mail.
-
The "Automatic forwarding settings" screen appears.
The steps to display the screen for automatic forwarding settings vary depending on the view that you are using.
- When preview is shown
- On the "E-mail" screen, click Forwarding in the icon.
- When preview is hidden
- On the "E-mail" screen, click the item for automatic forwarding settings under "Options".
-
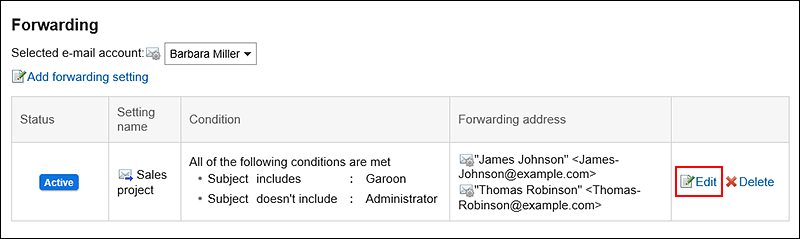
On the screen for automatic forwarding settings, select an e-mail account from the dropdown list, and then click "Change" in the automatic forwarding settings you want to change.
-
On the screen for changing automatic forwarding settings, you can change the settings as necessary.
-
Confirm your settings and click Save.
Disabling Automatic Forwarding Settings
You can temporarily disable the specified automatic forwarding setting.
-
Click the app icon
in the header. -
Click E-mail.
-
The "Automatic forwarding settings" screen appears.
The steps to display the screen for automatic forwarding settings vary depending on the view that you are using.
- When preview is shown
- On the "E-mail" screen, click Forwarding in the icon.
- When preview is hidden
- On the "E-mail" screen, click the item for automatic forwarding settings under "Options".
-
On the screen for automatic forwarding settings, select the e-mail account from the dropdown list, and then click "Disable" in the "Enable" field in the automatic forwarding settings.
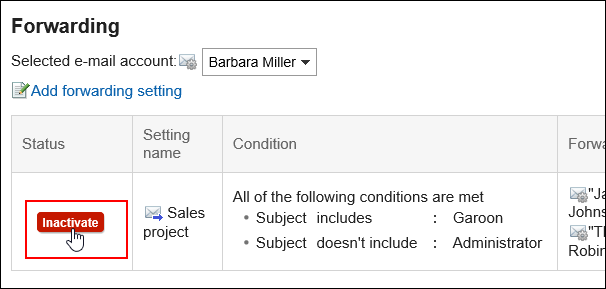 If you want to enable automatic forwarding, click "Enable".
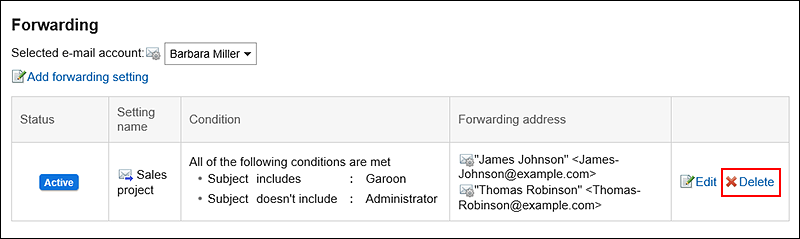
Deleting Automatic Forwarding Settings
You can delete the specified automatic forwarding settings.
-
Click the app icon
in the header. -
Click E-mail.
-
The "Automatic forwarding settings" screen appears.
The steps to display the screen for automatic forwarding settings vary depending on the view that you are using.
- When preview is shown
- On the "E-mail" screen, click Forwarding in the icon.
- When preview is hidden
- On the "E-mail" screen, click the item for automatic forwarding settings under "Options".
-
On the screen for automatic forwarding settings, select the e-mail account from the dropdown list, and then click "Delete" in the automatic forwarding settings you want to delete.
-
Click Yes on the screen for deleting automatic forwarding settings.