Changing the Character Encoding of Incoming E-mails
This section describes how to change the character encoding of incoming e-mails.
You can set the character encoding separately in titles and message bodies.
Steps:
-
Click the app icon
 in the header.
 -
Click E-mail.
-
On the "E-mail" screen, select a folder and click "Character encoding".
The steps to show "Character encoding" vary by views you are using.
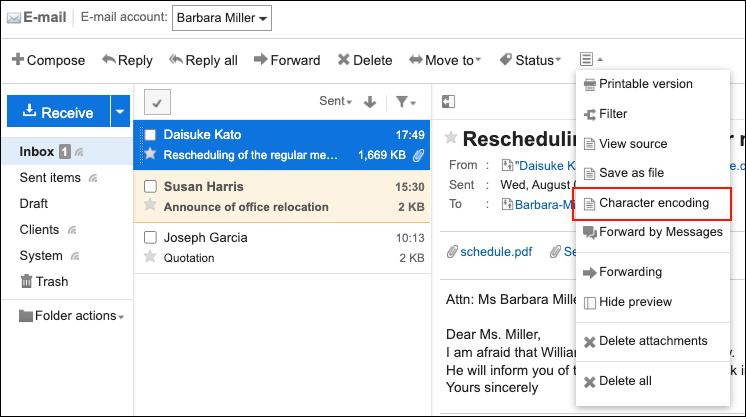
- When preview is shown
- Select the e-mail for which you want to change the character encoding.
- Click "Character encoding" on the
 icon.
icon.
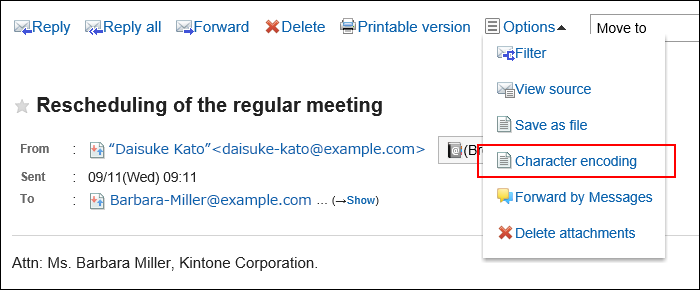
- When preview is hidden
- Click the subject of the e-mail for which you want to change the character code.
- On the "E-mail details" screen, click "Character encoding" in "Options".
-
From the "Character encoding" dropdown list, select the character encoding you want to change, and click Save.
The following character codes can be selected.
- UTF-8 (Unicode)
- Shift-JIS (Japanese)
- JIS (Japanese)
- EUC (Japanese)
- ASCII
- Latin1 (Western European)
- GBK/GB2312 (Simplified Chinese)
- TIS-620 (Thai)