E-mail account settings
You can add, edit, reorder, and delete your e-mail accounts.
Depending on the settings by your system administrator, you may not be able to take these actions on e-mail accounts, or you may only be allowed to change them.
Adding E-Mail Accounts
You can add an e-mail account. You can also add multiple e-mail accounts.
-
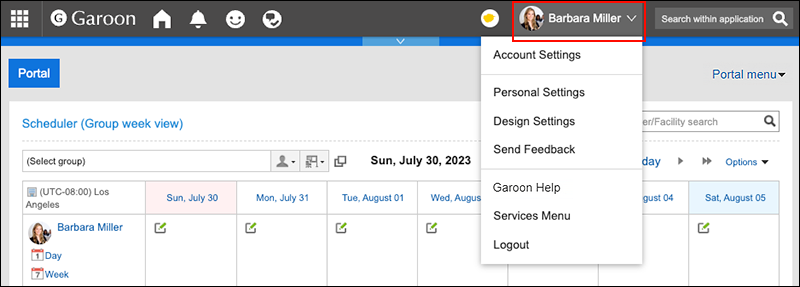
Click User name in the header.
-
Click Personal Settings.
-
Click Setting of each application.
-
Click E-mail.
-
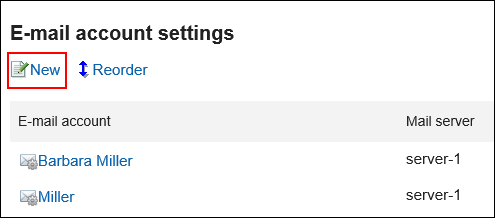
Click "E-mail account settings".
-
On the "E-mail account settings" screen, click Add.
-
On the Add E-mail Account screen, enter the name of the e-mail account.
You should set the e-mail account name. When this field is left blank, the address specified in "E-mail" is used as the e-mail account name.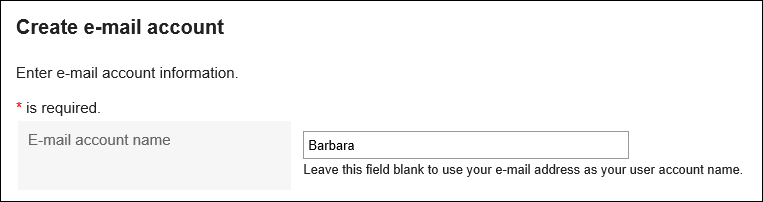
-
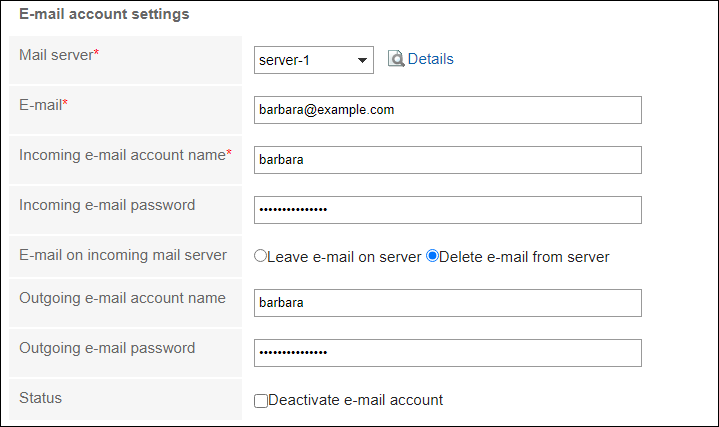
Set up an e-mail account.
 E-Mail Account Setting Fields
Mail Servers You must set up a mail server.
The target mail server must be set by your system administrator.
Click Details to check the details of the mail server.E-mail Enter the e-mail address to be used with the selected mail server.
You must set the E-mail field.Incoming e-mail account name Enter the e-mail account to receive e-mails.
You should set the Incoming e-mail account name filed.Incoming e-mail password Enter the password for the incoming e-mail account. E-mail on incoming mail server Select whether to leave e-mails on the incoming mail server.
Select "Delete e-mail from server" if you do not want to leave e-mails on incoming e-mail servers.
You may not be able to use this feature depending on the configurations by your system administrator.Outgoing e-mail account name This is displayed if your system administrator has set the account and password for sending in e-mail server settings.
Enter the e-mail account set for the outgoing mail server.Outgoing e-mail password This is displayed if your system administrator has set the account and password for sending in e-mail server settings.
Enter the password for the e-mail account set for the outgoing mail server.Status If you do not want the account to use the e-mail account shown, select the "Deactivate" checkbox. -
Confirm your settings and click Add.
If "Not granted" is displayed in the "OAuth authorization" item, users must perform OAuth authorization. This is a mandatory operation to send/receive t-mails.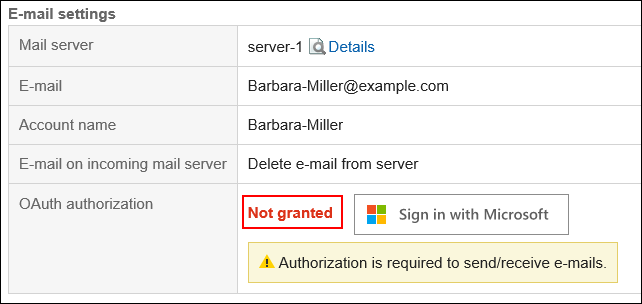
Performing OAuth Authorization
If users use Gmail or Exchange Online accounts to send/receive e-mails, users must perform OAuth authorization.
-
Click User name in the header.
-
Click Personal Settings.
-
Click Setting of each application.
-
Click E-mail.
-
Click "E-mail account settings".
-
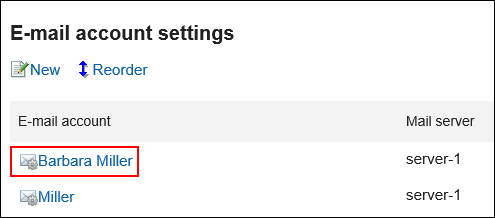
On the "E-mail account settings" screen, click the e-mail account name for which you want to perform OAuth authorization.
-
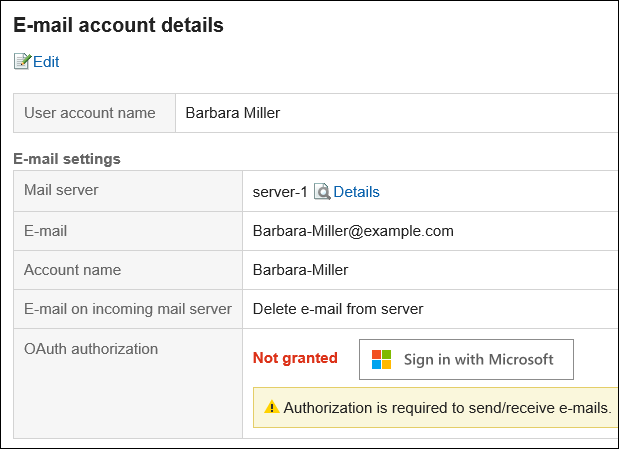
In the "E-mail account details" screen, click the displayed button in the "OAuth authorization" item to authorize the e-mail account and allow accesses.
- For Gmail account:
Click Sign in with Google. - For Exchange Online account:
Click Sign in with Microsoft.
- For Gmail account:
-
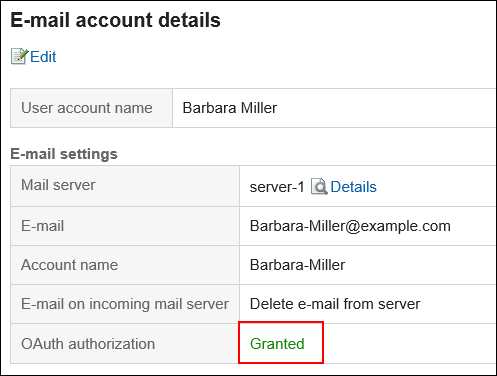
Confirm that the "Granted" is displayed in the "OAuth authorization" item.
Changing E-Mail Accounts
You can change the e-mail account.
-
Click User name in the header.
-
Click Personal Settings.
-
Click Setting of each application.
-
Click E-mail.
-
Click "E-mail account settings".
-
On the "E-mail account settings" screen, click the e-mail account you want to change.
-
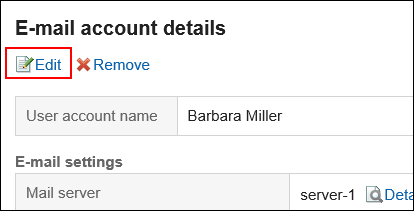
On the "E-mail account details" screen, click Edit.
-
On the Edit E-mail Account screen, set the fields as necessary.
For details on the settings, refer to E-mail account settings. -
Confirm your settings and click Save.
Reordering E-Mail Accounts
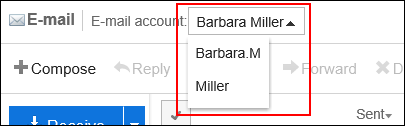
You can change the order of e-mail accounts.
The order set in this procedure is applied to the order in the dropdown list to select e-mail accounts on the "E-mail" screen.
-
Click User name in the header.
-
Click Personal Settings.
-
Click Setting of each application.
-
Click E-mail.
-
Click "E-mail account settings".
-
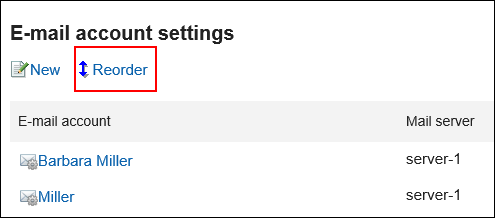
On the "E-mail account settings" screen, click the item to reorder E-mail accounts.
-
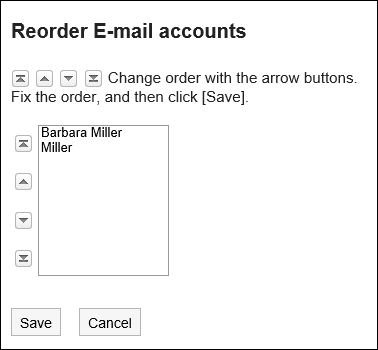
On the reordering e-mail accounts screen, reorder the e-mail accounts.
-
Confirm your settings and click Save.
Deactivating E-Mail Accounts
Once an e-mail account is deactivated, you can no longer send or receive e-mails with the deactivated account.
E-mails that were sent or received before the account is deactivated remain in Sent items, Inbox, or other folders.
-
Click User name in the header.
-
Click Personal Settings.
-
Click Setting of each application.
-
Click E-mail.
-
Click "E-mail account settings".
-
On the "E-mail account Settings" screen, click the e-mail account you want to deactivate.
-
On the "E-mail account details" screen, click Edit.
-
On the "Edit e-mail account" screen, select the "Deactivate e-mail account" checkbox and then click Save.
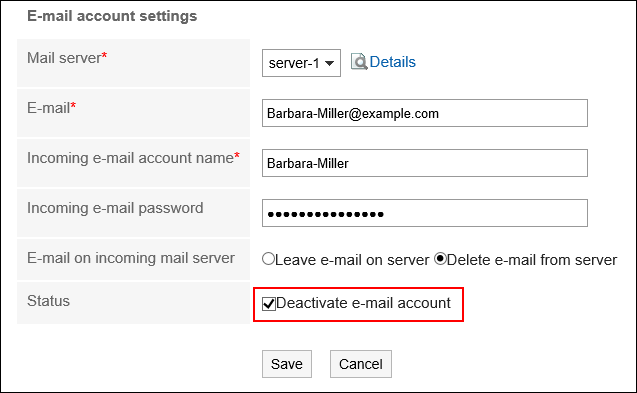 Inactive e-mail accounts are displayed in gray on the "E-mail account settings" screen.
Deleting E-Mail Accounts
You can delete your e-mail accounts. Once an e-mail account is deleted, you can no longer send or receive e-mails with the deleted account.
-
Click User name in the header.
-
Click Personal Settings.
-
Click Setting of each application.
-
Click E-mail.
-
Click "E-mail account settings".
-
On the "E-mail account settings" screen, click the email account you want to delete.
-
On the "E-mail account details" screen, click Delete.

-
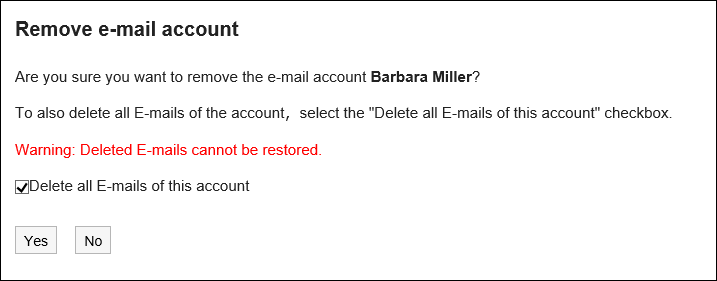
Click Yes on the deleting e-mail accounts screen.
Select whether you also want to delete the e-mail data.
- If you also want to delete the e-mail data:
Select the "Delete all E-mails of this account" checkbox.
Deleted e-mail data cannot be restored. - If you do not want to delete the e-mail data:
Clear the "Delete all E-mails of this account" checkbox.
It will keep all the received e-mails in the folder. You can view or export the e-mails stored in Inbox, Sent items, or other folders, even after the e-mail account is deleted.
- If you also want to delete the e-mail data: