Process Requests
This section describes how to process request data if you are set as a processor for the approval route.
You can approve, reject, send back, or confirm the request.
You can process your request data on the "Workflow (Recent)" screen. You cannot process them on the "Workflow (Inbox)" screen.
-
Click the app icon
in the header.
-
Click Workflow.
-
Click the subject of the request data you want to process from the unprocessed data list on the "Workflow (Recent)" screen.

-
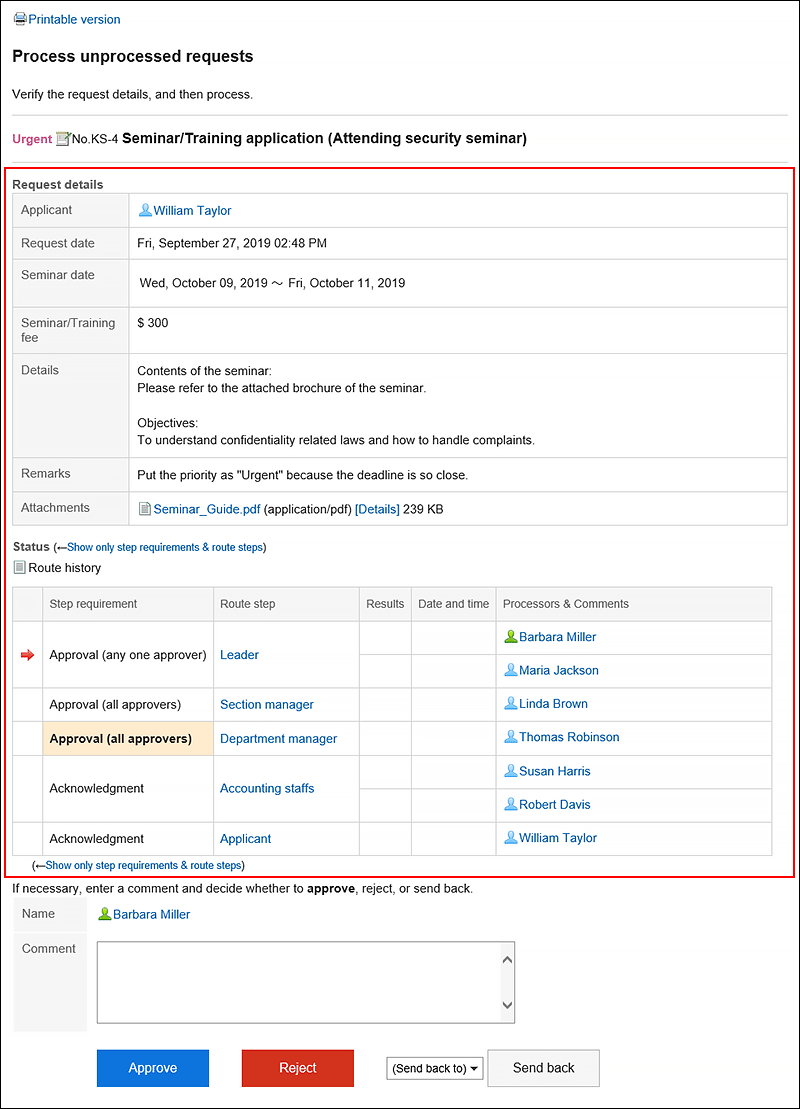
Confirm the request details on the screen for processing unprocessed requests.
-
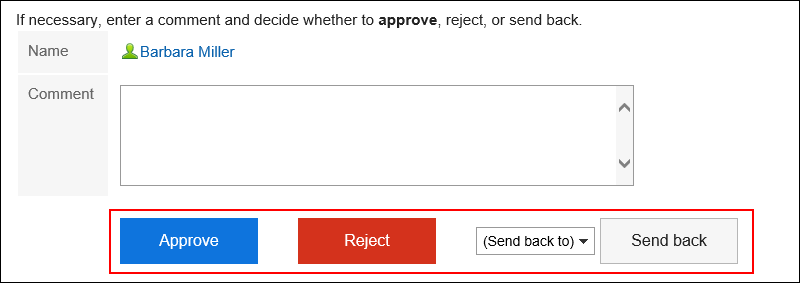
If necessary, enter a comment and click "Approve", "Rejected", or "Send back".
You can enter a comment if you want.
To send back the request, specify the target user to send back the request from the dropdown list.
The notifications will be sent to the following users, depending on the process of the request.- Approve: Users of the next route step
- Rejected: Applicant
- Send back: Specified users
The route types for the approval route are as follows.
- Approval (all approvers):
When all processors set for the route step approve the request, users can proceed to the next route step. - Approval (any one approver):
When one of the processor of all the processors set for the route step approves the request, users can proceed to the next route step.
For both route types, if one of the processors of the same route step returns the request, other processors cannot process the request. The same is true in the case of rejecting the request.
Also, after one of the processors has processed the request, the request data does not disappear from the "Workflow (Recent)" screen of other processors.
To clear the request data, click the subject of the target request data, and then click "Confirm".
Processing Requests Consecutively
If you have multiple unprocessed request data, you can select the number of request data to start the process and process the subsequent request data sequentially in the ascending order.
This is useful when you process a large amount of request data.
-
Click the app icon
in the header.
-
Click Workflow.
-
In unprocessed data list on the "Workflow (Recent)" screen, select the start number of the request data to process sequentially using one of the following methods.
- Select a number from the dropdown list and click the item to process data sequentially.
- Click the number buttons on the left side of the request data list.

-
On the screen for processing unprocessed requests, confirm the request details and click "Approve", "Rejected", or "Send back".
Enter any comments if necessary.
To send back the request, specify the target user to send back the request from the dropdown list.
Clicking Next in the upper right or the lower right corner allows you to defer processing of the request data being displayed and process the next one.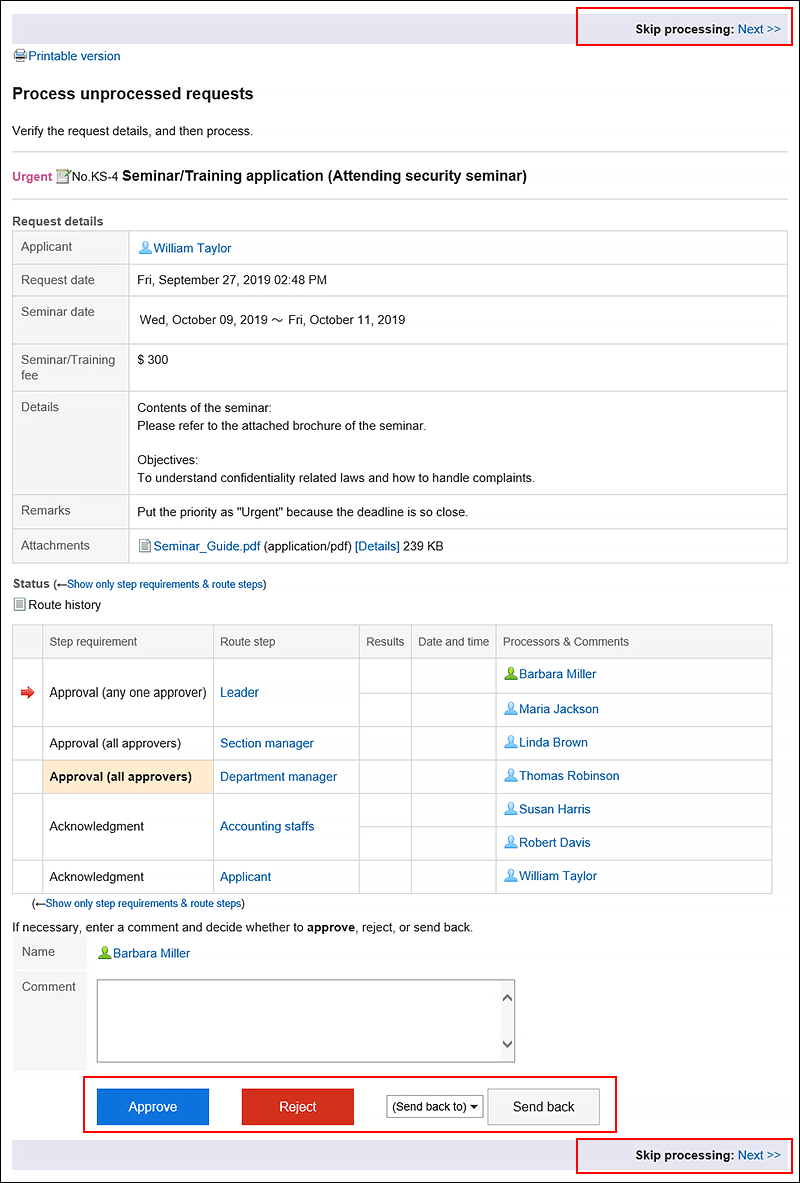
-
Repeat step 4 to process the request data.
What to Do If You Have Been Deleted from the Route Step
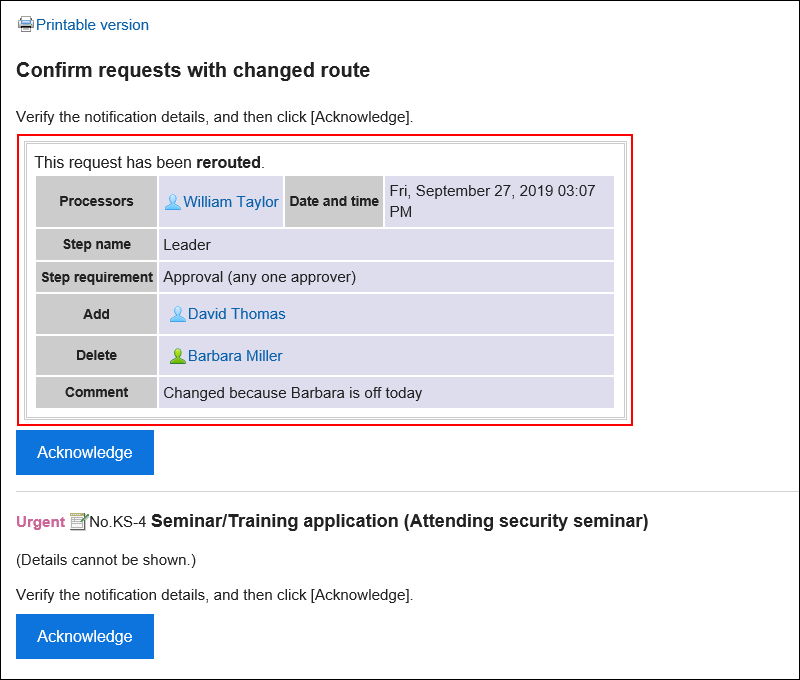
If you have been deleted from the processor of a route step before you process the request data, the request data details screen displays a message indicating that the route has been changed. The request details are not displayed.
When you click "Confirm", the request data will be deleted from the "Workflow (Recent)" screen.
If you want to delete the request data from the "Workflow (Inbox)" screen, refer to Deleting Requests from the List.
What to Do If the Applicant Has Withdrawn the Request
The status of the request data which has been withdrawn by the applicant is "Cancel".

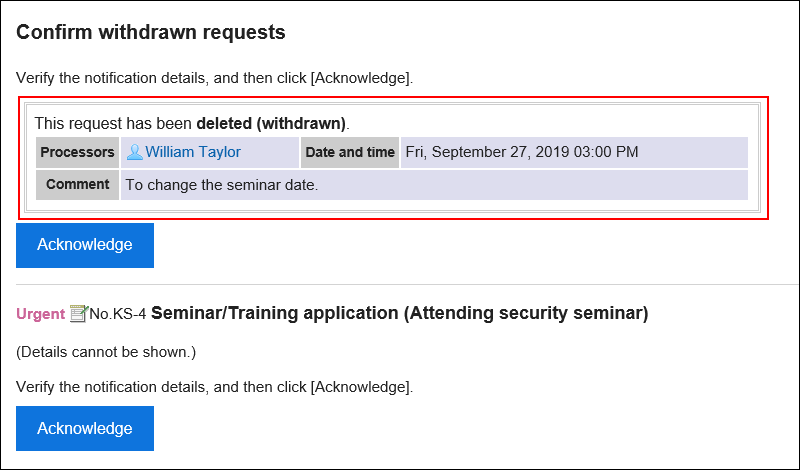
The details screen of the request data displays a message indicating that the request has been withdrawn and the comment from the applicant. The request details are not displayed.
When you click "Confirm", the request data will be deleted from the "Workflow (Recent)" screen.
If you want to delete the request data from the "Workflow (Inbox)" screen, refer to Deleting Requests from the List.
What to Do If a Request Has Been Canceled
The status of the request data will become "Cancel" when it is canceled by the applicant.

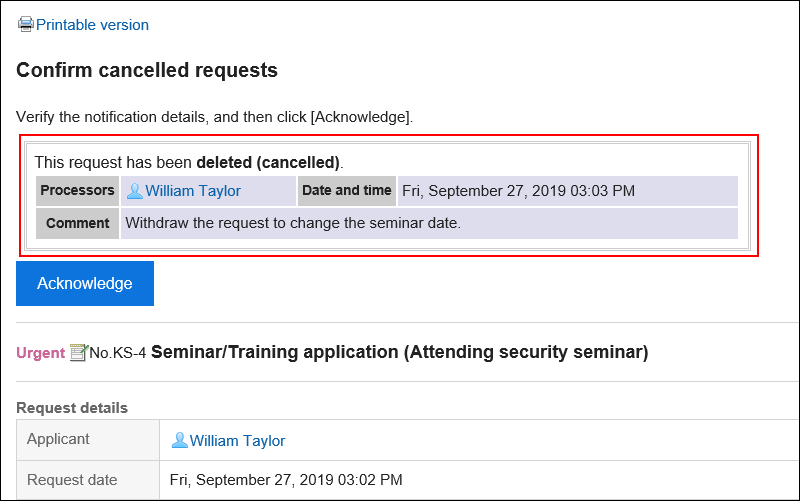
The details screen of the request data displays a message indicating that the request has been canceled and the comment from the applicant.
When you click "Confirm", the request data will be deleted from the "Workflow (Recent)" screen.
If you want to delete the request data from the "Workflow (Inbox)" screen, refer to Deleting Requests from the List.