Using Web Conference System
This section describes how to use a Web conference system.
Steps:
-
Click the app icon
 in the header.
 -
Click Scheduler.
-
On the "Scheduler" screen, click the item to add appointments or the
 icon.
icon. -
On the "New appointment" screen, click Regular.
-
If necessary, set the date/time and the attendees.
For details on the settings, refer to Items on the "New appointment" screen. -
In the facilities field, select a facility which supports the WEB conference system.
Configure a facility that supports Web conference systems.
You will see a form for setting up e-mail addresses and languages used by external invitees. -
In the field for configuring the Web conference, set the required items.
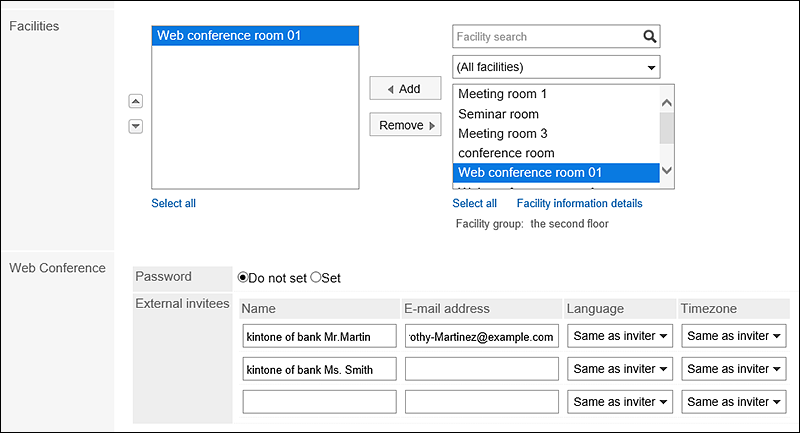
- Password:
Select whether to set a password for entering the conference room. Configured password will be noted in the invitation e-mail. - Name:
Enter the name of an external invitee. - E-mail:
Enter the e-mail address of an external invitee. A Web conference invitation e-mail will be sent to the e-mail address that you entered. - Language:
Select the language that is used by external invitees. - Time zone:
Select the time zone that is used by external invitees.
- Password:
-
Confirm your settings and click Add.
Users who have added the appointment will receive an e-mail stating that the invitation has been sent to external invitees.
Joining a Web Conference
External invitees enter the conference room by clicking the link in the invitation e-mail upon scheduled start time.
Attendees enter the conference room by clicking the item to join the conference on the appointment details screen upon scheduled start time.