View appointments
This section describes how to view the scheduled appointments and the facilities with the appointments configured.
-
Click the app icon
 in the header.
 -
Click Scheduler.
-
On the "Scheduler" screen, select a view type.

If you want to check appointments, select one of the following view types:
- Group Day view
- Group Week view
- Day view
- Week view
- Month view
-
Select a user, organization, or facility which you want to check appointments for.
Each view type has its own way of selecting a user, organization, or facility.
- If you select Group day view or Group week view:
Click the group drop-down list or the icon to select targets such as users.

- If you select Day view or Week view:
Click the Add user/facility button, the group drop-down list, or the Select users & facilities link to select targets such as users.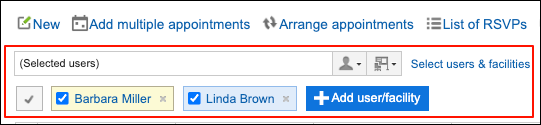
- If you select Month view:
Click the drop-down list or the icon to select targets such as users.
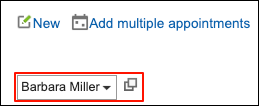
- If you select Group day view or Group week view:
-
Click the title of the appointment you want to check.
Clicking the title of the appointment displays its details.
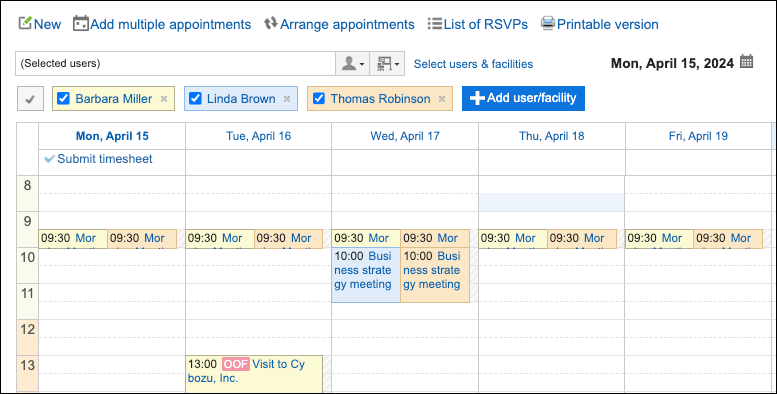
Checking the Availability of Multiple Users or Facilities
Check the availability of multiple users or facilities.
You can see which time slot is available for the selected users, organizations, or facilities whose appointments you want to check by displaying their schedules side-by-side.
-
Click the app icon
in the header. -
Click Scheduler.
-
On the "Scheduler" screen, select Day view or Week view.
-
Specify the user, organization, or facility whose appointments you want to display.
You can set up to 20 users, organizations, and facilities using one of the following ways.
- Click Add user/facility button
In the input field displayed, search user, organization, or facility to specify it individually.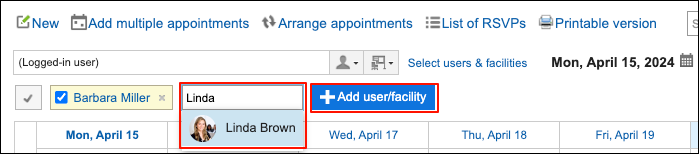
- Click the drop-down list
Specify a group of users/facilities, such as users who belong to My group or a particular organization, or facilities that belong to a particular facility.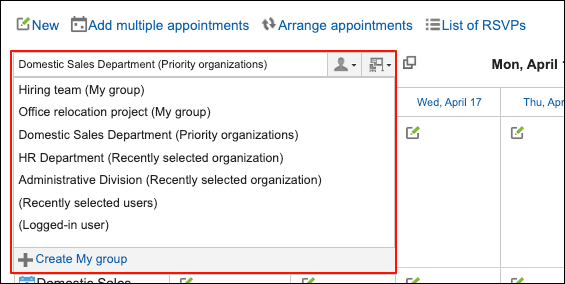
- Click Select users & facilities link
In the dialog displayed, search for a user or facility to specify. You can also search My group, organizations groups, or facility groups to find your target user, organization, or facility.
You can also change the display order of selected users, organizations, or facilities before applying them.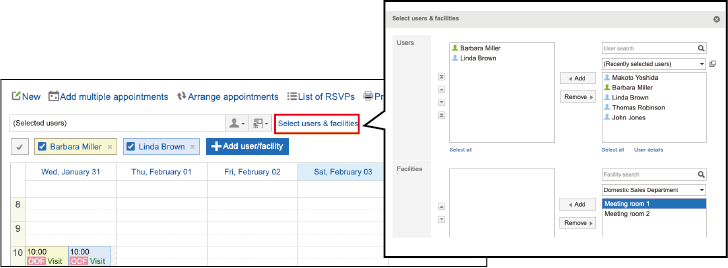
- Click Add user/facility button
-
Check the availability.
The regular appointments of users, organizations, and facilities are displayed using colors for each user.
The color of the user helps you to distinguish the user the appointments belong.
When any of the specified users, organizations, or facilities have appointments, those slots are shaded.
You can add a new appointment of the selected users, organizations, and facilities by dragging the time period. For details, refer to Quickly Adding Regular Appointments.