Create reports
Create a report, such as a transcript or report.
-
Click the app icon
 in the header.
 -
Click MultiReport.
-
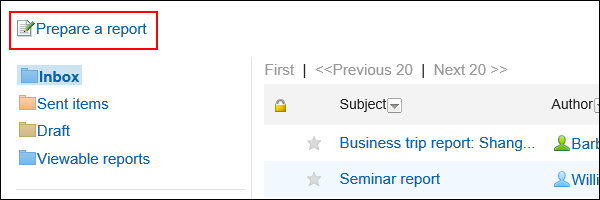
Click Create a Report on the "MultiReport" screen.
-
On the "Create a Report Form" screen, select a category and select a report form.
-
Set the required items, and click "Confirm".
-
On the "Create a Report" screen, confirm the details and click "Create".
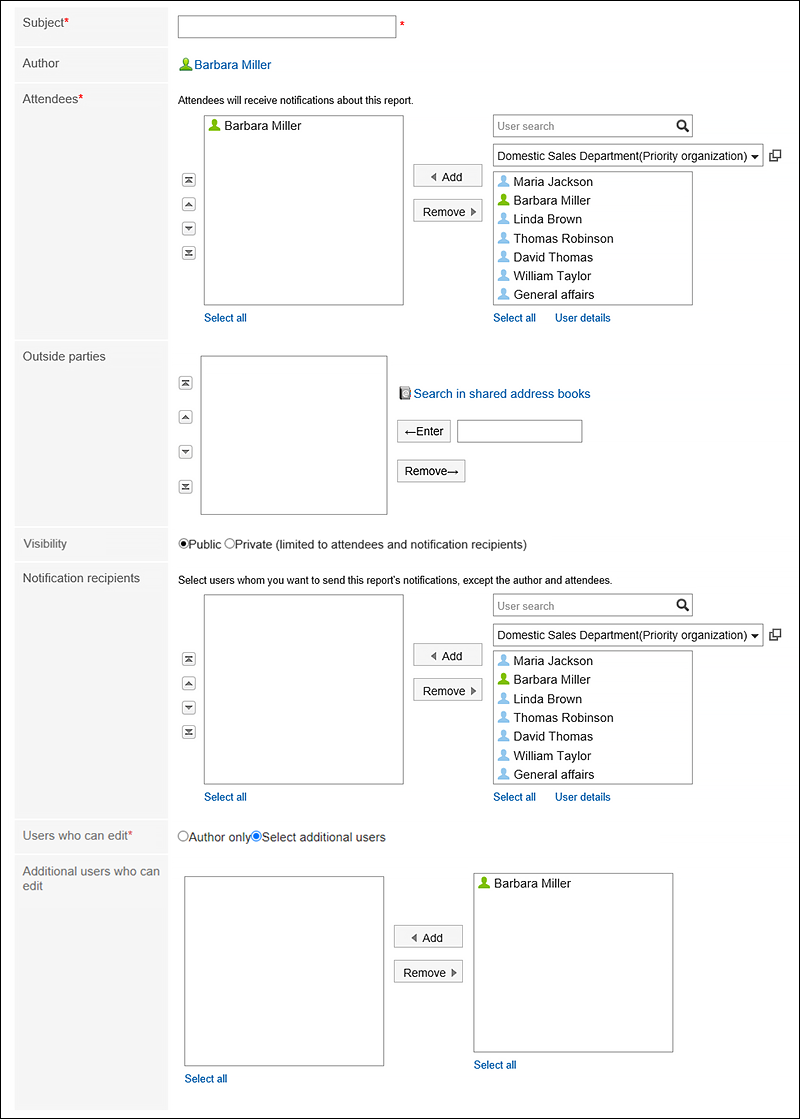
| Item | Description |
|---|---|
| Subject | Enter a title for the report. |
| Attendees | Select users who have participated in meetings, business trips, and so on. The report form may not be displayed. |
| Outside parties | Enter external attendees, such as business partners and customers, in one of the following ways The report form may not be displayed.
|
| Other Items | Added by the system administrator. You can use the form editing feature or you can attach a file. For details, refer to the following page: Working with Rich Text Formatting Attaching Files |
| Visibility | Select the visibility range of the report in the following
|
| Notification recipients other than attendees | You can set users to be notified when a report is created, modified, or commented as a comment. The update notifications are automatically set for authors and attendees. |
| Users who can edit | Set users who can change or delete the report. You can select one of the following options:
|
| Who can change? | The "Users who can change a report" field is displayed if you select "Set users who can change". Select users from attendees and notification recipients. |
Reusing a Report
Duplicate a report that has been created to create a new report.
This is useful when you want to create a report with a similar type.
The comment cannot be reused.
-
Click the app icon
in the header. -
Click MultiReport.
-
On the "MultiReport" screen, click the subject of the report.
-
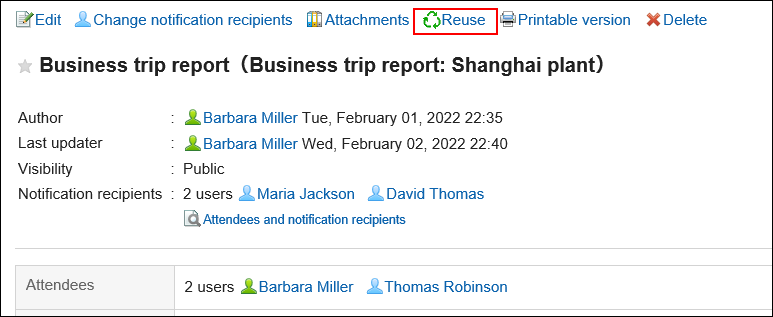
On the "Report details" screen, click "Reuse".
-
On the "Create a report (reuse)" screen, set the required items and click "Confirm Contents".
For details, refer to Setting Items for Reports. -
On the "Create a Report" screen, confirm the details and click "Create".
Saving a Report in Draft
Save the report as draft.
Only saved users can view, change, and delete draft reports.
-
Click the app icon
in the header. -
Click MultiReport.
-
Click Create a Report on the "MultiReport" screen.
-
On the "Create a Report Form" screen, select a category and select a report form.
-
On the "Create a Report" screen, enter the required items and click Save as Draft.
For details, refer to Setting Items for Reports.
The draft report is saved in the Drafts folder.
You can then change the draft to create a report.