Connecting to the Scheduler
The attendees of an appointment can associate a report with a fixed appointment.
When you associate an appointment with a report, you can view the minutes of the conference from the appointment details screen of the conference and the details screen of the appointment from the report details screen.
Each attendee of an appointment has one report associated with an appointment.
The report icon![]() is displayed to the right of the title of the appointment that is associated with the report.
is displayed to the right of the title of the appointment that is associated with the report.
Create a Report Related to an Appointment
Create a report related to an appointment.
You can only create a report related to an appointment that you are participating in.
-
Click the app icon
 in the header.
 -
Click Scheduler.
-
On the "Scheduler" screen, click the title of the appointment that you want to associate with the report.
-
Click Prepare a report on the "Appointment details" screen.
You may go through different steps before clicking the "Prepare a report" option, depending on the version you are using.
- When using Garoon version 5.15.0 or later
- In the "MultiReport" section on the "Appointment details" screen, click Prepare a report.

- When using Garoon earlier than version 5.15.0
- Click "Report" on the "Appointment details" screen.
- Click "Create a Report".
-
On the "Select a form" screen, select a category and select the Report form.
-
On the "Create a Report" screen, set the required items, and click "Confirm".
The title of the appointment and the "notification address" will be set by the attendees of the appointment.
For details, refer to Setting Items for Reports. -
On the "Create a Report" screen, confirm the details and click "Create".
Associating Existing Reports with Appointments
Associate a report that you have already created to the appointment you are attending.
Only reports that are created by you are associated with the appointment.
-
Click the app icon
in the header. -
Click Scheduler.
-
On the "Scheduler" screen, click the title of the appointment that you want to associate with the report.
-
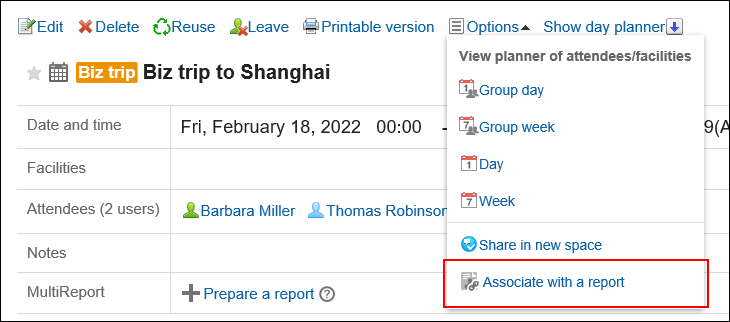
Click Associate with a report on the "Appointment details" screen.
You may go through different steps before clicking the "Associate with a report" option, depending on the version you are using.
- When using Garoon version 5.15.0 or later
-
Click Options on the "Appointment details" screen.
-
Click Associate with Report.
- When using Garoon earlier than version 5.15.0
- Click "Report" on the "Appointment details" screen.
- Click Associate with Report.
-
On the "Select a report to associate" screen, select the report, and click "Associate".
When you click Details, the "Report details" page is displayed in a separate tab or a new window.
You cannot select the following reports:- Reports associated with other appointments
- Draft report
Deleting Appointments and Report Associations
Delete the associations that you have set.
Deleting an association does not delete the report itself.
-
Click the app icon
in the header. -
Click Scheduler.
-
On the "Scheduler" screen, click the title of the appointment you want to delete the report and association.
-
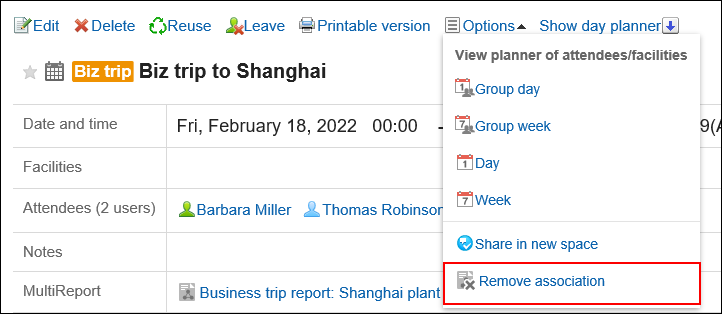
Click Remove association on the "Appointment details" screen.
You may go through different steps before clicking the "Remove association" option, depending on the version you are using.
- When using Garoon version 5.15.0 or later
-
Click Options on the "Appointment details" screen.
-
Click Remove association.
- When using Garoon earlier than version 5.15.0
- Click "Report" on the "Appointment details" screen.
- Click Delete Association in the report for which you want to delete the association.
-
Click Yes on the "Delete association" screen.