Log In to Garoon Mobile for Android
This section describes how to log in to Garoon mobile.
Getting Necessary Information for Login
Obtain the following information from your system administrator in advance, because it is required during the login steps.
- URL to access Garoon
- Login name and password to log in to Garoon
- If you are using Basic authentication, the user name and password for Basic authentication
- If a client certificate is required, the client certificate (PFX file) and its password:
When you have obtained the client certificate, refer to Saving a Client Certificate (Garoon Mobile for Android) to save it on your smartphone.
Log In to Garoon Mobile
-
On your smartphone, tap
 and start the mobile app.
 -
On the "Connection Settings" screen, enter the URL of the Garoon that you are using, and then tap Next.
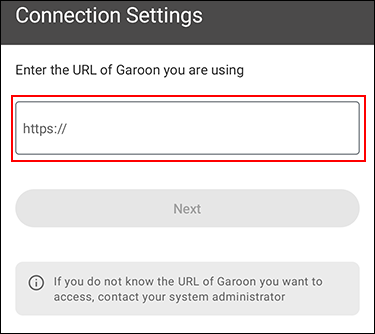
Enter the access URL to Garoon that you obtained from your system administrator.
- Example of an access URL when using Remote Service:
- Windows version
remote2.cybozu.co.jp/scripts/cbgrn/grn.exe - Linux (single-machine deployment):
remote2.cybozu.co.jp/cgi-bin/cbgrn/grn.cgi - Linux version (DB-distributed deployment):
remote2.cybozu.co.jp/grn/index.csp
- Windows version
- Example of an access URL if you are not using Remote Service:
- Windows version
(IP address or FQDN of the server)/scripts/cbgrn/grn.exe - Linux (single-machine deployment):
(IP address or host name of the server)/cgi-bin/cbgrn/grn.cgi - Linux version (DB-distributed deployment):
(IP address or FQDN of the server)/grn/index.csp
- Windows version
- Example of an access URL when using Remote Service:
-
When the "Client Certificate Settings" screen is displayed, import the client certificate, enter its password, and tap Next.
On the screen displayed after tapping Import, select the client certificate that has been saved on your smartphone.
-
If you are using Basic authentication, enter the user name and password for Basic authentication on the "Basic Authentication" screen, and tap Next.

-
On the "Login" screen, enter the login name and password to log in to Garoon, and tap Login.
Your login to Garoon mobile is now completed.
Confirm the description in the walk-through screens, and start using Garoon mobile.
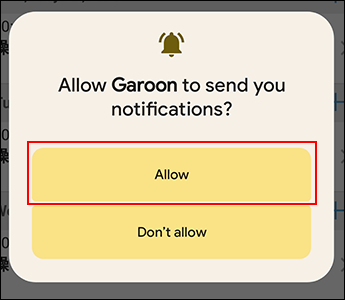
When the notification permission dialog appears, tap Allow to receive the reminder notifications for the appointment.
 When another dialog appears to check your alarms and reminders settings, tap Allow and enable the alarms and reminders settings also on the settings screen on your smartphone.