Request Submission
You can use a request form created by your system administrator to create a request data.
Request forms have preconfigured required information for making requests, such as input fields and the request route.
Select a request form that is appropriate for the purpose of the request.
-
Click the app icon
 in the header.
 -
Click Workflow.
-
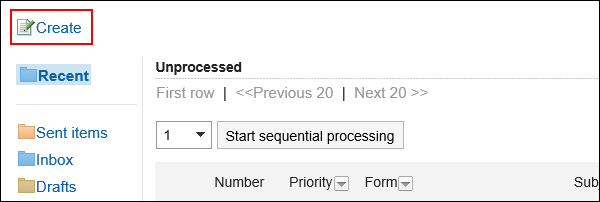
Click the item to request on the "Workflow (Recent)" screen.
-
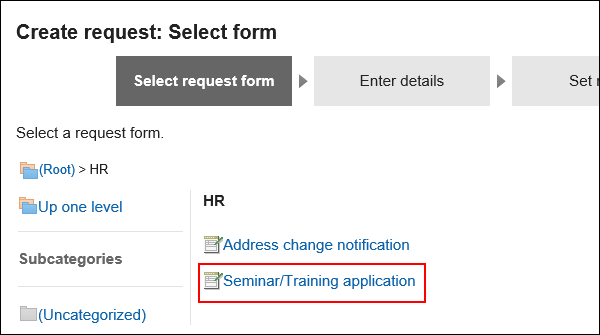
On the screen to create requests (for selecting request forms), select a category and then select the request form.
-
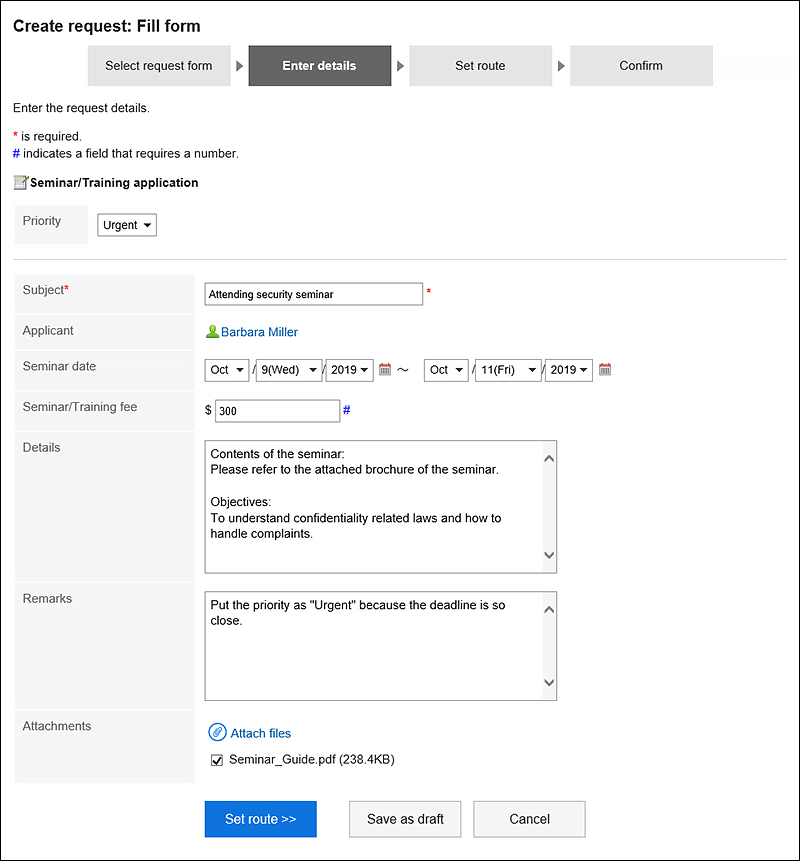
On the screen to create requests (for entering contents), set the required items and click the item to set the route.
When you click Save as draft, the request data is saved in the "Drafts" folder of the applicant.
Depending on which type of request form you use, the items displayed on the form will change. If you want to know more about the items displayed on the request forms, refer to the description in Item Types.- Items with an asterisk (*):
Required items. - Items with a hash mark (#):
A single-byte number must be entered. - "Priority" item:
If you want the processor to process the request faster, select "Urgent" from the dropdown list. - Item for attachment:
You can attach files. For details, refer to Attaching Files. - Item for date:
You can select a date using a calendar picker.
You can select a date with the calendar picker if it is January 3, 1970, or later.
- Items with an asterisk (*):
-
On the screen for creating a request (for setting up routes), set the processors for each route step, and then click "Confirm".
Depending on your system administrator settings, you may not be able to change the default processors.
If no users are available as processors, set "(Omitted)".
Note that the processor of the final route step in the approval route cannot be omitted.
Also, you cannot set all the processors of a route step to be omitted.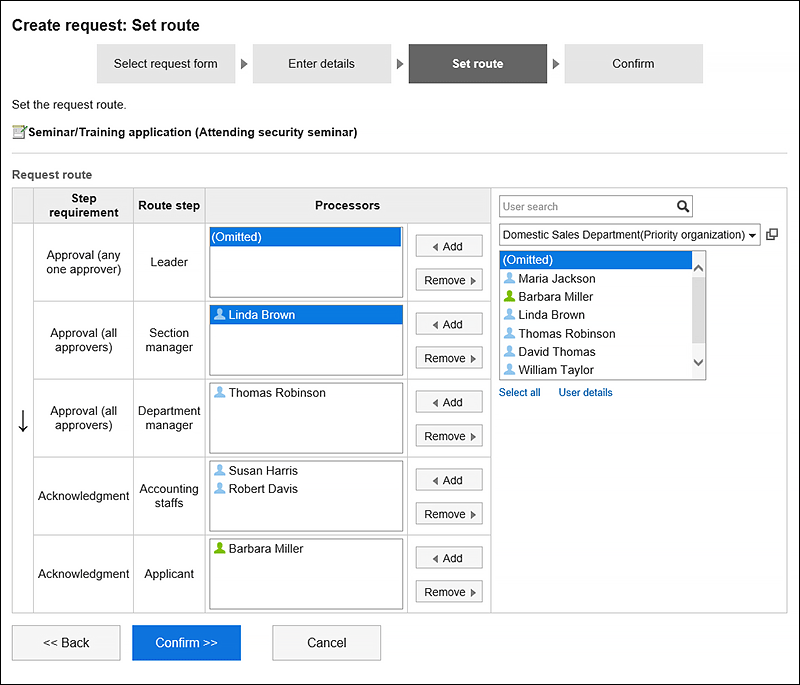
-
On the screen to create a request (confirmation), confirm the request details and click the item to commit the request.
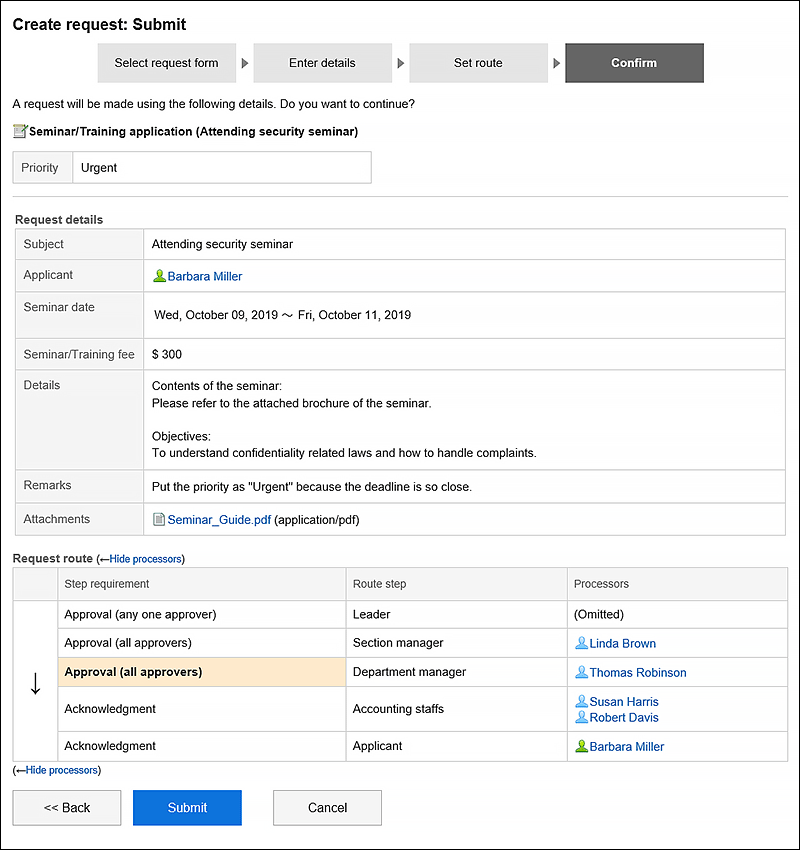 The submitted request data will be saved in the "Sent items" folder and the notification will be sent to the first processor.
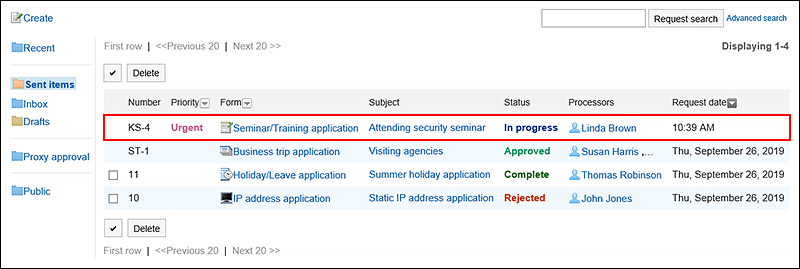
Reusing and Submitting Requests
You can reuse the contents of a request data that you have submitted to create a new request data.
You can also reuse request data that have been cancelled or rejected.
-
Click the app icon
in the header. -
Click Workflow.
-
On the "Workflow (Recent)" screen, select the sent items folder and click the subject of the request data you want to reuse.
-
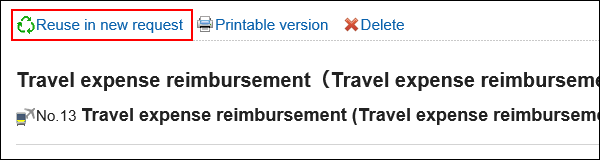
On the request details screen, click the item to reuse and request.
-
On the screen to create requests (for entering contents), modify the request details and click the item to set the route.
-
On the screen for creating a request (for setting up routes), change the processor as required, and then click "Confirm".
-
On the screen to create a request (confirmation), confirm the details and click the item to commit the request.