Facility Usage Request
In Garoon, you can add an appointment by using the facility usage request. By using this feature, you need an approval to use facilities.
This section describes how to request approval for using facilities and how to approve requests.
Creating Request to Use Facility
When you add an appointment, select a facility that requires you to submit a facility usage request.
By adding a new appointment, a facility usage request is automatically submitted to the operational administrator of the facility group.
-
Click the app icon
in the header.
-
Click Scheduler.
-
On the "Scheduler" screen, click the item to add appointments or the
 icon.
icon. -
On the "New appointment" screen, configure the required fields.
-
In the "Facilities" field, select the facilities you want to use and click Add.
If the selected facility requires approval, a "Purpose" field is displayed.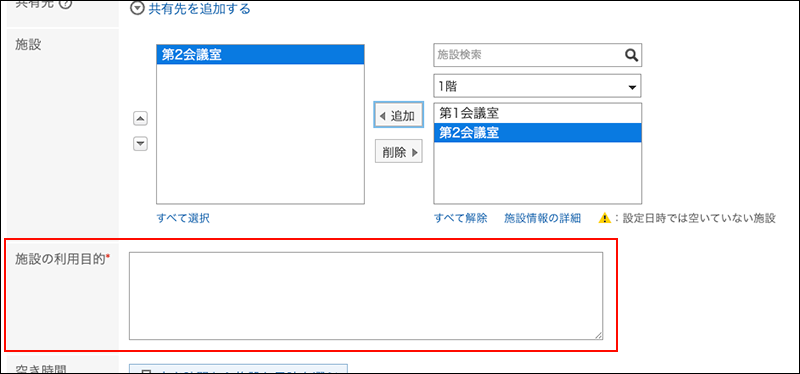
-
Provide information in the "Purpose" field.
"Purpose" is a required field. You cannot add your appointment without providing a purpose to use. -
Check the information you provided and click Add.
Changing the Request Details
You can change or cancel the data you provided in a facility usage request. Use the "Edit appointment" screen to make changes.
When you make changes to the selected facility, a notification will be sent to the operational administrator of the facility group.
-
Click the app icon
in the header.
-
Click Scheduler.
-
On the "Scheduler" screen, click the title of the appointment in which you want to change the request.
-
Make changes to the "Facilities" or the "Purpose" field.
-
Check the information you provided and click Save.
Check if the Facility Usage Request Is Approved
Check whether the facility usage request has been approved or not.
-
Click the app icon
in the header.
-
Click Scheduler.
-
On the "Scheduler" screen, click the title of the appointment for which you want to check the approval status of the facility usage request.
-
On the "Appointment Details" screen, confirm the "Facilities" field.
- When the request is unprocessed:
"(In progress)" is displayed next to the facility name.
- When the request is approved:
A notification of "Approved" is sent to the user who created the appointment.
Clicking "History" displays the details of the process.
- When the request is rejected:
A notification of "Rejected" is sent to the user who created the appointment.
The facility is removed from the appointment.
Clicking "History" displays the details of the process.
- When the request is unprocessed:
(For Operational Administrator) Processing the Facility Usage Requests
You can approve or reject the facility usage requests created by users.
Processing from The "Facility Usage Requests" Screen
From the "Facility usage requests" screen, you can process the facility usage requests.
-
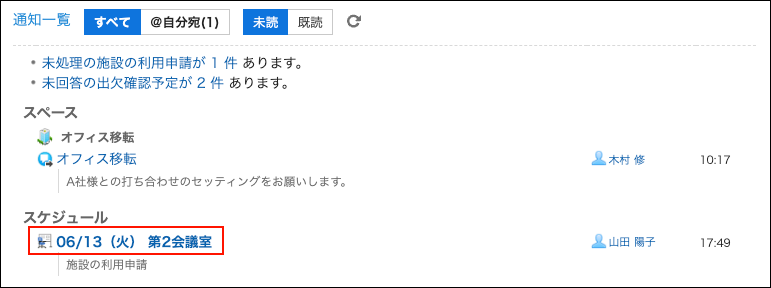
In the "Notifications" Portlet, click the title of the appointment where the facility usage request is displayed.
-
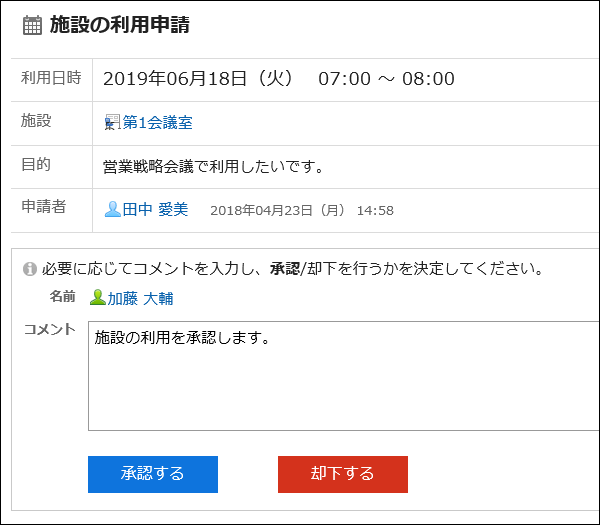
On the screen for facility usage request, enter a comment if necessary, and click "Approve" or "Reject".
Processing from the "Facility Usage Requests" Screen
From the facility usage requests screen, you can process the requests.
-
Displays the facility usage requests screen.
- To view from the Scheduler:
- Click the app icon
in the header.
- Click Scheduler.
- On the "Scheduler" screen, click "Facility usage requests" under "Options".

- To display from the "Notifications" portlet:
- In the "Notifications" portlet, click "You have N unprocessed requests".
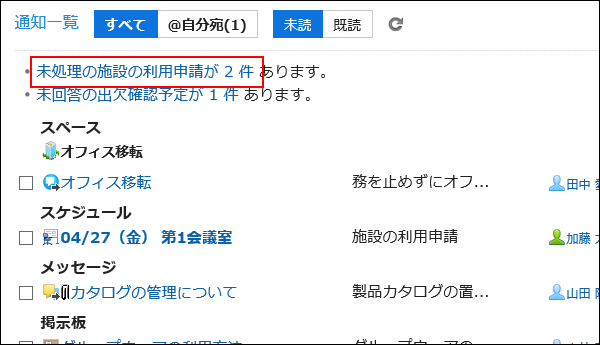
-
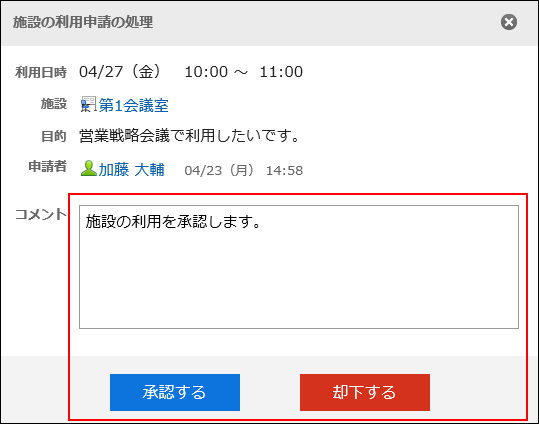
On the "Facility usage requests" screen, check the purpose of the target request and then click "Process".
If you click "Facility usage requests" on the "Scheduler" screen, a list of all usage requests is displayed.
If you click "You have N unprocessed requests" in the "Notifications" portlet, a list of the unprocessed facility usage requests is displayed.
Only the facility usage requests having future end time are displayed on the "Facility usage requests" page.
A facility usage request is created per facility. For example, if three facilities with usage requests exist in one appointment, three usage requests are created.
-
On the screen for processing facility usage requests, enter a comment if necessary, and click "Approve" or "Reject".
