Comment Feature in Messages
In the comment field, you can write an opinion or a reply to the contents of the message.
The comments are displayed in descending order, with the most recently updated comment at the top.
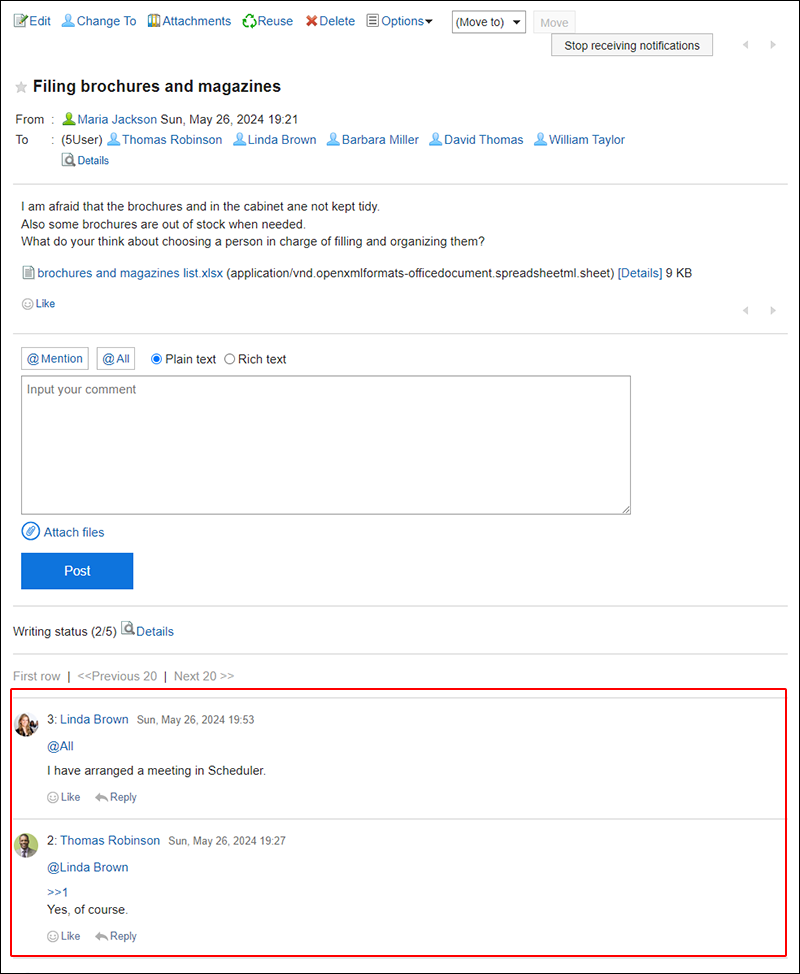
If you specify recipients when you post a comment, they will receive updated information even if they chose not to receive the update notification.
By using "@All", you can send your comment to all recipients in the "To" and "From" fields of the message, which will arrive as "@To me".
For details on the Mention feature, refer to the How to Use Mentions.
Posting a Comment
You can post a comment to the message.
-
Click the app icon
 in the header.
 -
Click Messages.
-
On the "Messages" screen, select a folder and click the subject of the message you want to add a comment.
-
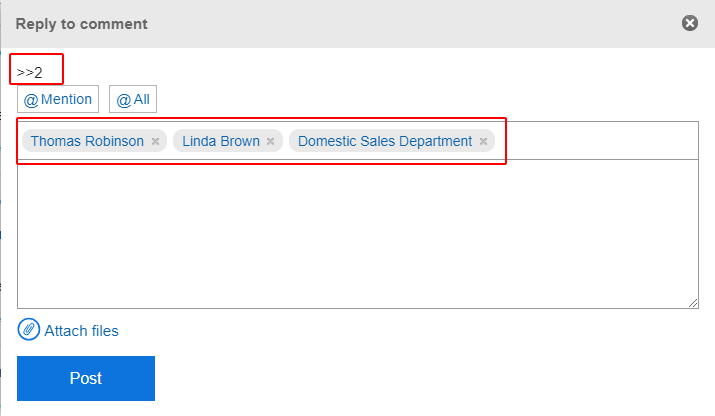
Specify the recipients in the comment field of the "Messages details" screen.
You can specify recipients using one of the following ways, as necessary.
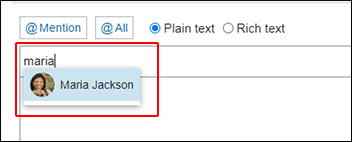
Specifying specific users, organizations, or roles as recipientsClick @Mention to specify users, organizations, or roles. You can specify roles when your system administrator allows you to use roles.
 Recipients which can be specified vary according to the types of recipients.
Type of Recipient Recipient which can be specified Users Only users who are included in the message recipients can be specified. Organization All organizations can be specified as recipients. However, users who are in the specified department but not in the recipient list of the message do not receive the update notifications. Role All roles can be specified as recipients. However, users who are in the specified department but not in the recipient list of the message do not receive the update notifications. Specifying all users in the "From" and "To" fields of a message as recipientsClick @All.
You don't need to specify recipients one by one.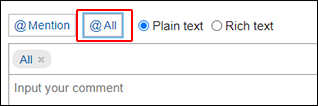
-
Enter your comment.
You can use Rich Text Formatting. For details, refer to Working with Rich Text Formatting. -
Attach a file if necessary.
You can attach multiple files. For details, refer to Attaching Files. -
Click "Post".
Replying to a Comment
You can reply to a comment.
-
Click the app icon
in the header. -
Click Messages.
-
On the "Messages" screen, select a folder, and then click the subject of the message you want to reply to a comment.
-
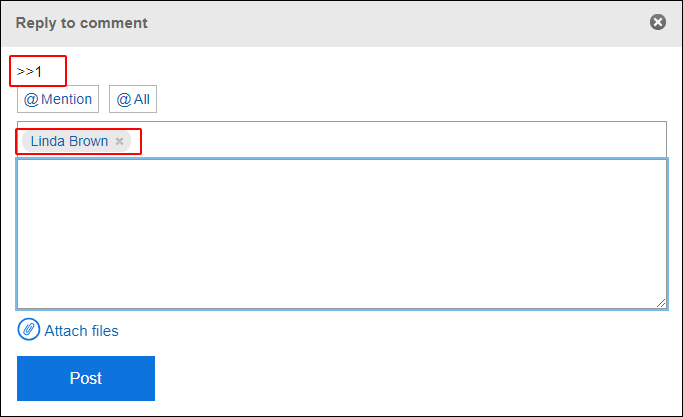
In the "Messages details" screen, click "Reply" of the comment to which you would like to post a reply.
The following two items are automatically set.
- Original comment number for the reply
- Recipients of the reply
-
Enter your comment.
-
Attach a file if necessary.
You can attach multiple files. For details, refer to Attaching Files. -
Click "Post".
Reply All
Send a reply to all recipients (except yourself) specified in the original comment.
-
Click the app icon
in the header. -
Click Messages.
-
On the "Messages" screen, select a folder, and then click the subject of the message you want to reply to a comment.
-
In the "Messages details" screen, hover the mouse cursor over the comment to which you would like to post a reply, and click Reply all.
The following two items are automatically set.
- Original comment number for the reply
- Sender of the original comment, and users (except yourself), organizations, and roles specified as recipients in the original comment
-
Enter your comment.
-
Attach a file if necessary.
You can attach multiple files. For details, refer to Attaching Files. -
Click "Post".
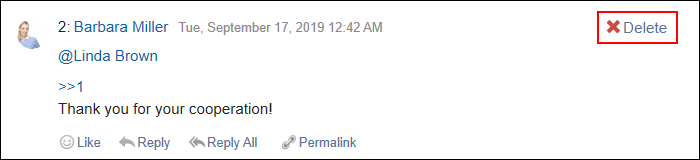
Deleting a Comment
Deletes the comment.
Only the user who posted the comment can delete it.
No notification is sent even though you delete the comment.
-
Click the app icon
in the header. -
Click Messages.
-
On the "Messages" screen, select a folder, and then click the subject of the message you want to delete comments.
-
In the "Messages details" screen, hover the mouse cursor over the comment which you would like to delete, and click Delete.
-
Click Yes in the "Delete comment" screen.
Useful Features of the Comment
This section describes useful features of the comment.
Anchor Feature
Anchor is the feature to set the referral link to the comment which was already posted.
A comment number is used to specify the comment to refer to.
By using two inequality signs (>>) followed by the comment number, you can create a link to the comment to which you want to refer.
-
Enter two inequality signs (>>) followed by the comment number to which you want to refer, and enter your comment.
Example:
>>3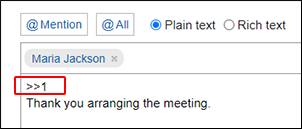
-
Click "Post".
You can access the comment by clicking the comment number you entered.
Permalink
The permalink is the URL assigned to each comment.
Accessing Permalink allows you to directly access the designated comment.
-
Display the comment to which you would like to refer.
-
Hover over the comment and click Permalink.

-
Copy the URL displayed and paste it in Garoon where you want to create a link.
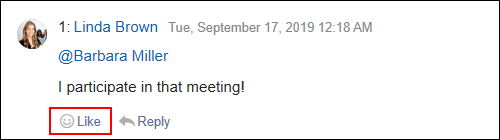
Respond ("Like") Feature
Respond is the feature to express your sympathy or acknowledgement for the other user's comment and body text, without posting any comment.
This respond feature may not be available depending on the settings by the system administrator.
Only the system administrators can change the label of respond feature.
For details, refer to Working with Respond Feature.
-
Display the comment in the message.
-
On the message's body text or comment, click a link to respond such as "Like" and "Acknowledged".
 To cancel your response, click a link such as "Not Like" and "Not Acknowledged".