Delete E-mails
This section describes how to delete e-mails.
If you are using the Trash feature, the deleted e-mail is moved to trash.
You can recover deleted e-mails from Trash if they are within retention period.
However, the e-mail is permanently deleted in the following cases.
- If you delete e-mails in bulk by specifying a date
- If you are not using the Trash feature
- Retention period has elapsed
- If you have deleted e-mails from the Trash folder
You can configure the Trash feature in the "Personal settings" screen.
For details, refer to Trash settings.
Deleting E-mails One by One
You can delete e-mails one by one.
-
Click the app icon
in the header.
-
Click E-mail.
-
On the "E-mail" screen, select a folder and delete the e-mail.
Steps to delete e-mails vary by views you are using.
- When preview is shown
- Select the e-mail you want to delete.
- Click "Delete".
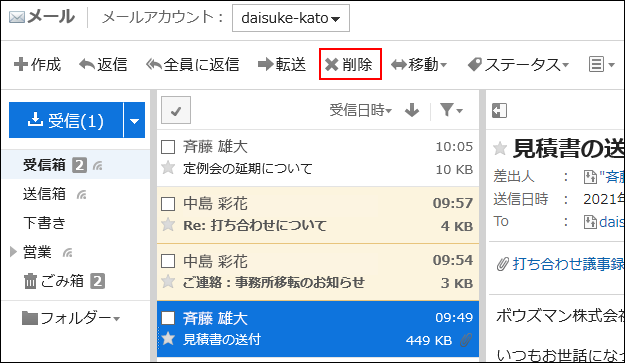
- When preview is hidden
- Click the subject of the e-mail you want to delete.
- On the "E-mail Details" screen, click Delete.
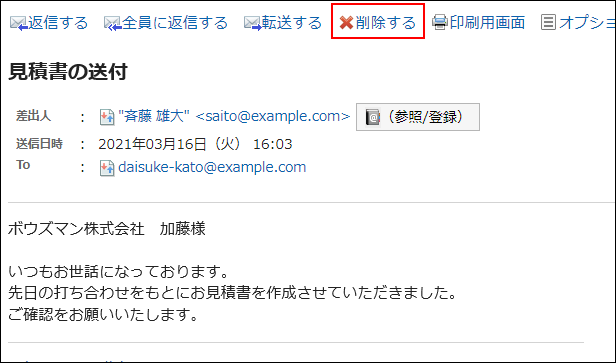
-
Click Yes on the screen for deleting all e-mails or on the screen for deleting e-mails.
Deleting Multiple E-mails in Bulk
You can select the e-mails you want to delete, and delete them all together.
-
Click the app icon
in the header.
-
Click E-mail.
-
On the "E-mail" screen, select a folder and delete the e-mail.
Steps to delete e-mails vary by views you are using.
- When preview is shown
- Select checkboxes for the e-mails you want to delete, and then click "Delete".
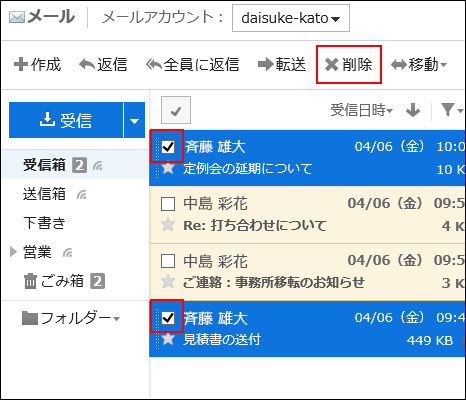
- When preview is hidden
- Select checkboxes for the e-mails you want to delete, and then click Delete.
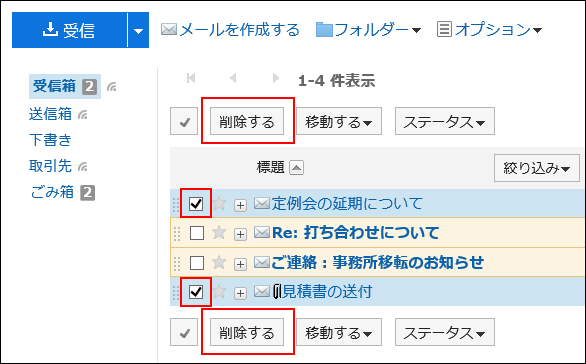
-
Click Yes on the Delete all e-mails screen.
Deleting All Data in a Folder
Delete all e-mails in each folder.
-
Click the app icon
in the header.
-
Click E-mail.
-
On the "E-mail" screen, select a folder and delete all data.
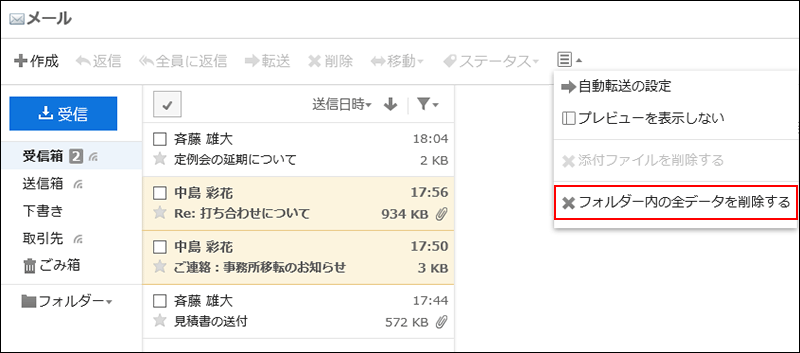
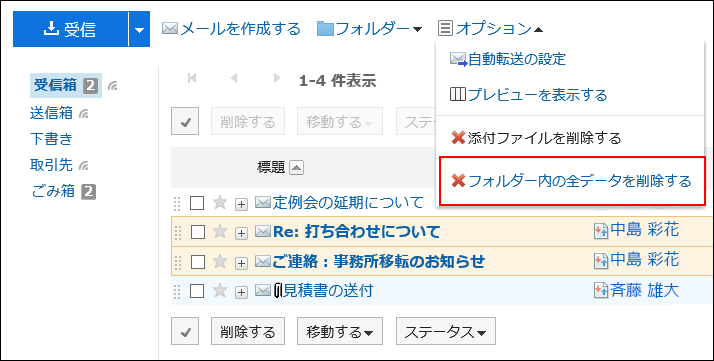
Steps to delete all data vary by views you are using.
- When preview is shown
- Click "Deleting all data in a folder" on the
 icon.
icon.
- When preview is hidden
- Under "Options", click the item to delete all data in the folder.
-
Click Yes on the screen to delete all data in the folder.
Deleting Deleted E-mail Account Data
You can delete the data of deleted e-mail accounts.
If your system administrator leaves e-mail data and have deleted only the e-mail account, a message indicating "the e-mail account has been deleted" is shown in the "E-mail" screen.

-
Click the app icon in the header.
-
Click E-mail.
-
On the "E-mail" screen, select the e-mail account for which you want to delete data, and then click the item to permanently delete accounts.
-
Click Yes on the "Delete account data" screen.
Deleting E-mails in Bulk by Specifying a Date
You can delete the following e-mails and drafts in bulk by specifying a particular date.
- The e-mails you received or sent before the specified date
- The drafts saved before the specified date
-
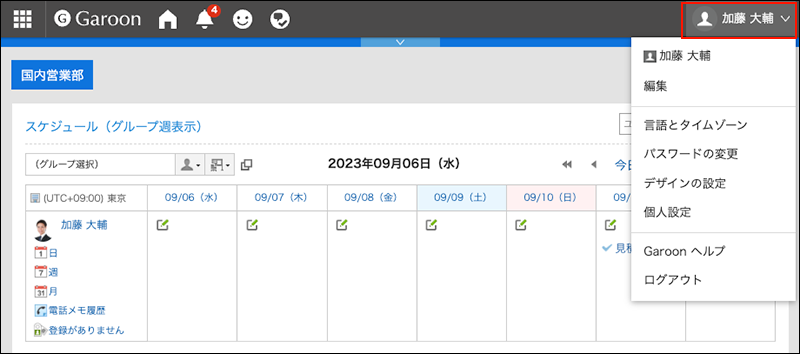
Click User name in the header.
-
Click Personal Settings.
-
Click Setting of each application.
-
Click E-mail.
-
Click the item to delete all e-mails.
-
On the screen to delete all e-mails, set the required items and click Delete.
- E-mail account:
Specify the e-mail account for which you want to delete e-mails. - Date:
Specify the base date to use for deletion.
- E-mail account:
-
Click Yes on the confirmation screen of bulk deletion.