Setting Up Default Shared with Users in Appointments
If you have some users, organizations, or roles you frequently select as targets to share with, you can configure them as the default values for the "Shared with" field.
For example, if the appointments of the company president need to be shared with managers and secretaries, configuring them as the default values for "Share with" makes it faster and easier to select them.
Adding Default "Shared with"
You can set the default "Shared with" users for each user.
-
Before configuring default values for "Shared with" users, ensure that the following preparations are completed:
- Permissions to select roles
To allow users to set roles to default values for "Shared with" users, you also need to allow the users to select roles on the "Role settings" page.
For details, refer to Role Permissions. - Specify organizations/roles for the "Shared with" users
To allow users to select organizations and roles as "Shared with" users, check that the "Allow" checkbox of "Specify organizations/roles for the "Shared with" users" field in "General Settings" screen of Scheduler is selected.
For details, refer to Allowing Users to Specify Organizations/Roles for "Shared with" Users.
- Permissions to select roles
-
Click the administration menu icon (gear icon) in the header.
-
Click System settings.
-
Select "Application settings" tab.
-
Click Scheduler.
-
Click Default "Shared with".
-
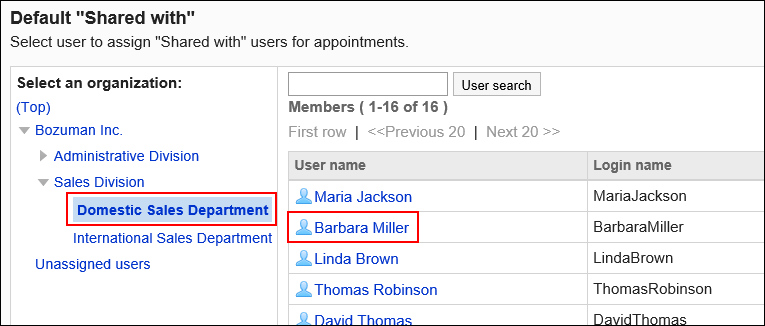
On the "Default Shared with" screen, select the organization, and then click the user name of the user to whom you set the default "Shared with".
-
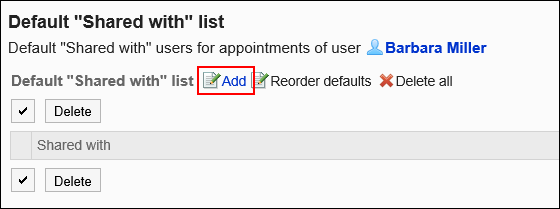
On the "Default "Shared with" list" screen, click Add.
-
On "Add defaults" screen, select the user, organization, or role to set as the default "Shared with", and then click Add.
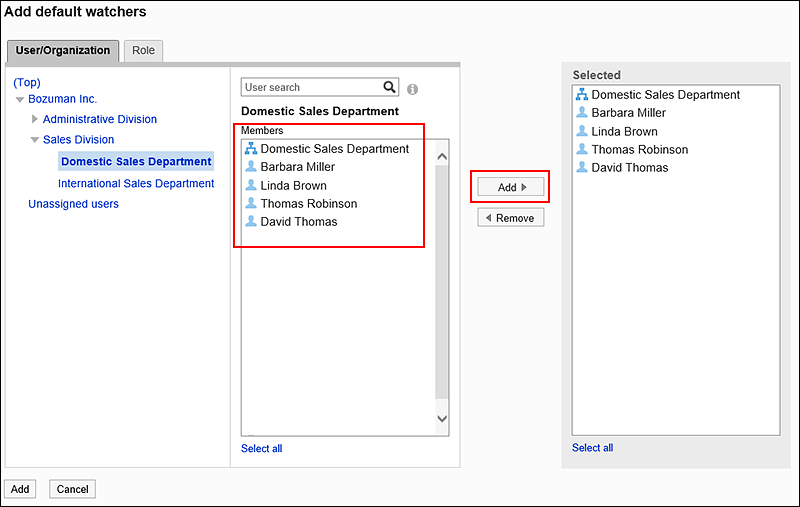
If you do not allow users to "Specify organizations/roles for the "Shared with" users" in the General settings screen of Scheduler, organizations or roles specified as "Shared with" are disabled.
On "Organizations/Users" tab, selecting an department then searching for users allows you filter the scope of the search to the department and its child departments.When you click "(All)" on the "Role" tab, all roles used in Garoon are displayed selected.
You cannot select the "Administrators", "Everyone", and "LoginUser" roles.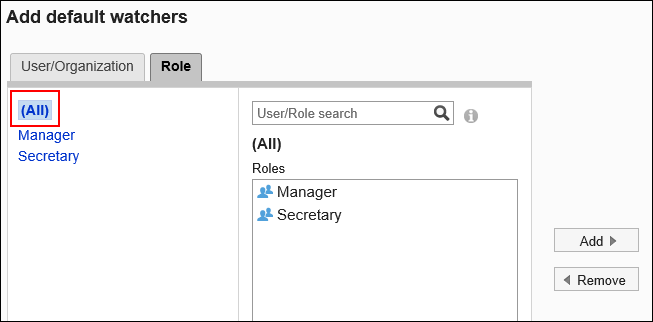
-
Check the selections and click Add.
Reordering Default "Shared with"
For each user, you can reorder the default "Shared with" users of the appointments.
Users can reorder the "Shared with"users when they add their appointment.
-
Click the administration menu icon (gear icon) in the header.
-
Click System settings.
-
Select "Application settings" tab.
-
Click Scheduler.
-
Click Default "Shared with".
-
On the "Default Shared with" screen, select the organization, and then click the user name of the user for whom you reorder default "Shared with" users.
-
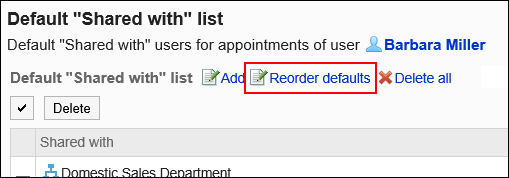
On the "Default "Shared with" list" screen, click "Reorder defaults".
-
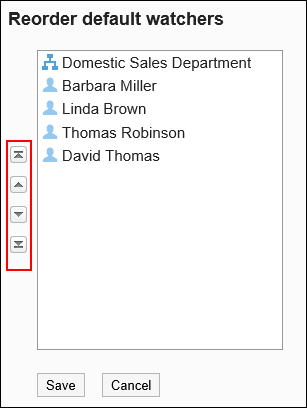
On "Reorder defaults" screen, reorder users, organization, or roles.
-
Confirm your settings and click Save.
Deleting Default "Shared with"
You can delete the default "Shared with" users.
Selecting Default "Shared with" to Delete
Select default "Shared with" to delete.
-
Click the administration menu icon (gear icon) in the header.
-
Click System settings.
-
Select "Application settings" tab.
-
Click Scheduler.
-
Click Default "Shared with".
-
On the "Default Shared with" screen, select the organization, and then click the user name of the user of whom you delete default "Shared with" users.
-
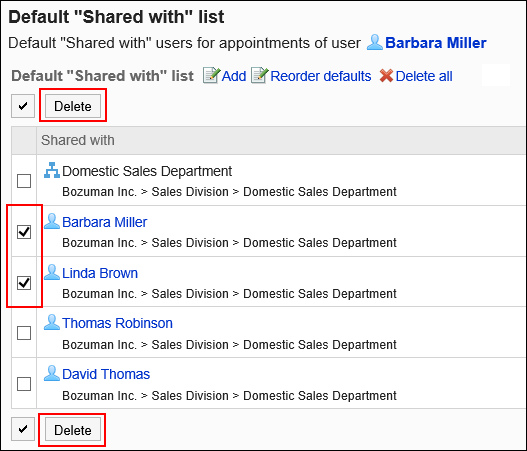
On the "Default "Shared with" list" screen, select the checkboxes of default "Shared with" users, and then click Delete.
-
Click Yes on "Delete defaults" screen.
Deleting All Default "Shared with"
Delete all default "Shared with" users.
-
Click the administration menu icon (gear icon) in the header.
-
Click System settings.
-
Select "Application settings" tab.
-
Click Scheduler.
-
Click Default "Shared with".
-
On the "Default Shared with" screen, select the organization, and then click the user name of the user of whom you delete default "Shared with" users.
-
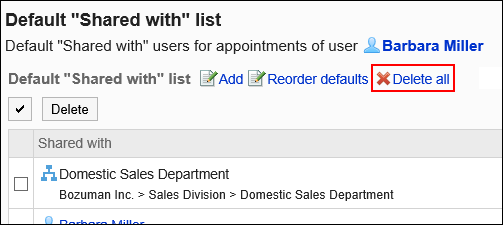
On the "Default Shared with list" screen, click Delete all.
-
Click Yes on "Delete all defaults" screen.