Managing Scheduler Data Using CSV Files
Manage scheduler data using CSV files.
The following data can be managed using CSV files:
- Appointment
- Facility Information
- Facility Name
- Facility Group Information
- Facility Group Name
- Operational administrative privileges for facility groups
- Access Permissions
- Default "Shared with"
Importing Data from a CSV File
Import scheduler data from a CSV file.
If an error occurs while importing a CSV file, the import process will be terminated. The data which has been imported will be eliminated.
-
Create a CSV file to import data.
For information on items that can be managed in CSV files, refer to the topic about Scheduler CSV format. -
Click the administration menu icon (gear icon) in the header.
-
Click System settings.
-
Select "Application settings" tab.
-
Click Scheduler.
-
Click Import from CSV file.
-
On "Import from CSV File" screen, select the data to import.
-
Select the CSV file that you created in step 1.
-
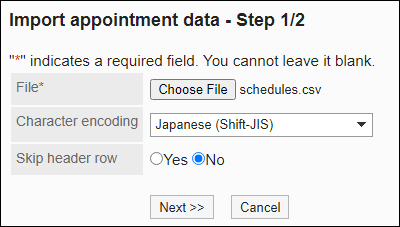
Set the data to import, and click Next.
The setting fields are as follows:
- Character encoding:
Encodes data from a CSV file with the selected character code.
The following character encoding can be selected:- Unicode (UTF-8)
- Japanese (Shift-JIS)
- ASCII
- English (Latin1)
- Simplified Chinese (GBK/GB2312)
- Thai (TIS-620)
- Skip the first row:
If the header row contains information other than data such as an item name and a comment, select "Yes".
- Character encoding:
-
Confirm the CSV file contents and click Import.
Exporting Data to a CSV File
Exports scheduler data to a CSV file.
-
Click the administration menu icon (gear icon) in the header.
-
Click System settings.
-
Select "Application settings" tab.
-
Click Scheduler.
-
Click Export to CSV file.
-
On the "Export to CSV File" screen, select the data to export.
To export appointment data, proceed to step 7.
If the date to export is other than appointment data, proceed to step 8. -
To export appointment data, select the departments, users, or facilities to export appointments, then click Add and click Next.
You can select multiple departments, users, and facilities.
-
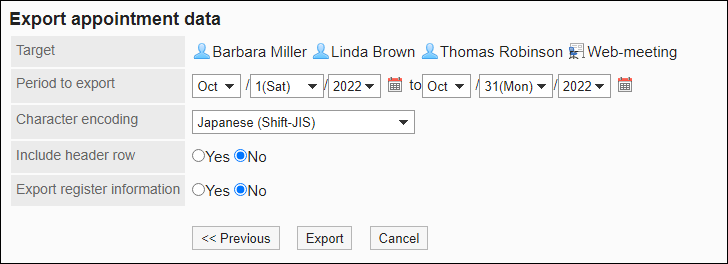
Set the required items for the data to export.
The setting fields are as follows:
- Period to export appointments:
This field is displayed when you export appointments.
Select the period of time of appointments to export. - Character encoding:
Select the character code that you want to use for encoding.
The following character encoding can be selected:- Unicode (UTF-8)
You can select with BOM as required. - Japanese (Shift-JIS)
- ASCII
- English (Latin1)
- Simplified Chinese (GBK/GB2312)
- Thai (TIS-620)
- Unicode (UTF-8)
- Include header row:
To export an item name to the header row of a CSV file, select "Yes". - Export registrants:
This field is displayed when you export appointments.
To export appointment registrants to a CSV file, select "Yes". - Language in which the data is exported:
This field is displayed when you export facility names or facility group names.
Set the language in which you export the facility names or facility group names. You can set multiple languages.
The following languages can be selected:- All
- 日本語
- English
- 中文(简体)
- 中文(繁體)
Exported in Traditional Chinese.
- Period to export appointments:
-
Confirm your settings and click Export.
-
Save the file with a function provided by your Web browser.