Setting up Appointment Types
Appointment types are strings that represent categories of the appointments shown preceding the appointment subject.
When users add an appointment, they can select the appointment type from the "Subject" field.
By using appointment types, you can easily show the type of the appointment.
For example, setting up frequently used appointment types in your company such as company-wide meetings and leaving work early makes users easily set appointments.
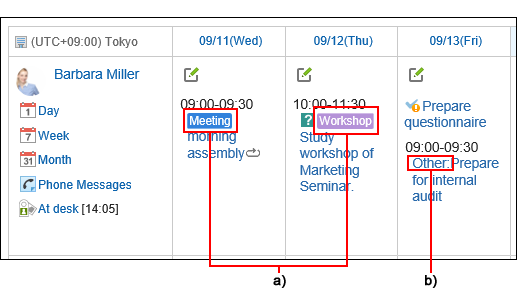
a): An appointment type added by administrators
b): An appointment type set by users
Appointment types can also be set by users.
While system administrators prepare menus for all users, users can add their own menus in a menu set by their system administrator.
For details, refer to Setting up Appointment Types in the personal settings.
Menus added by users are not displayed in the dropdown list of other users.
The appointment types added by the user is displayed above the appointment types added by system administrators.

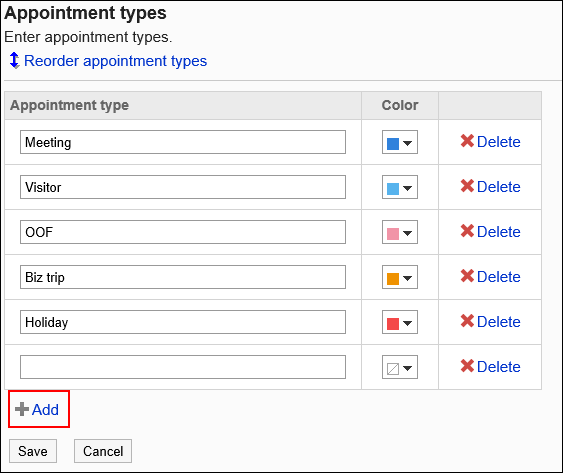
Set display names and background colors to be displayed for appointment types.
-
Click the administration menu icon (gear icon) in the header.
-
Click System settings.
-
Select "Application settings" tab.
-
Click Scheduler.
-
Click Appointment types.
-
On the screen to set appointment types, click Add.
-
Enter the name of an appointment type.
You can enter codes in up to 100 characters.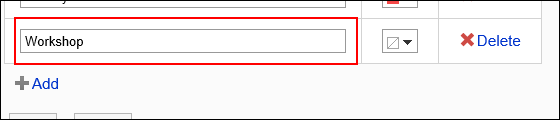
-
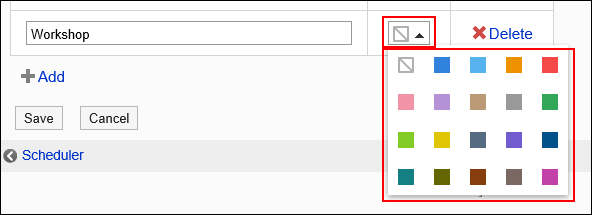
Select a color for the background of the appointment type.
If you do not add a background color, select colorless .
.
-
Confirm your settings and click Save.
Change display names and colors of appointment types.
The new names and colors are not applied to the appointment types made previously.
-
Click the administration menu icon (gear icon) in the header.
-
Click System settings.
-
Select "Application settings" tab.
-
Click Scheduler.
-
Click Appointment types.
-
On the screen to set appointment types, you can change the settings in the appointment type.
-
Confirm your settings and click Save.
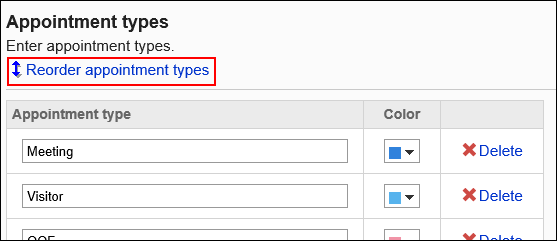
Reorder appointment types.
-
Click the administration menu icon (gear icon) in the header.
-
Click System settings.
-
Select "Application settings" tab.
-
Click Scheduler.
-
Click Appointment types.
-
On the screen to set appointment types, click "Reorder".
-
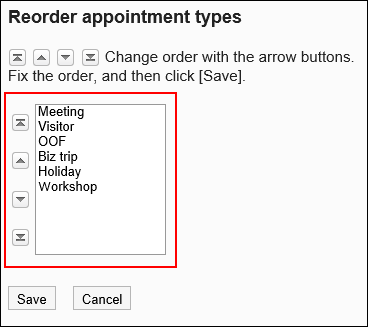
On the screen to reorder appointment types, reorder appointment types.
-
Confirm your settings and click Save.
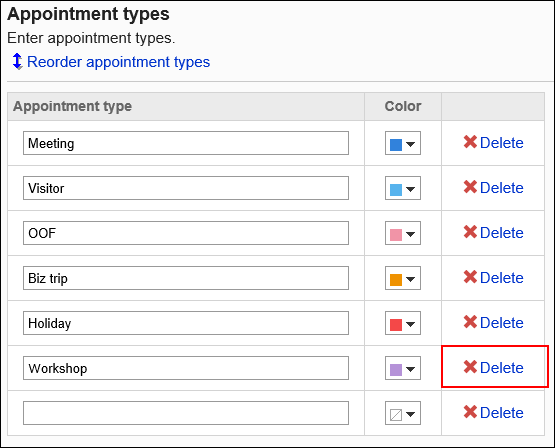
Delete Appointment types.
Deleting appointment types doesn't delete appointment types from appointments that have already be added.
-
Click the administration menu icon (gear icon) in the header.
-
Click System settings.
-
Select "Application settings" tab.
-
Click Scheduler.
-
Click Appointment types.
-
On the screen to set appointment types, click Delete in the delete field.
-
Confirm your settings and click Save.