Scheduler Operations on Mobile View
This section describes the main operations for Scheduler on the mobile view.
Checking Your Availability to Add Appointments
In Garoon mobile, you can check your available hours in the week to add new appointments.
This section explains it using Garoon Mobile for iOS screen as an example.
-
Tap
 .
. -
On the "Check availability" screen, tap any time slot with no appointment.
The "New appointment" screen is displayed, with the date/time you tapped being populated.
If you tap a different time slot on the "Check availability" screen, its date/time will be applied to the "New appointment" screen.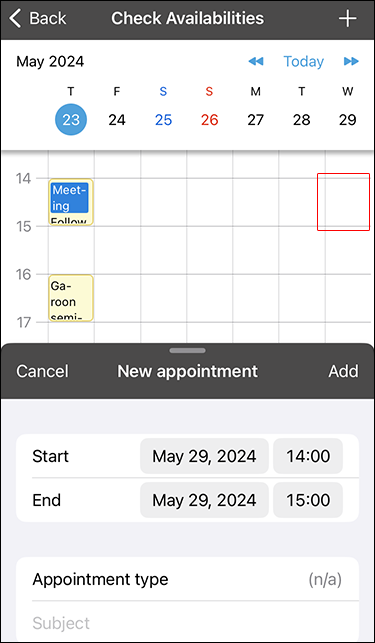
-
On the "New appointment" screen, configure the required fields.
- Start:
Set the start date and time for the appointment. - End:
Set the end date and time for the appointment. - Appointment Type
Select the appointment type. - Title:
Set the title of the appointment. - Notes:
Enter notes for the appointment. - Public:
Select whether to make the appointment public.
To display all fields on Garoon Mobile for iOS
Scroll down the "New appointment" screen, or drag the top of the "New appointment" screen upward to get a full-screen view.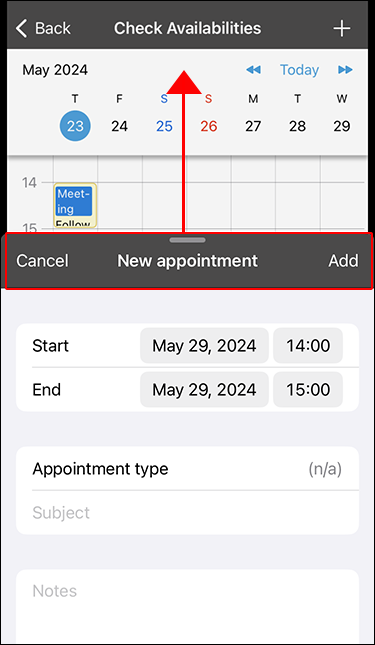
If you want to display the "Check availability" screen again, drag the top of the "New appointment" screen downward until it reaches half the screen height.
To display all fields on Garoon Mobile for Android
Tap Enter other items to display the "New appointment" screen.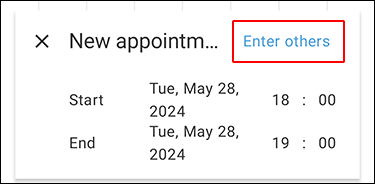
If you want to display the "Check availability" screen again, tap Collapse on the top right of the "New appointment" screen.
- Start:
-
Review the settings you have set and tap Add.
Adding Appointments
Add an appointment for the user, organization, or facility.
Depending on your system administrator's settings, you may not be able to add appointments for organizations.
-
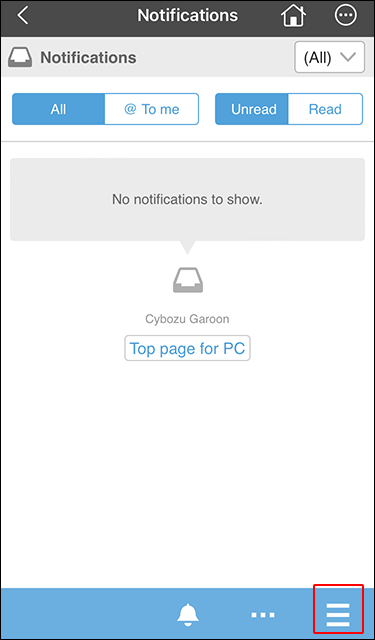
Tap the App menu icon.
-
Tap "Scheduler".
-
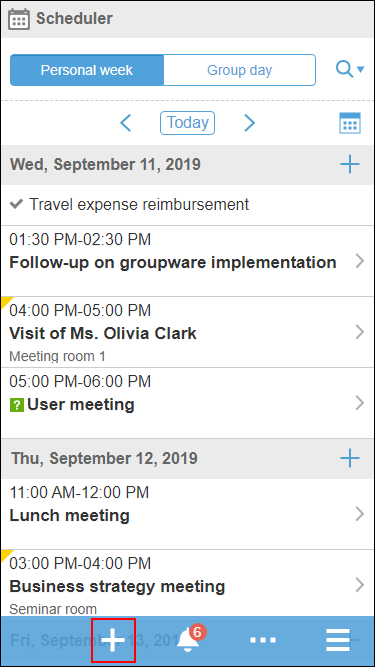
On the "Personal week" screen, tap the add icon.
-
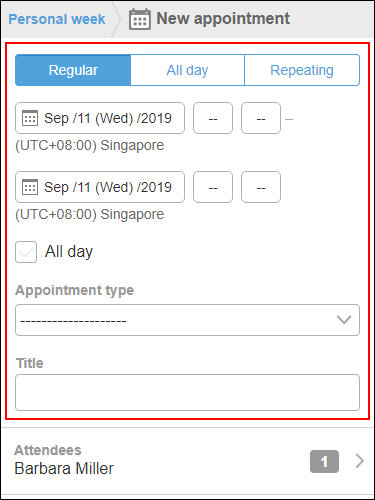
On the "New appointment" screen, select the appointment type and then enter the date/time and the subject.
-
Tap "Attendees".
-
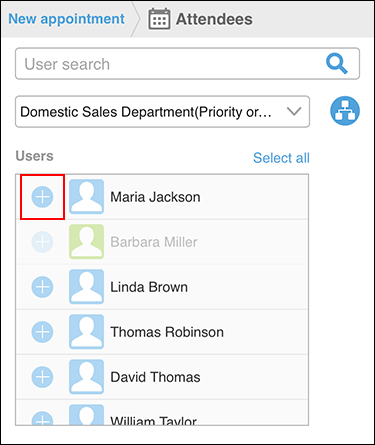
On the "Attendees" screen, add users to set as attendees to the screen showing the candidates.
 a): Enter keywords in the search box, then tap
 to search users. When you type characters in the search box, a list of suggested attendees is displayed.b): From the dropdown list, select the group to which the target user or organization belongs.c): Tap the
 , select the organization of the target user, and then tap "Apply".
 -
Tap the
 for the users and organizations you want to set as attendees of an appointment, among users who are displayed in the candidate field.
-
In the field to show selected attendees, confirm that all the desired users are listed, and then tap "Apply".
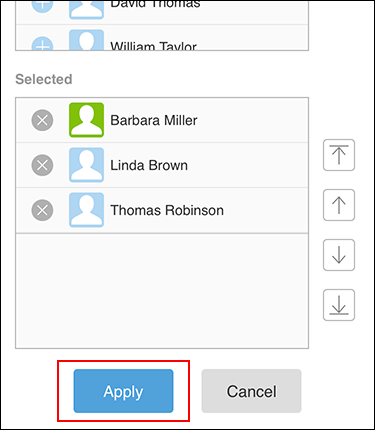 When you tap
 for users, you can cancel the selection.
To change the display order of users, tap the name of the user, and then tap the arrow to the right of the "Selected" field. -
On the "New appointment" screen, tap "Facilities".
-
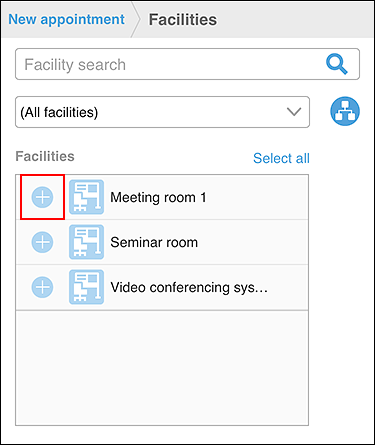
On the "Facilities" screen, use one of the following methods to display the facilities to the candidate screen.
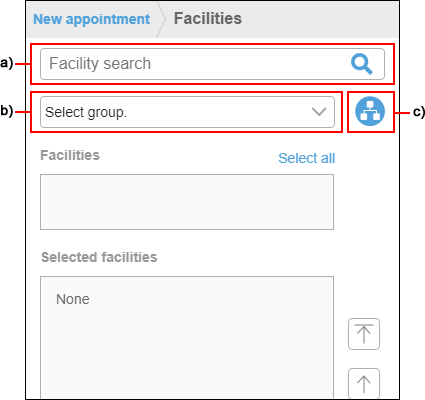 a): Enter keywords in the search box, then tap to search facilities. When you enter characters in the search box, a list of suggested facilities is displayed.b): From the dropdown list, select the facility group where the target facility belongs.c): Tap the, select the group of the target facility, and then tap "Apply".
 -
Among the facilities in the candidates, tap
for the target facility.
-
In the field to show the selected facilities, confirm that all the facilities you want to use are displayed, and then tap "Apply".
 When you tap for facilities, you can cancel the selection.
If you want to change the order of facilities, tap the facility name, and then tap the arrow to the right of the selected facilities field. -
On the "New appointment" screen, set the required items such as notes and attachments, and then tap "Add".
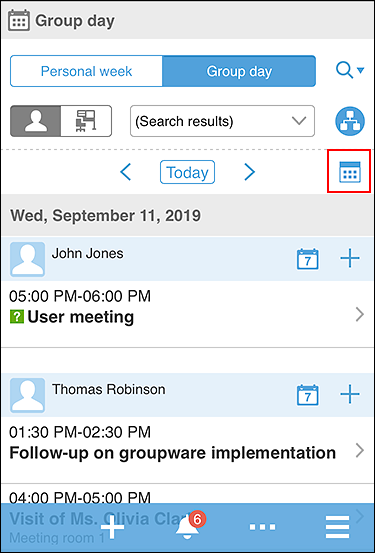
Searching the Appointments of Users and Facilities
You can search the appointments for multiple users and facilities.
-
Tap the App menu icon.
-
Tap "Scheduler".
-
On the group day screen, search for users and facilities by tapping
 and entering keywords in the search box.
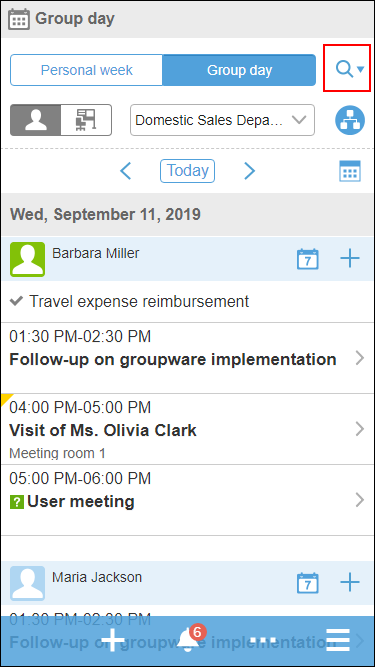 The OR search can be performed for multiple users and facilities using multiple keywords by separating each keyword with a space.
 -
Tap the target user or facility from the search results.
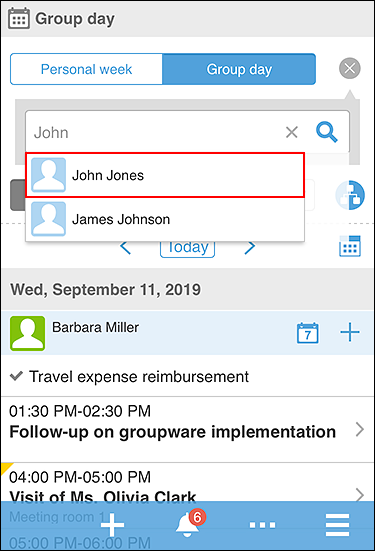 The selected users and facilities are displayed below the search box.
You can search for other users and facilities by entering keywords in the search box. -
After you have selected all the users and facilities for which you want to view appointments, tap
.
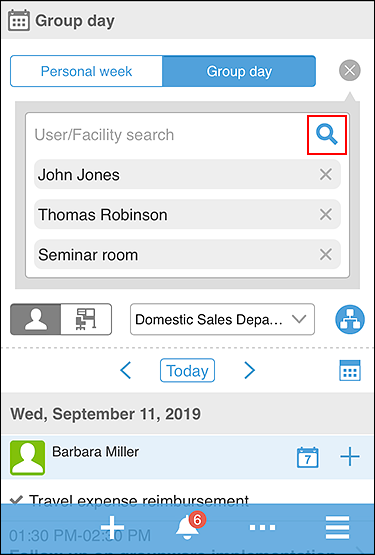 Today's appointments for the selected users and facilities are displayed.
 -
Tap the
 and select the date of the appointment you want to display.