Logging In to Garoon Mobile for Android (Using the Settings Information Sent via an E-mail)
This section describes how to log in to Garoon mobile by sending the settings information required for login via e-mail.
Follow the three steps below to log in.
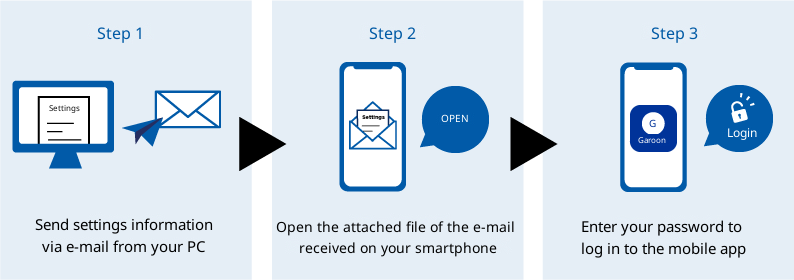
Step 1: Send Settings Information from Your PC to Your Smartphone
From your PC, you can send the settings information to log in to Garoon mobile via an e-mail.
-
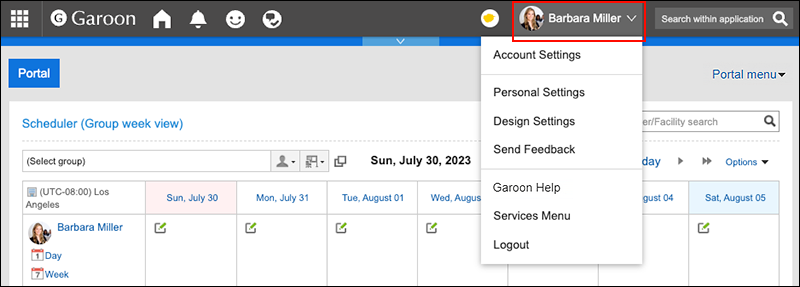
Access Garoon from your PC.
-
Click User name in the header.
-
Click Account Settings.
-
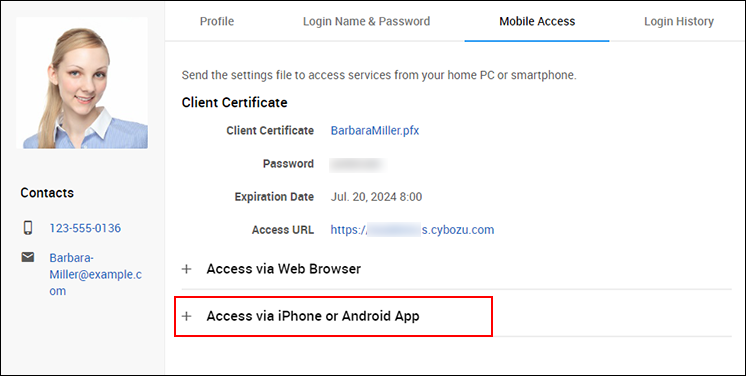
Click "Mobile Access".

-
Click Access via iPhone or Android App.
-
On "2. Select the app to use", select "Garoon Mobile".
-
Enter the e-mail address (twice to verify) that can receive e-mails on your smartphone.
Enter the e-mail address that can receive e-mails using the Gmail app. -
Click Send.
An e-mail with steps to configure Garoon mobile and login information will be sent to the e-mail address that you have entered.
Step 2: Open the File Attached to the E-Mail on Your Smartphone
To start Garoon mobile, open the file attached to the received e-mail.
Different steps may apply depending on whether you can use Gmail app or not.
If Gmail App Is Available
Open the e-mail in your Gmail app and tap the attachment.
-
On your smartphone, open the received e-mail.
-
Tap the attached file.
Garoon mobile will be launched.
If Garoon mobile is not launched automatically and multiple apps to open the file are suggested, tap .
.
If Gmail App Is Not Available
Save the file containing setting information to the file management app "Files by Google", and then tap the file.
If you cannot find "Files by Google" on your smartphone, install it via Google Play Store.
-
On your smartphone, open the received e-mail.
-
Save the client certificate attached to the e-mail to "Files by Google".
The steps vary depending on your mobile device and e-mail app. -
Open "Files by Google", and tap the file containing setting information you saved in Step 2.
Garoon mobile will be launched.
Step 3: Enter Your Password and Log in to Garoon Mobile
Enter your password to log in to Garoon mobile.
Enter the appropriate password according to the screen displayed.
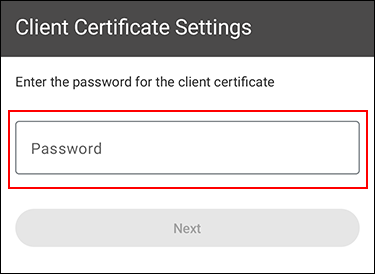
When the screen for entering the password for the client certificate is displayed
-
On the "Client Certificate Settings" screen, enter the password for the client certificate, and tap Next.
-
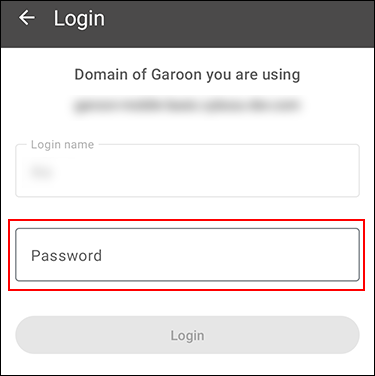
On the "Login" screen, enter the password to log in to Garoon, and tap Login.
 If you have enabled the two-factor authentication, the "Two-Factor Authentication" screen will be displayed after tapping Login. Enter the confirmation code for two-factor authentication, and tap Verify.
For the confirmation code, use a six-digit code that is created by an authentication app such as Google Authenticator. For details, refer to How Can I Get a Two-Factor Authentication Verification Code?.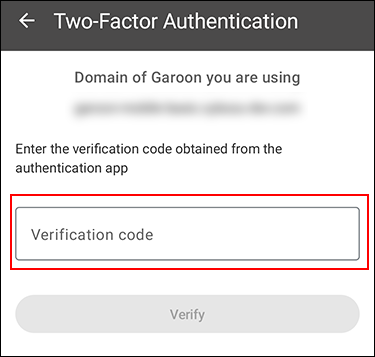
Your login to Garoon mobile is now completed.
Confirm the description in the walk-through screens, and start using Garoon mobile.
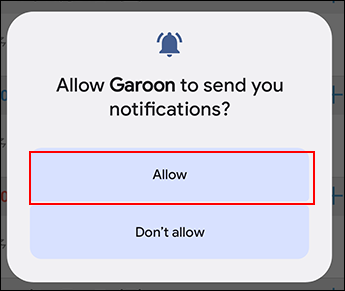
When a dialog appears asking you to allow or disallow notifications to be sent, tap Allow to receive the update information of Garoon and the reminder notifications for the appointment.
 When another dialog appears to check your alarms and reminders settings, tap Allow and enable the alarms and reminders settings also on the settings screen on your smartphone.
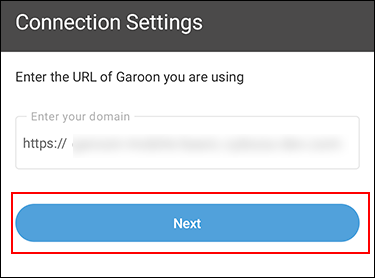
When the screen in which the URL to access Garoon has been set is displayed
-
On the "Connection Settings" screen, tap Next.
-
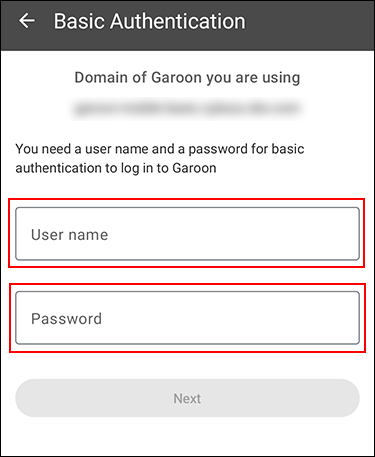
If you are using Basic authentication, enter the user name and password for Basic authentication on the "Basic Authentication" screen, and tap Next.
 If SAML authentication is used along with Basic authentication, tap Next and enter the user name and password again for Basic authentication.
-
If you are using SAML authentication, enter the login name and password for SAML authentication.
If you are using SAML authentication, your login to Garoon mobile is now completed. -
On the "Login" screen, enter the password to log in to Garoon, and tap Login.
-
If you have enabled two-factor authentication, enter the confirmation code on the "Two-Factor Authentication" screen, and tap Verify.
For the confirmation code, use a six-digit code that is created by an authentication app such as Google Authenticator. For details, refer to How Can I Get a Two-Factor Authentication Verification Code?.
Your login to Garoon mobile is now completed.
Confirm the description in the walk-through screens, and start using Garoon mobile.
When a dialog appears asking you to allow or disallow notifications to be sent, tap Allow to receive the update information of Garoon and the reminder notifications for the appointment.
When another dialog appears to check your alarms and reminders settings, tap Allow and enable the alarms and reminders settings also on the settings screen on your smartphone.