How to View the Screen
This section describes icons and buttons that are displayed on the bulletin board screen.
"Bulletin Board" Screen
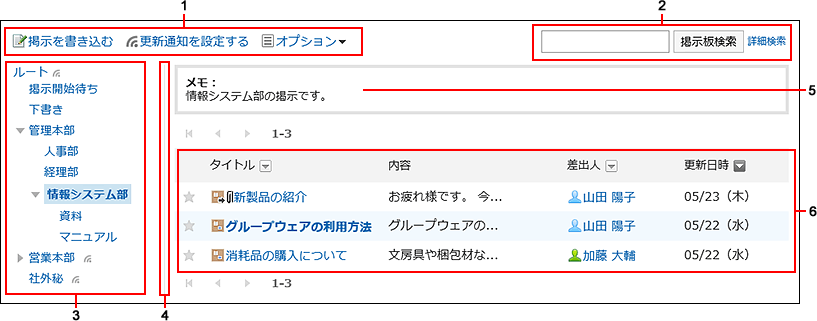
A list of topics is displayed. Unread topic titles are displayed in bold.
| Icon |
Description |
 |
Topics with updated body text and/or comments |
 |
A topic with attachments in the body |
 |
Topics with updated body text and/or comments, which also have attachments to the body text |
Topic Details Screen
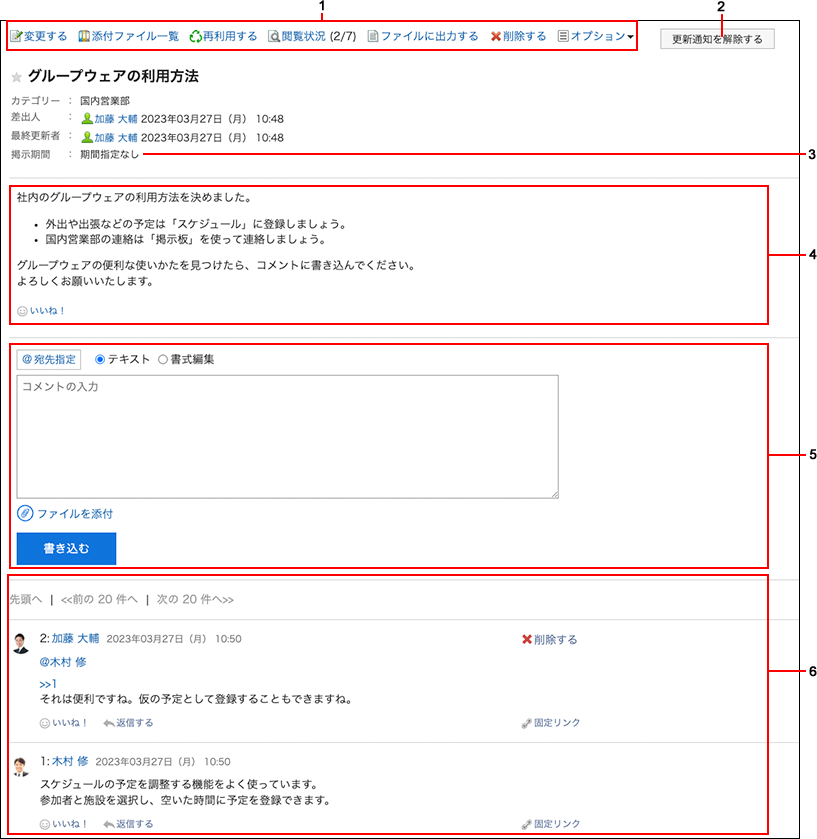
This section describes how to view the topic details screen.
| Number |
Description |
| 1 |
- "Change" Link:
You can change the body text and settings of the topic.
This is displayed only for the user who posted the topic and users who are allowed to change/delete the topic.
- Attachment List Link:
Displays all files attached to the body and comments. Images inserted by using rich text formatting feature are not displayed.
- Reuse Link:
Duplicate the body and settings of any topic and create a new topic.
- "Acknowledgment status (number)" Link:
Status of notification recipients. The number is shown in the format as "the number of users who have viewed the topic/the number of notified users".
When you click a link, the date and time that the user viewed the topic are displayed.
The notification recipients are set by the system administrator or the operational administrator of the bulletin board category.
- "Save as file" Link:
You can export topics to text files.
- "Delete" Link:
You can delete topics.
This is displayed only for the user who posted the topic and users who are allowed to change/delete the topic.
- "Options" Link:
The following menus are displayed.
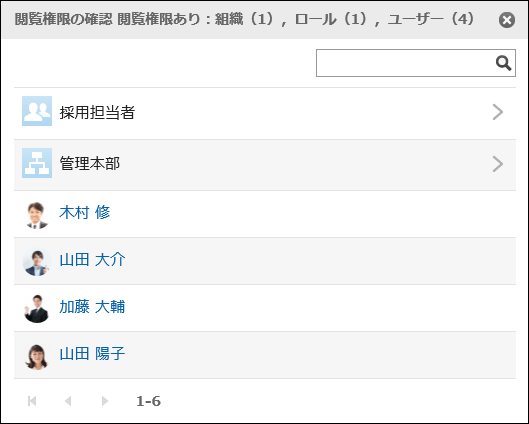
- "Check access permissions" Link:
A list of organizations, roles, and users who can view the topics is displayed.
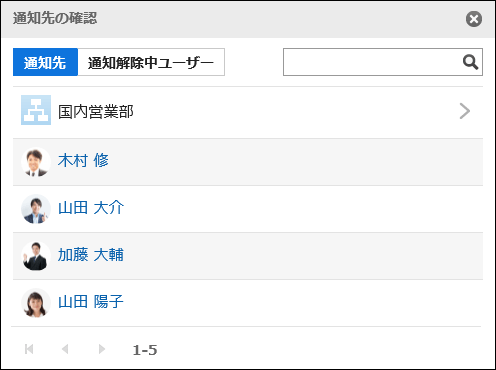
- "Notification recipients" Link:
Under "Recipients", a list of organizations, roles, and users who receive category notifications is displayed.
Under "Unsubscribed users", a list of users who stop receiving update notifications of the category is displayed.
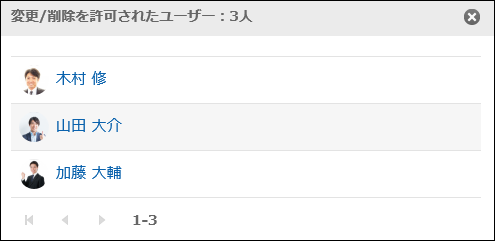
- "Users who can edit" Link:
Displays a list of users who have been allowed to edit and delete the topic.
This is displayed only for the users who are allowed to change/delete the topic.
|
| 2 |
"Stop receiving update notification" button:
You can stop receiving the update notifications for topics. Click "Edit notifications" if you want to configure the update notifications. |
| 3 |
Posting period:
The period the topic is published. |
| 4 |
- Body:
The body of the topics.
- "Respond" Link:
You can easily respond to the topic contents using "Like".
Depending on your system administrator settings, the links may not be displayed or the wording will be different.
|
| 5 |
- Comment Field:
Enter the comment you want to post in the topic.
- Attachments Link:
Select the file you want to attach to the comment.
- Post button:
You can post comments to the topics.
|
| 6 |
- "Delete" Link:
Deletes the comment. It is displayed only for the comments that you have written.
- "Respond" Link:
You can quickly respond to comments.
Depending on your system administrator settings, the links may not be displayed or the wording will be different.
- [>> Number] Links:
This is an an anchor link. Click to move the comment with the number.
- "Reply" Link:
You can reply to a comment. By clicking Reply, the relevant users are displayed in the recipient area of your reply.
When you click Reply and write your comment, an anchor link (>>comment number) for the original comment is set in your reply comment.
- Permalink:
Displays the URL of the comment. By clicking Permalink, an URL assigned to each comment is displayed.
Accessing Permalink allows you to directly access the designated comment. For details, refer to Permalink.
|


