Setting Up Events
You can set up holidays, work days, and memos in a calendar.
Adding Events
You can add events.
-
Click the Administration menu icon (gear icon) in the header.
-
Click System settings.
-
Select "Basic system administration" tab.
-
Click Calendar.
-
Click Calendar settings.
-
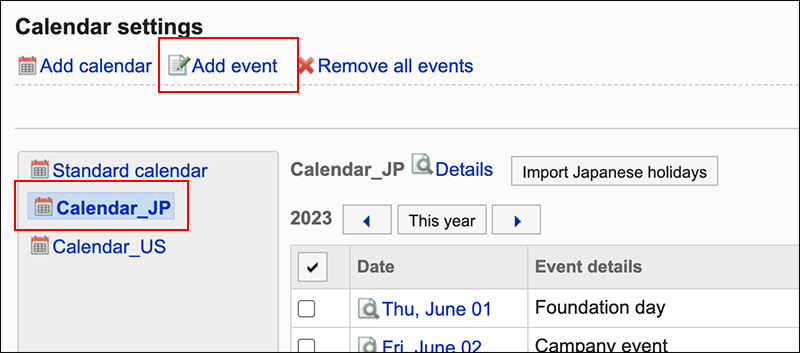
On the "Calendar Settings" screen, select a calendar and click Add event.
-
On the "Add an Event" screen, set the date of the event in the "Date" field.

-
In the "Event Type" field, select an event type.
Calendar display varies depending on the type of event. The following types of events can be selected.
- Holiday:
Select this to add holidays. Holiday icon and event details will be displayed on the specified date. The background color is red.
 - Work day:
Select to add business days. Workday icon and event details will be displayed on the specified date. The background color is white.
 - Memo:
Event details are displayed on the specified date. The background color does not change.
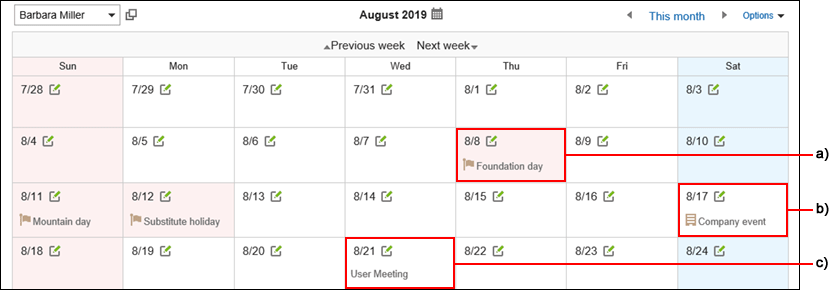 a): Holiday
b): Workday
c): Memo - Holiday:
-
Enter an event name in the "Event details" field.
This event details must be set.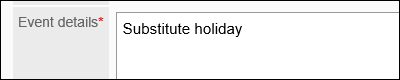
-
Confirm your settings and click Add.
Changing Events
Change the settings of an event.
-
Click the Administration menu icon (gear icon) in the header.
-
Click System settings.
-
Select "Basic system administration" tab.
-
Click Calendar.
-
Click Calendar settings.
-
On the "Calendar Settings" screen, select a calendar, and then click the date of the event you want to change.
-
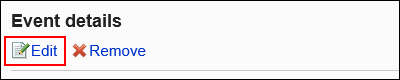
On the "Event details" screen, click Edit.
-
On the screen to edit events, set the required items.
-
Confirm your settings and click Save.
Deleting Events
You can delete events.
Deleting Events One by One
You can delete events one by one.
-
Click the Administration menu icon (gear icon) in the header.
-
Click System settings.
-
Select "Basic system administration" tab.
-
Click Calendar.
-
Click Calendar settings.
-
On the "Calendar Settings" screen, select a calendar and click the date of the event you want to delete.
-
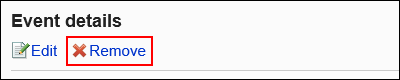
On the "Event details" screen, click Delete.
-
Click Yes on the screen to delete events.
Deleting Multiple Events in Bulk
You can select multiple events and delete them all together.
-
Click the Administration menu icon (gear icon) in the header.
-
Click System settings.
-
Select "Basic system administration" tab.
-
Click Calendar.
-
Click Calendar settings.
-
On the "Calendar Settings" screen, select a calendar.
-
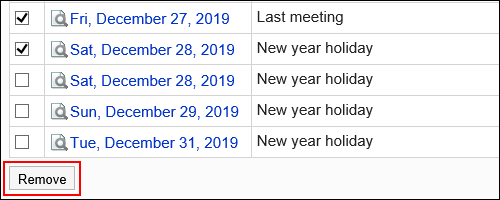
Select the checkboxes of the events you want to delete, and then click Delete.
-
Click Yes on the screen to delete events in bulk.
Deleting All Events in a Calendar
You can delete all events in a calendar.
-
Click the Administration menu icon (gear icon) in the header.
-
Click System settings.
-
Select "Basic system administration" tab.
-
Click Calendar.
-
Click Calendar settings.
-
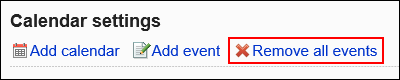
On the "Calendar Settings" screen, select a calendar and click Remove all events.
-
On the screen to delete all events, click Yes.