Approval Route Settings (Shared Route)
Set up a route step for approving the request. Multiple route steps can be set.
You can also set the approver for each route step beforehand.
Add a route step for the approval route.
-
Click the Administration menu icon (gear icon) in the header.
-
Click System settings.
-
Select "Application settings" tab.
-
Click Workflow.
-
Click the route list.
-
On the "Route list" screen, select the "Shared routes" tab, and click the route name of the shared route.
-
On the route details screen, click Add in "Approval route".

-
On the "Add route Step" screen, set the required items.
-
Confirm your settings and click Add.

| Item | Description |
|---|---|
| Route type | Select the approval style for the route step.
|
| Route Step Name | Enter the route step name. |
| Step code | An item code is a unique code to identify items for JavaScript customization. If you do not use the JavaScript customization, you do not need to set the route step code. You can use single-byte alphanumeric characters, hyphens, and _ (underscores). When a step code is duplicated in one request form, an error occurs. Up to 100 characters can be entered in a code. If 101 or more characters are entered, the first 100 characters are registered. |
| Allow Route change | To allow a processor to reroute, select the "Allow" checkbox. If a route change is allowed, the processor can be changed by other processors in the same route step and in the subsequent route step, when processors are processed in this route step. |
Setting the default value for the route step simplifies the job of the applicant.
Organization, user, or role.
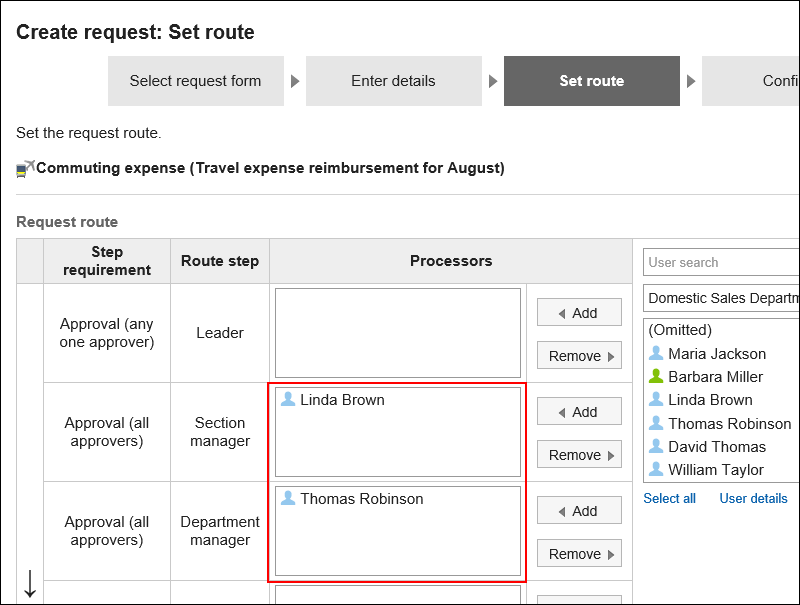
Adds the default value for the route step.
-
Click the Administration menu icon (gear icon) in the header.
-
Click System settings.
-
Select "Application settings" tab.
-
Click Workflow.
-
Click the route list.
-
On the "Route list" screen, select the "Shared routes" tab, and click the route name of the shared route.
-
On the route details screen, click the route step name of the route step in "Approval route" field.
-
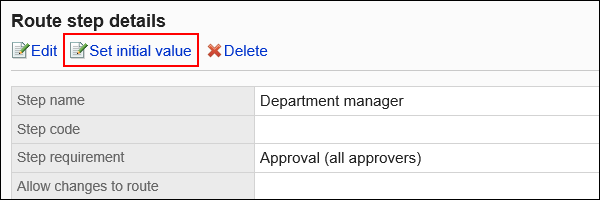
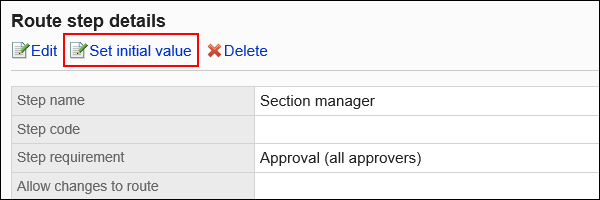
On the "Route Step Details" screen, click "Set Default".
-
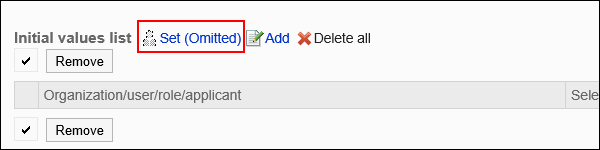
On the screen to set default settings, click Add in the default value list.
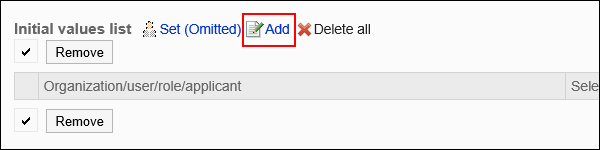
-
On "Add new entry" screen, select the organization, user, or role, and then click Add.
To select a role, switch the view to the Roles tab.
When you switch tabs after clicking Add, the selected departments, users, or roles are cleared before you switch.
-
Confirm your settings and click Add.
When you add roles to the initial value of a route step, users who have the roles that you have set can display only the superior of the applicant when the user requests.
Superior is displayed as a "Primary Department" of the applicant, or a user who belongs to the organization.
If you have configured the superiors for the default value of a route step, the users shown as the superiors in the processor field are determined by the following conditions.
- A user who belongs to the "Primary Department" of the applicant and who has the specified role
- A user who is a member of the organization that is higher in the "Primary Department" of the applicant and who has the specified role
If there are any users who match condition 1, those users are displayed as the superiors in the processor field.
If there are no users who match the condition 1, users meeting condition 2 are displayed as the superiors in the processor field.
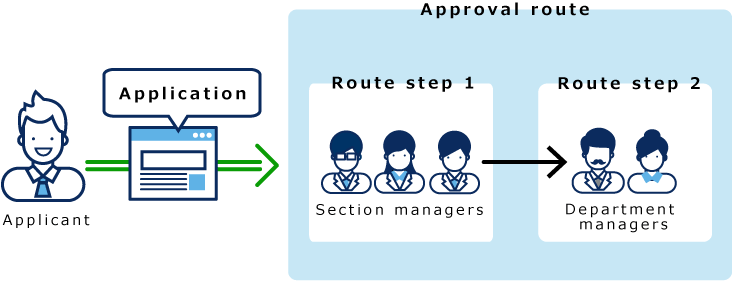
This section describes how to create a request data for a user who is a member of the sales department.
The primary departments of the applicants are the sales department.
The above-said applicant is the director of Sales department and one division manager. The Sales department manager has the role "manager" and the "Manager" section.
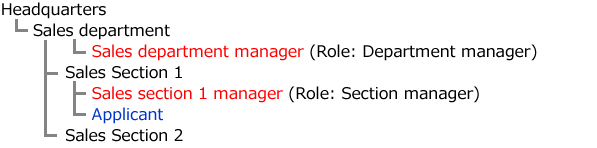
If you have set the role of "manager" as the initial value of step 1 and the "manager" for the initial value of route step 2, when you create the request data, all users belonging to each role will be set as processors.
The applicant must select his or her top length from among the processors.
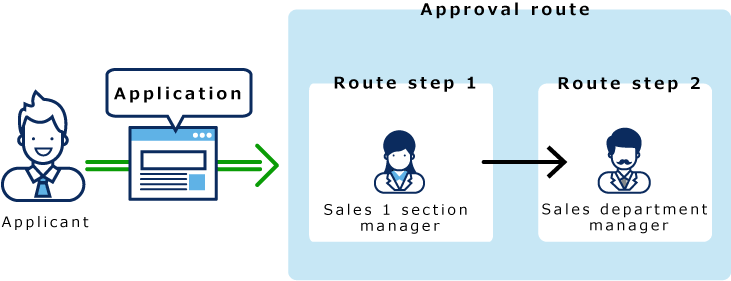
Before superior:
If you set superior in Route Step 1 and Step 2, only your superior is automatically set for the processor of each route step.
After setting superior:
-
Click the Administration menu icon (gear icon) in the header.
-
Click System settings.
-
Select "Application settings" tab.
-
Click Workflow.
-
Click the route list.
-
On the "Route list" screen, select the "Shared routes" tab, and click the route name of the shared route.
-
On the route details screen, click the route step name of the route step in "Approval route" field.
-
On the "Route Step Details" screen, click "Set Default".
-
On the screen to set default settings, click Change in the default value list for the role to set a superior.
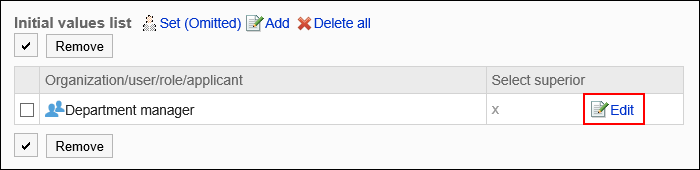
-
On the "Change superior selection" screen, select the "Select the" checkbox.
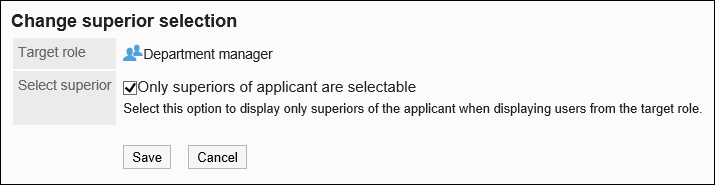
-
Confirm your settings and click Save.
When superior is set, "(Superior)" is displayed after the role name on the "Route details" screen.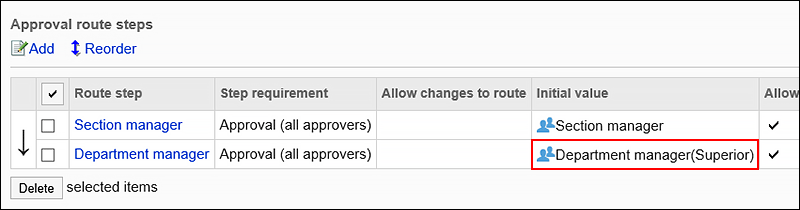
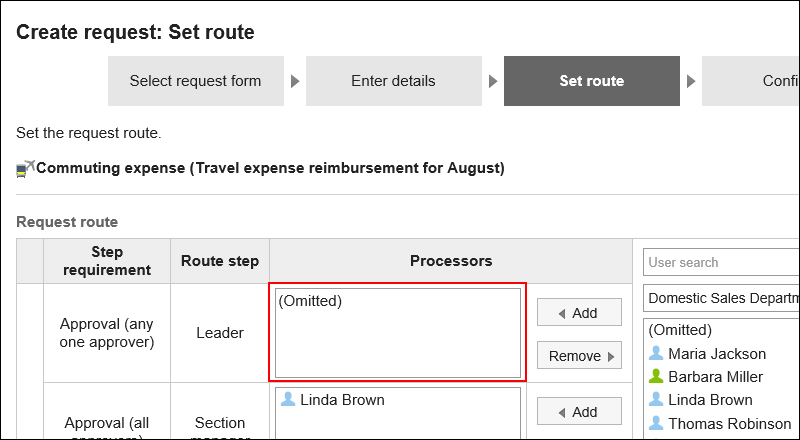
The default value can be set to "(omitted)" For a route step that is expected to have no processors.
A route step with a set of "(omitted)" skips the processing of the request data.
-
Click the Administration menu icon (gear icon) in the header.
-
Click System settings.
-
Select "Application settings" tab.
-
Click Workflow.
-
Click the route list.
-
On the "Route list" screen, select the "Shared routes" tab, and click the route name of the shared route.
-
On the route details screen, click the route step name of the route step in "Approval route" field.
-
On the "Route Step Details" screen, click "Set Default".
-
On the screen to set default settings, click "(Omitted)" to set in the default value list.
-
Click Yes on the "(omitted)" screen.
If you have already set the default value for this route step, delete all default values and delete "(omitted)".
When you create a request data, you can set whether to allow the applicant to change the default value of the route step.
-
Click the Administration menu icon (gear icon) in the header.
-
Click System settings.
-
Select "Application settings" tab.
-
Click Workflow.
-
Click the route list.
-
On the "Route list" screen, select the "Shared routes" tab, and click the route name of the shared route.
-
On the route details screen, click the route step name of the route step in "Approval route" field.
-
On the "Route Step Details" screen, click "Set Default".
-
On the screen to set default settings, click Save in the field to allow defaults to change.
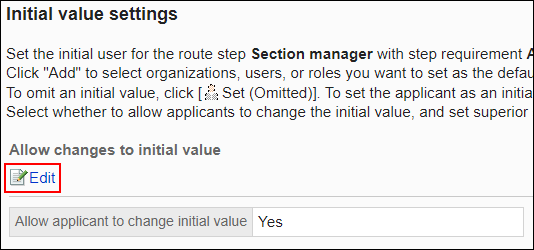
-
On the "Allow Default change" screen, select the "Allow applicant to change default values" checkbox.
Otherwise, clear the checkbox.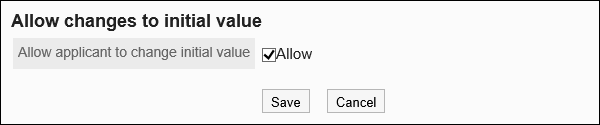
-
Confirm your settings and click Save.
Select the default value that is set for the route step and delete it.
-
Click the Administration menu icon (gear icon) in the header.
-
Click System settings.
-
Select "Application settings" tab.
-
Click Workflow.
-
Click the route list.
-
On the "Route list" screen, select the "Shared routes" tab, and click the route name of the shared route.
-
On the route details screen, click the route step name of the route step in "Approval route" field.
-
On the "Route Step Details" screen, click "Set Default".
-
In the default value list on the screen to set default settings, select the checkbox for departments, users, or roles to delete from the default values, and click "Remove".

-
Click Yes on "Delete multiple initial values" screen.
Delete all default values for the route step.
-
Click the Administration menu icon (gear icon) in the header.
-
Click System settings.
-
Select "Application settings" tab.
-
Click Workflow.
-
Click the route list.
-
On the "Route list" screen, select the "Shared routes" tab, and click the route name of the shared route.
-
On the route details screen, click the route step name of the route step in "Approval route" field.
-
On the "Route Step Details" screen, click "Set Default".
-
On the screen to set default settings, click "Delete all" in the default value list.

-
Click Yes on "Delete all initial values" screen.
Change the settings for the route step in the approval route.
-
Click the Administration menu icon (gear icon) in the header.
-
Click System settings.
-
Select "Application settings" tab.
-
Click Workflow.
-
Click the route list.
-
On the "Route list" screen, select the "Shared routes" tab, and click the route name of the shared route.
-
On the route details screen, click the route step name of the route step to change in "Approval route".
-
On the route step details screen, click Change.
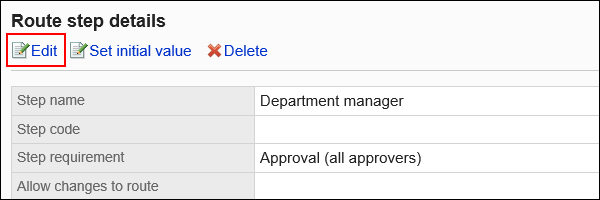
-
On the "Change route step" screen, set the required items.
For details, refer to settings for route steps in the approval route. -
Confirm your settings and click Save.
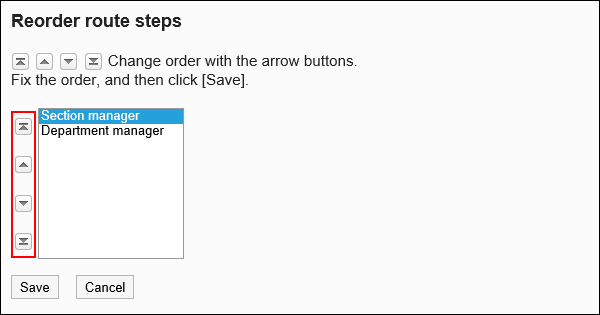
Reorder Route steps in the approval route.
-
Click the Administration menu icon (gear icon) in the header.
-
Click System settings.
-
Select "Application settings" tab.
-
Click Workflow.
-
Click the route list.
-
On the "Route list" screen, select the "Shared routes" tab, and click the route name of the shared route.
-
On the route details screen, click "Reorder" in "Approval route".
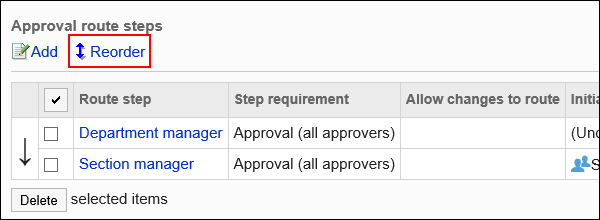
-
On the Reorder Route steps screen, reorder route steps.
-
Confirm your settings and click Save.
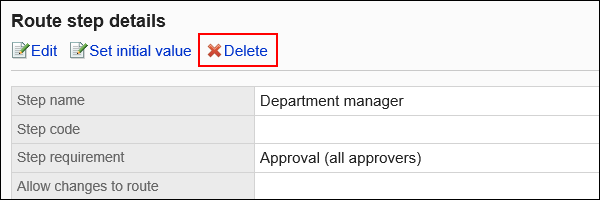
Delete the route step for the approval route.
Delete the route step for the approval route.
-
Click the Administration menu icon (gear icon) in the header.
-
Click System settings.
-
Select "Application settings" tab.
-
Click Workflow.
-
Click the route list.
-
On the "Route list" screen, select the "Shared routes" tab, and click the route name of the shared route.
-
On the route details screen, click the route step name of the route step to delete in "Approval route".
-
On the "Route Step Details" screen, click Delete.
-
Click Yes on the "Delete route steps" screen.
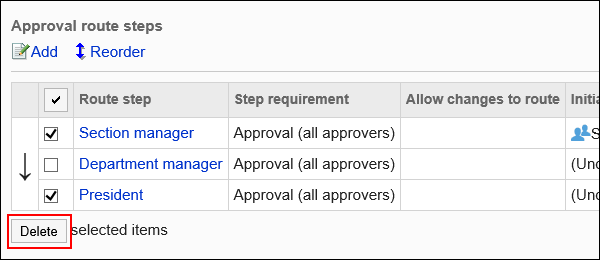
Select the route step for the approval route you want to delete, and delete it in bulk.
-
Click the Administration menu icon (gear icon) in the header.
-
Click System settings.
-
Select "Application settings" tab.
-
Click Workflow.
-
Click the route list.
-
On the "Route list" screen, select the "Shared routes" tab, and click the route name of the shared route.
-
On the route details screen, under "Approval route", select the checkbox for the route step to delete, and then click Delete.
-
Click Yes on the "Delete multiple route steps" screen.