Setting up an E-Mail Server
Garoon has no e-mail server features. If you want to send and receive e-mails, you need an e-mail server for this purpose.
Garoon version 5.0.0 and later support e-mail servers that use the following protocols and authentication methods.
- Supported protocols
- POP3
- POP3 over TLS
- IMAP4
- IMAP4 over TLS
- Supported authentication methods
- APOP
- Advanced authorization (OAuth 2.0) for Gmail and Exchange Online:
Available in Garoon version 5.5.1 or later.
- Supported protocols
- SMTP
- SMTP over TLS
- SMTP STARTTLS
- Supported authentication methods
- POP before SMTP
- SMTP Authentication
- Advanced authorization (OAuth 2.0) for Gmail and Exchange Online:
Available in Garoon version 5.5.1 or later.
Adding Mail Servers
Add a configured e-mail server as an e-mail server for sending and receiving e-mails in Garoon.
You can add multiple e-mail servers.
-
Click the administration menu icon (gear icon) in the header.
-
Click System settings.
-
Select "Application settings" tab.
-
Click E-mail.
-
Click "Mail server settings".
-
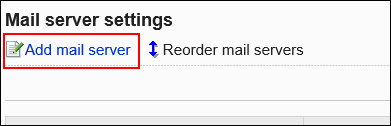
On "Mail server settings" screen, click to "Add mail server".
-
On the screen to add mail servers, enter the e-mail server code.
You must set the mail server code.
It is an unique code for identifying e-mail servers.
Even if more than one server has the same mail server name, they are recognized as individual servers because they have their own mail server codes .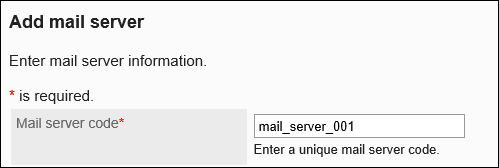
-
Enter a name for an e-mail server.
You must set the mail server name.
The names entered here will be displayed in the dropdown list on the e-mail servers of "Create e-mail account" screen or "Editing E-mail Accounts" screen.
-
Set whether to use OAuth to send/receive e-mails.
You need to configure OAuth to use Gmail/Exchange Online account.
-
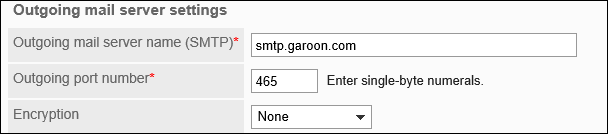
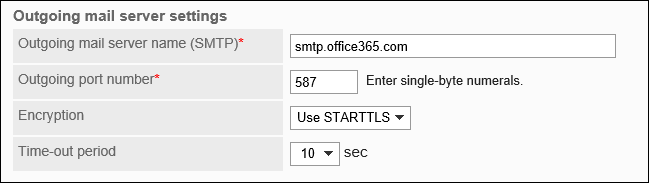
Set up the outgoing mail server information.
 Outgoing E-Mail Server Setting Fields
Outgoing mail server name (SMTP) You must set the outgoing e-mail server name.
Example: smtp.example.com
The protocol used to send e-mail is SMTP.Outgoing port number The outgoing e-mail server port number must be set.
Enter the port number of the outgoing e-mail server with single-byte numbers.Encryption method Set the encrypted communication method for the outgoing mail server.
To encrypt communications with the outgoing mail server, select one of the following depending on your communication method:
- Use TLS
- Use STARTTLS
-
Optionally, set SMTP authentication or POP before SMTP authentication.
You can use one of them as your authentication method. You cannot use both SMTP Authentication and POP before SMTP authentication at the same time.
SMTP Authentication SettingsSet if the outgoing e-mail server supports SMTP authentication.

SMTP authentication method Select the authentication method for SMTP authentication.
From the dropdown list, select from the following authentication methods:- PLAIN
- LOGIN
- CRAMMD5
- DIGEST-MD5
Account names and passwords for sending This appears when you select other than "(Unused)" in "SMTP authentication method" field.
You can select one of the following options:- Set:
The account name and the password set for the user account will be used for authentication. - Do not set:
Incoming e-mail account and its password are used for authentication.
Settings for POP before SMTP AuthenticationSet if the outgoing e-mail server supports POP before SMTP authentication.

SMTP authentication method Select "None". Authenticate before sending e-mail
(POP before SMTP)Set whether to send after receiving.
You can select one of the following options:- If you set it:
If you select to set this option, you also set the the number of seconds to wait before sending.
From the drop-down list, select from 0 second to 10 seconds. - Do not set
-
Set "Time-out period" field.
Select the number of seconds to wait before communication with the outgoing e-mail server times out. You can set the value from 10 seconds to 120 seconds.
-
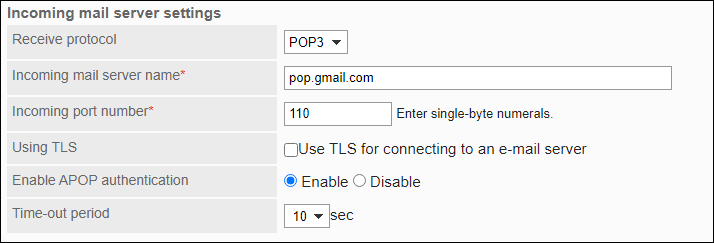
Set the incoming e-mail server information.
 Items of Incoming E-Mail Server Settings
Protocol for incoming e-mails Select one of the following: - POP3
- IMAP4
Incoming mail server You must set the incoming e-mail server name.
Example: pop.example.comIncoming port number You must set the incoming e-mail server port number.
Enter the port number of the incoming e-mail server with single-byte numbers.Using TLS If you use TLS for communication between the incoming mail server and Garoon, select the "Use TLS for connecting to an e-mail server" checkbox. Enable APOP authentication If you use APOP authentication when receiving e-mails, select "Enable". Time-out period Select the number of seconds to wait before communication with the incoming e-mail server times out.
You can set the value from 10 seconds to 120 seconds. -
Confirm your settings and click Add.
Using Gmail/Exchange Online Accounts
This section describes how to use a Gmail or Exchange Online account in Garoon.
You need to configure an OAuth client before adding a server. Add an e-mail server after configuring an OAuth client.
-
Click the administration menu icon (gear icon) in the header.
-
Click System settings.
-
Select "Application settings" tab.
-
Click E-mail.
-
Click "Mail server settings".
-
On "Mail server settings" screen, click to "Add mail server".
-
On the screen to add mail servers, enter the e-mail server code.
You must set the mail server code.
It is an unique code for identifying e-mail servers.
Even if more than one server have the same mail server name, they are recognized as individual servers because they have their own mail server codes.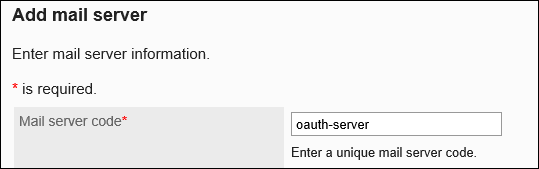
-
Enter a name for an e-mail server.
You must set the mail server name.
The names entered here will be displayed in the dropdown list on the e-mail servers of "Create e-mail account" screen or "Editing E-mail Accounts" screen.
-
In "OAuth settings", select the "Use OAuth for sending/receiving e-mails" checkbox and choose the OAuth client.
 You cannot select the "Use OAuth for sending/receiving e-mails" check box if an OAuth client is not configured.
Refer to "Configuring OAuth Clients" to add an OAuth client.
-
Change the following settings of the outgoing mail server as necessary.
- Time-out Period:
Select the number of seconds to wait before communication with the outgoing e-mail server times out. You can set the value from 10 seconds to 120 seconds.
"Outgoing mail server name", "Outgoing port number", and "Encryption" are set automatically.
 11. Change the following settings of the incoming mail server as necessary.
- Protocol for incoming e-mails:
Select one of the following:- POP3
- IMAP4
- Time-out Period:
Select the number of seconds to wait before communication with the incoming e-mail server times out. You can set the value from 10 seconds to 120 seconds.
The "Incoming mail server name", the "Incoming port number", and the "Using TLS" fields are configured automatically.

- Time-out Period:
-
Confirm your settings and click Add.
Changing E-Mail Servers
Change the information on the e-mail servers.
-
Click the administration menu icon (gear icon) in the header.
-
Click System settings.
-
Select "Application settings" tab.
-
Click E-mail.
-
Click "Mail server settings".
-
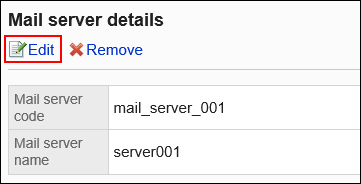
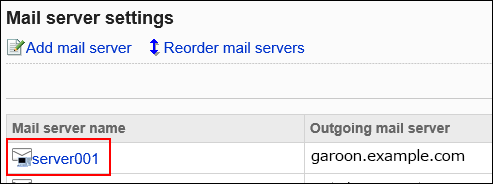
On the e-mail server setting screen, select the e-mail server to change its settings.
-
On the screen to set e-mail server details, click Save.
-
On the screen to change e-mail server settings, change the settings as necessary.
For details on the settings, refer to Adding Mail Servers. -
Confirm your settings and click Save.
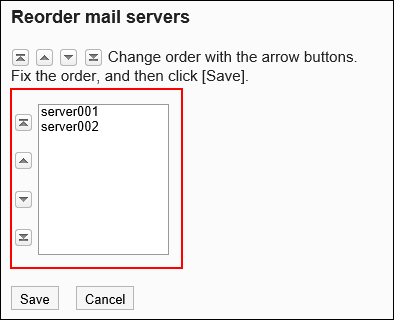
Reordering E-Mail Servers
Change the order of mail servers displayed on the following screens:
- "Mail server setting" screen
- "Create user account" screen
- "Edit user account" screen
-
Click the administration menu icon (gear icon) in the header.
-
Click System settings.
-
Select "Application settings" tab.
-
Click E-mail.
-
Click "Mail server settings".
-
On the e-mail server setting screen, click "Reorder mail servers".
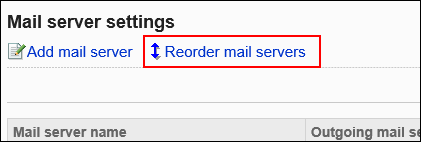
-
On the reordering e-mail servers screen, reorder the mail servers.
-
Confirm your settings and click Save.
Deleting E-Mail Servers
Delete e-mail servers.
Deleting e-mail servers does not delete the information on e-mail servers stored for user accounts.
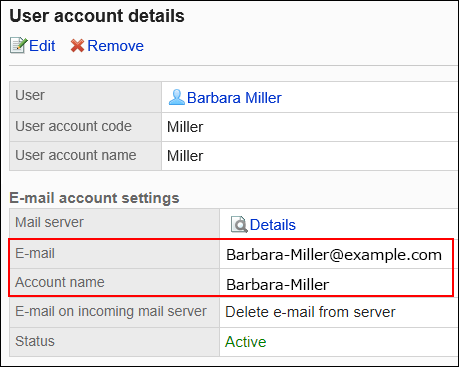
If necessary, change the user account settings.
For details, refer to Changing User Accounts.
Deleting E-Mail Servers One by One
Delete e-mail servers one at a time.
-
Click the administration menu icon (gear icon) in the header.
-
Click System settings.
-
Select "Application settings" tab.
-
Click E-mail.
-
Click "Mail server settings".
-
On the e-mail server setting screen, select the e-mail server to delete.
-
On the screen to set e-mail server details, click Delete.
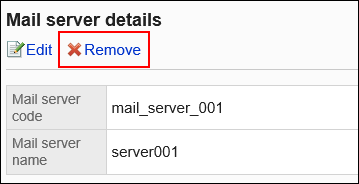
-
Click Yes on the deleting e-mail servers screen.
Deleting All E-Mail Servers
Delete all e-mail servers.
-
Click the administration menu icon (gear icon) in the header.
-
Click System settings.
-
Select "Application settings" tab.
-
Click E-mail.
-
Click "Mail server settings".
-
On the e-mail server setting screen, click to delete all e-mail servers.

-
Click Yes on the deleting all e-mail servers screen.