Adding Blank Portals
This section describes how to add a blank portal with no portlet inside. For details on creating a portal from a template, refer to Adding a Portal from a Template.
-
Click the Administration menu icon (gear icon) in the header.
The gear-shaped icon appears only on the screen for the users with administrative privileges. -
Click Garoon System Administration.
-
Select "Application settings" tab.
-
Click Portal.
-
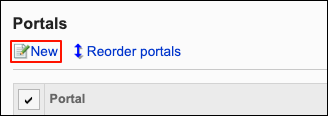
Click Portals.
-
On the screen for a portal list, click New.
-
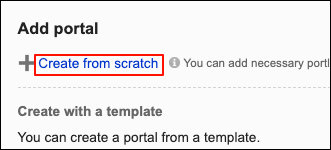
On the "Add portal" screen, click Create from scratch.
-
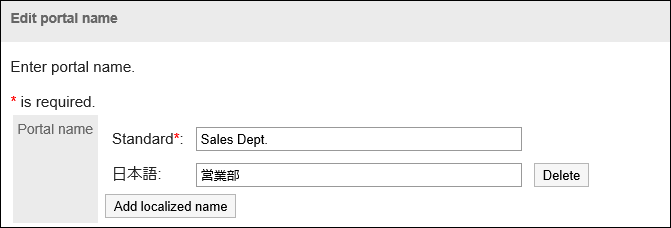
On the "Add blank portal" screen, fill in the "Portal name" field.
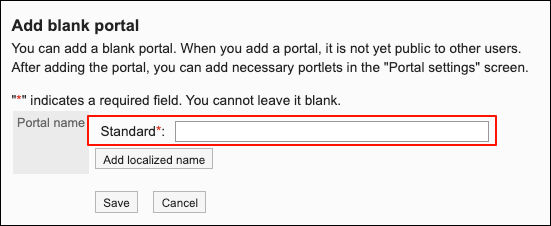 Clicking "Add localized name" allows you to set portal names in multiple languages.
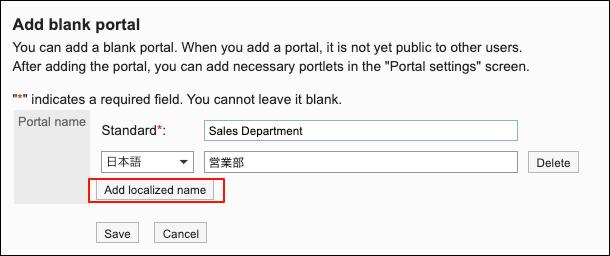
The following languages can be set:
- 日本語
- English
- 中文(简体)
- 中文(繁體)
Displayed in Traditional Chinese.
If you have not configured a portal name in the language selected in the "Time Zone and Language Settings", a default portal name is displayed.
-
Confirm your settings and click Add.
You have now finished creating a portal.
For information on how to place portlets on the portal you created, refer to Deploying Portlets.
Changing Portal Names
Change portal names.
-
Click the Administration menu icon (gear icon) in the header.
The gear-shaped icon appears only on the screen for the users with administrative privileges. -
Click Garoon System Administration.
-
Select "Application settings" tab.
-
Click Portal.
-
Click Portals.
-
On the screen for a portal list, select the portal name for the portal to change its name.
-
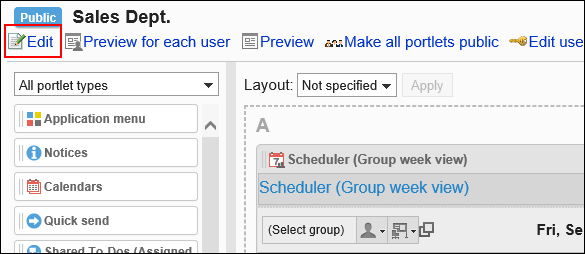
On the "Portal settings" screen, click Edit.
-
On the screen to change portal names, change the portal name.
-
Confirm your settings and click Save.