Managing Files
This section describes how to manage files on the System administration page.
Changing Default File Order
When you select a folder, you can set the default value of the display order of the displayed files.
If a user sorts by title, file name, and so on, the default value does not change if the order of files is changed.
-
Click the administration menu icon (gear icon) in the header.
-
Click System settings.
-
Select "Application settings" tab.
-
Click Cabinet.
-
Click Folder settings.
-
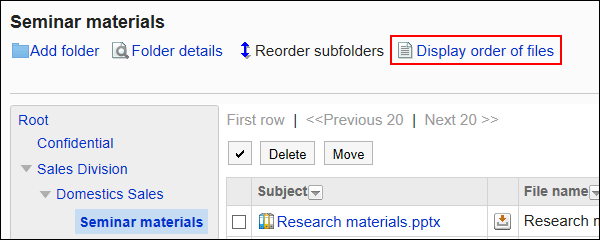
On the "Folder settings" screen, select a folder and click Display order of files.
-
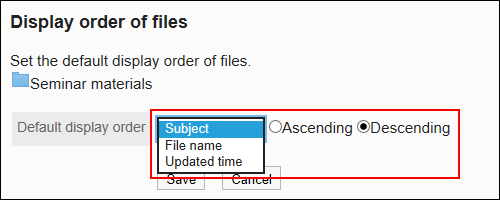
On the "Display order of files" screen, set the "Default display order" field.
Select one of the following default values, and then select "Ascending" or "descending".
- Subject
- File name
- Updated
-
Confirm your settings and click Save.
Moving Files
Move the file to another folder.
When a file is moved to a folder where update notifications are set, an update notification is sent to the notification recipients.
Moving Files One by One
Move one file to another folder.
-
Click the administration menu icon (gear icon) in the header.
-
Click System settings.
-
Select "Application settings" tab.
-
Click Cabinet.
-
Click Folder settings.
-
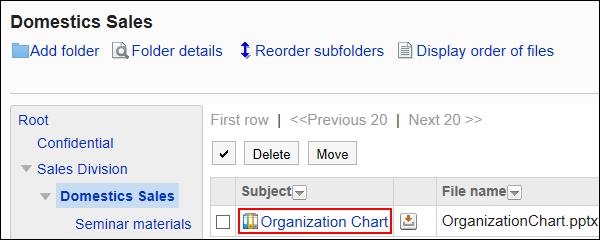
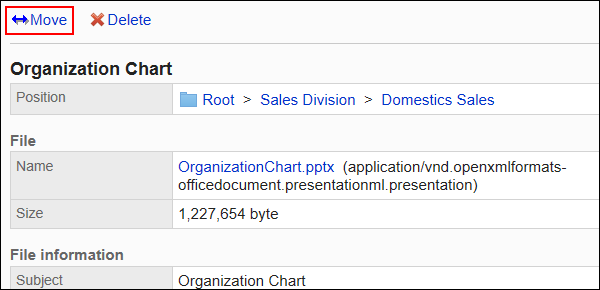
On the "Folder settings" screen, select a folder and click the title of the file you want to move.
-
On the "File Details" screen, click "Move Files".
-
In the "New location" field on the "Move files" screen, select the folder to which you want to move the file.
You can search the destination folder by entering keywords and clicking Search Folder.
Clicking "Up one" moves the folder up one.
Clicking a folder name moves it to the subfolder you clicked. Numbers represent the number of subfolders.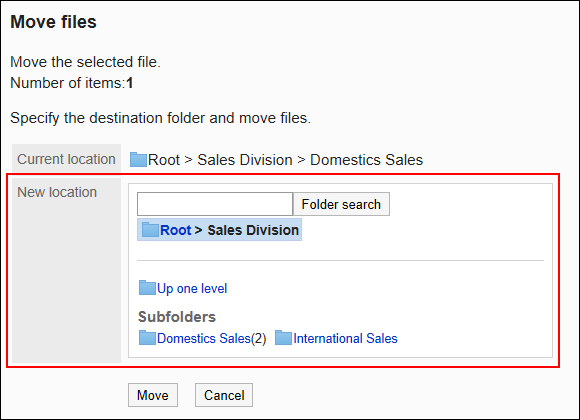
-
Confirm your settings and click "Move".
Moving Multiple Files Together
Move multiple files to another folder.
-
Click the administration menu icon (gear icon) in the header.
-
Click System settings.
-
Select "Application settings" tab.
-
Click Cabinet.
-
Click Folder settings.
-
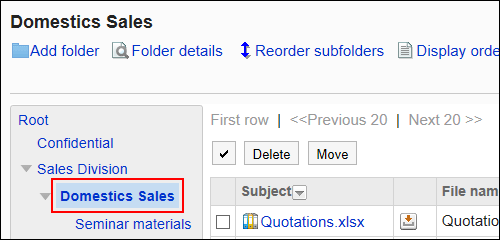
On the "Folder settings" screen, select a folder.
-
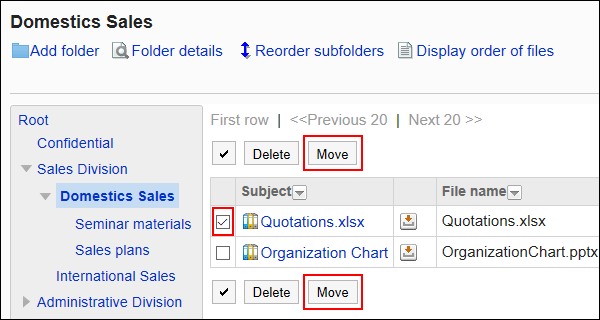
Select the checkboxes of the files you want to move, and click "Move".
-
In the "New location" field on the "Move files" screen, select the folder to which you want to move the files.
You can search the destination folder by entering keywords and clicking Search Folder.
Clicking "Up one" moves the folder up one.
Clicking a folder name moves it to the subfolder you clicked. Numbers represent the number of subfolders.
-
Confirm your settings and click "Move".
Deleting Files
Delete the file.
The deleted files are moved to "Trash". The files in "Trash" will be saved for the specified period.
For details on setting the "Recycle Bin" retention period, refer to General settings for files.
Deleting Files One by One
Delete each file.
-
Click the administration menu icon (gear icon) in the header.
-
Click System settings.
-
Select "Application settings" tab.
-
Click Cabinet.
-
Click Folder settings.
-
On the "Folder settings" screen, select a folder and click the title of the file you want to delete.

-
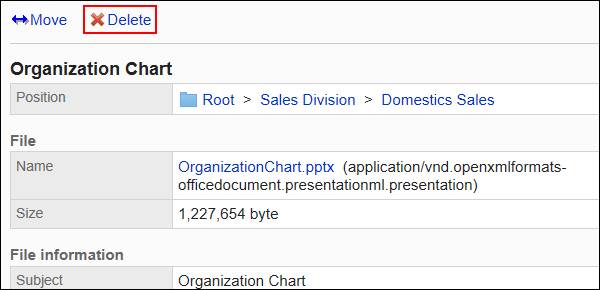
On the "File Details" screen, click Delete.
-
Click Yes on the "Delete files" screen.
Deleting Multiple Files Together
Delete multiple files at once.
-
Click the administration menu icon (gear icon) in the header.
-
Click System settings.
-
Select "Application settings" tab.
-
Click Cabinet.
-
Click Folder settings.
-
On the "Folder settings" screen, select a folder.

-
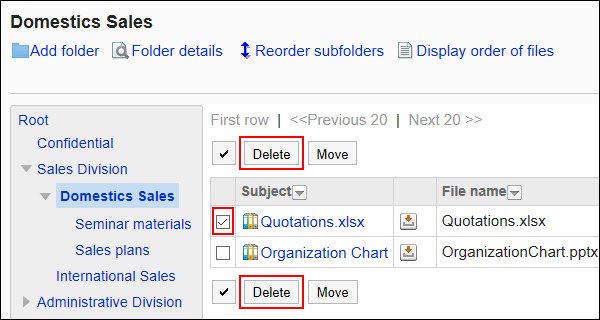
Select the checkbox for the file you want to delete, and then click Delete.
-
Click Yes on the "Delete files" screen.
Restoring Deleted Files
Delete files that have been deleted and moved to trash.
-
Click the administration menu icon (gear icon) in the header.
-
Click System settings.
-
Select "Application settings" tab.
-
Click Cabinet.
-
Click Folder settings.
-
On the "Folder settings" screen, select a folder that has been saved before the file is moved to "Trash".
-
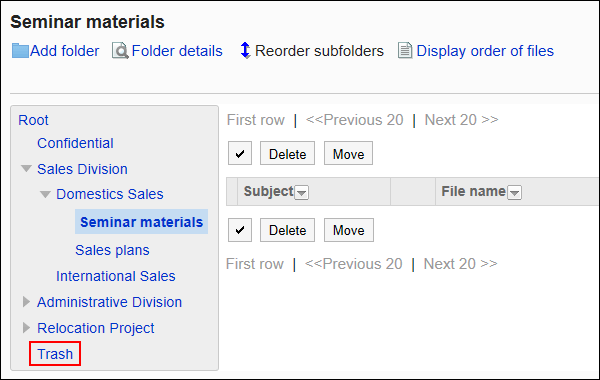
Click Trash.
-
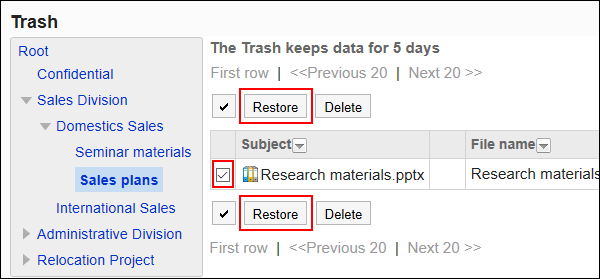
Select the checkbox for the undo file, and then click Undo.
Go to the folder that was saved before the file was deleted.