Setting up Items for Facility Reservation Information
There are two types of facility reservation information:
- Built-in fields
These are provided by default. - Custom items
These can be added by administrators if necessary.
Changing Built-In Item Settings
Change whether or not the built-in items are displayed in the facility list.
-
Click the Administration menu icon (gear icon) in the header.
The gear-shaped icon appears only on the screen for the users with administrative privileges. -
Click Garoon System Administration.
-
Select "Application settings" tab.
-
Click Scheduler.
-
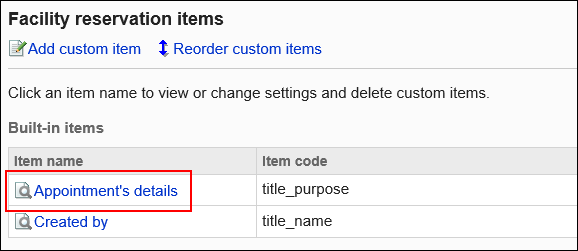
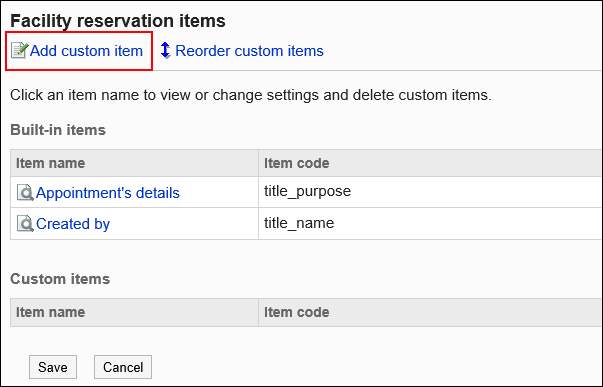
Click Facility reservation items.
-
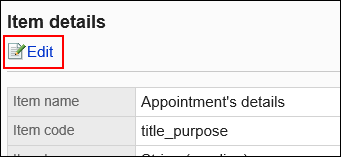
On the screen for facility reservation information, click the item name of the built-in item to change.
-
On the item details screen, click Save.
-
To show facilities on list view, select the checkbox for list view as a default view on the screen to change items.
-
Check the changes and click Save.
Changing Multiple Built-In Item Settings in Bulk
You can also set whether to show the built-in items in the facility list.
-
Click the Administration menu icon (gear icon) in the header.
The gear-shaped icon appears only on the screen for the users with administrative privileges. -
Click Garoon System Administration.
-
Select "Application settings" tab.
-
Click Scheduler.
-
Click Facility reservation items.
-
On the screen for facility reservation information, select the checkbox for list view of built-in items to show in the facility list.

-
Confirm your settings and click Save.
Adding Custom Items
Add custom items to facility reservations.
-
Click the Administration menu icon (gear icon) in the header.
The gear-shaped icon appears only on the screen for the users with administrative privileges. -
Click Garoon System Administration.
-
Select "Application settings" tab.
-
Click Scheduler.
-
Click Facility reservation items.
-
On the screen for facility reservation information, click to add custom items.
-
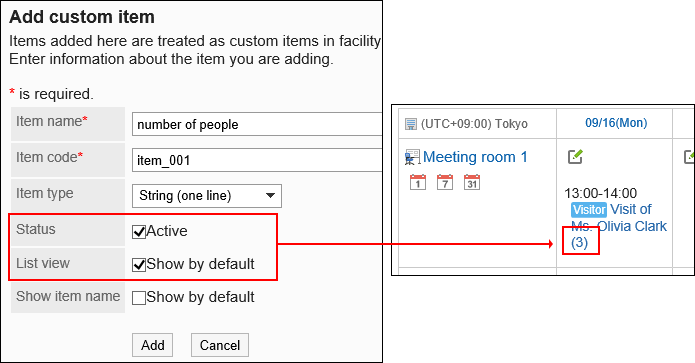
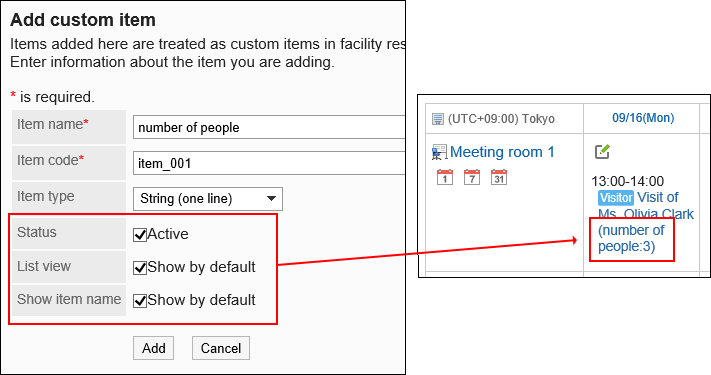
On the screen to add custom items, enter the "Item name" field.
You should set the item names.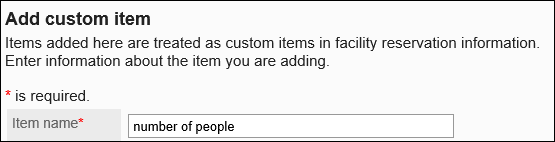
-
Enter "Item Code" field.
You should set item codes.
This is a unique code for identifying an item.
-
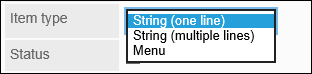
In "Item Type" field, select a type from the dropdown list.
The following types can be selected:
- String (one line)
- String (multiple lines)
- Menu
Enter one menu in one line. You can set one of the menus as the default value.
-
To enable the added custom item immediately, select "Enable" checkbox in the "Status" field.

-
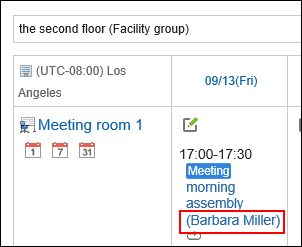
If you display the contents of custom items when you select a facility or a user to view appointments in the list, set it as follows:
- Use field:
Select "Enable" checkbox. - Show as list field:
Select the checkbox to view as a default view.
- Use field:
-
If you display the item names of custom items when you select a facility or a user to view appointments in the list, set it as follows:
- Use field:
Select "Enable" checkbox. - Show as list field:
Select the checkbox to view as a default view. - Item names in list field:
Select the checkbox to view as a default view.
- Use field:
-
Confirm your settings and click Add.
Changing Custom Items
Change custom item settings.
-
Click the Administration menu icon (gear icon) in the header.
The gear-shaped icon appears only on the screen for the users with administrative privileges. -
Click Garoon System Administration.
-
Select "Application settings" tab.
-
Click Scheduler.
-
Click Facility reservation items.
-
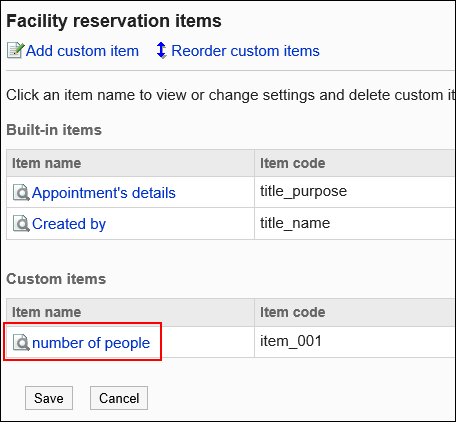
On the screen for facility reservation information, click the item name of the custom item to change.
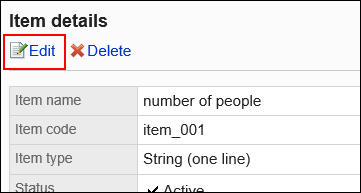
-
On the item details screen, click Save.
-
On the screen to change items, change the settings as necessary.
-
Confirm your settings and click Save.
Changing Multiple Custom Item Settings in Bulk
You can also change the settings for custom items in bulk.
-
Click the Administration menu icon (gear icon) in the header.
The gear-shaped icon appears only on the screen for the users with administrative privileges. -
Click Garoon System Administration.
-
Select "Application settings" tab.
-
Click Scheduler.
-
Click Facility reservation items.
-
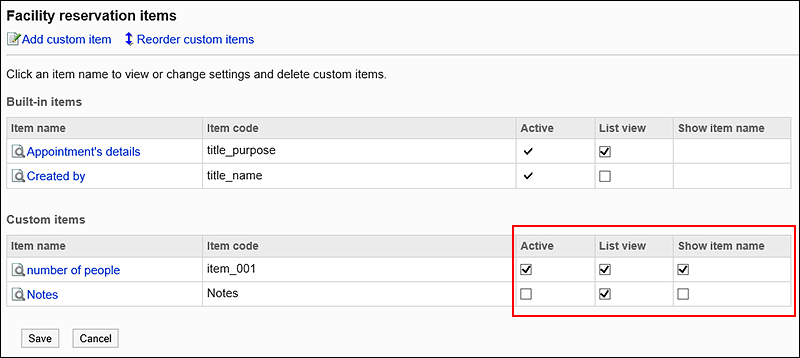
On the screen for facility reservation information, change the settings of items that can be changed in bulk if necessary.
The setting fields that can be changed in bulk are as follows:
- "Enable" field
- "List view" field
- Item names in list field
-
Confirm your settings and click Save.
Reordering Custom Items
Reorder custom items.
-
Click the Administration menu icon (gear icon) in the header.
The gear-shaped icon appears only on the screen for the users with administrative privileges. -
Click Garoon System Administration.
-
Select "Application settings" tab.
-
Click Scheduler.
-
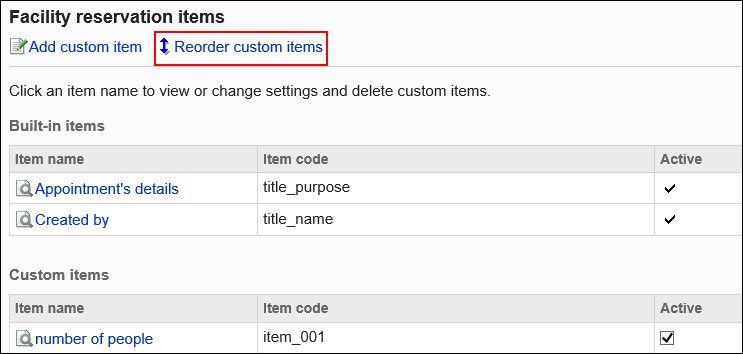
Click Facility reservation items.
-
On the screen for facility reservation information, click to reorder custom items.
-
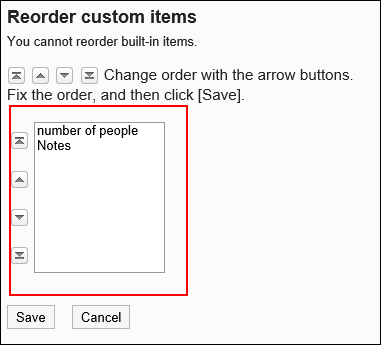
On the screen to reorder custom items, reorder the custom items.
-
Confirm your settings and click Save.
Deleting Custom Items
Delete custom items.
-
Click the Administration menu icon (gear icon) in the header.
The gear-shaped icon appears only on the screen for the users with administrative privileges. -
Click Garoon System Administration.
-
Select "Application settings" tab.
-
Click Scheduler.
-
Click Facility reservation items.
-
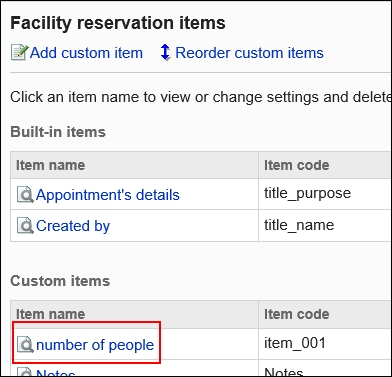
On the screen for facility reservation information, click the item name of the custom item to delete.
-
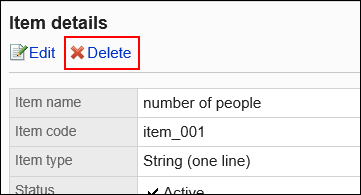
On the item details screen, click Delete.
-
Click Yes on the screen to delete items.