Configuring Application Menu
You can configure the application menu on the user screen.
The default is to display all menus for available applications.

The application menu settings also apply to the menu that appears by clicking the app icon in the header.
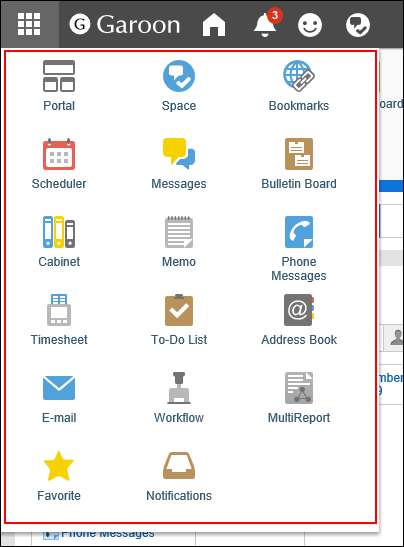
You can change the format of the Application menu.
However, the configuration will not be applied to the menu shown by clicking the app icon
in the header.
-
Click the Administration menu icon (gear icon) in the header.
-
Click System settings.
-
Select "Basic system administration" tab.
-
Click Screen.
-
Click Header and footer settings.
-
By toggling the "Application menu" checkbox in "Header and footer settings" screen, you can control whether to show or hide the application menu.
 If you uncheck the "Show" checkbox, you can hide the application menu.
-
Choose "Application menu type" option whether to display application icons or not.
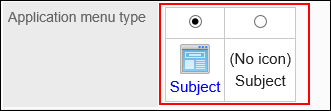 When you configure not to show icons of applications, only the application names are displayed in the Application menu.
-
Confirm your settings and click Save.
You can select whether to allow users to change the application menu.
-
Click the Administration menu icon (gear icon) in the header.
-
Click System settings.
-
Select "Basic system administration" tab.
-
Click Screen.
-
Click Header and footer settings.
-
In the "Personal settings" field on the setting screen for headers and footers, select whether to allow users to change the application menu.
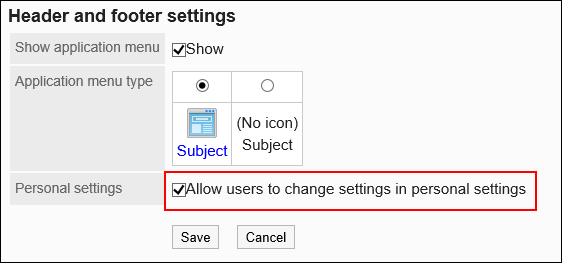 If you select the checkbox to allow users to change settings in personal settings, users can change the appearance of the application menu in the personal settings.
 -
Confirm your settings and click Save.
You can add menus to the Application menu.
You can add Garoon applications and the links to Web sites.

-
Click the Administration menu icon (gear icon) in the header.
-
Click System settings.
-
Select "Basic system administration" tab.
-
Click Screen.
-
Click Application menu list.
-
In the "Application menu list" screen, click Add item.

-
On the screen for adding application menu, select a link method and set the required items.
- For links to applications:
Set up links to Garoon applications.- Subject:
Enter a title.
Clicking Add localized name allows you to set subjects in multiple languages.
If you do not set the subject in the user preference language, the default subject is displayed.
The following languages can be set:- 日本語
- English
- 中文(简体)
- 中文(繁體)
This is displayed in Traditional Chinese.
- Links to applications:
Select the applications you want to link.
The Application menu displays the icon of the selected application. You cannot change the icon.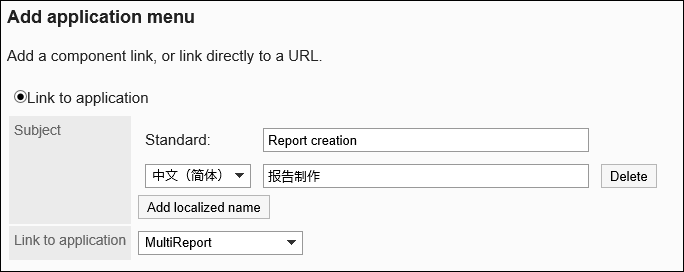
- Subject:
- For links to any URL:
Set up links to systems other than Garoon or Web sites.- Subject:
Enter a title.
Clicking Add localized name allows you to set subjects in multiple languages. - URL:
Enter the URL of the destination, such as a system other than Garoon or a Web site. - Icon URL:
Specify the URL of any image file on the Internet that you want to use for the icon. - Icon file:
Specify a file for the icon.
Specifying any files may affect the operation of Garoon.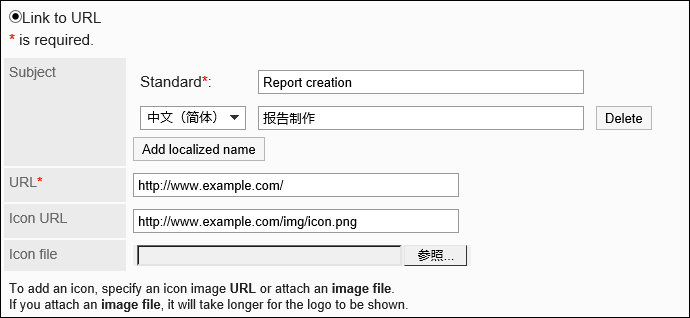
- Subject:
- For links to applications:
-
Confirm your settings and click Add.
You can change the Application menu.
-
Click the Administration menu icon (gear icon) in the header.
-
Click System settings.
-
Select "Basic system administration" tab.
-
Click Screen.
-
Click Application menu list.
-
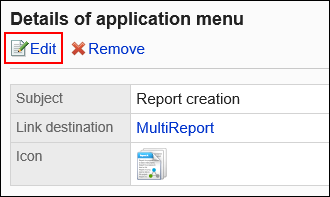
In the list of Application menu, click the item to change.
-
On the detail screen of the Application menu, click Edit.
-
On the edit screen for Application menu, you can optionally change the title, URL, and so on.
-
Confirm your settings and click Save.
You can reorder the menus in the Application menu.
-
Click the Administration menu icon (gear icon) in the header.
-
Click System settings.
-
Select "Basic system administration" tab.
-
Click Screen.
-
Click Application menu list.
-
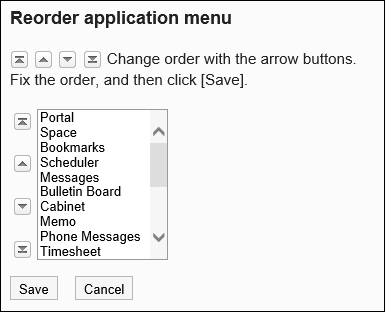
On the "Application menu list" screen, click Reorder items.

-
On the Reorder Application Menus screen, reorder the menus.
-
Confirm your settings and click Save.
You can delete application menus.
Deleting application menus does not delete data in the menus.
You can delete the Application menus one by one.
-
Click the Administration menu icon (gear icon) in the header.
-
Click System settings.
-
Select "Basic system administration" tab.
-
Click Screen.
-
Click Application menu list.
-
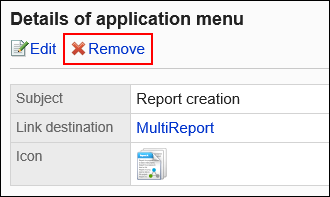
On the Application Menu List screen, select the application menu you want to delete.
-
On the Application Menu Details screen, click Delete.
-
Click Yes on the Application Menu Delete screen.
You can delete multiple application menus together.
-
Click the Administration menu icon (gear icon) in the header.
-
Click System settings.
-
Select "Basic system administration" tab.
-
Click Screen.
-
Click Application menu list.
-
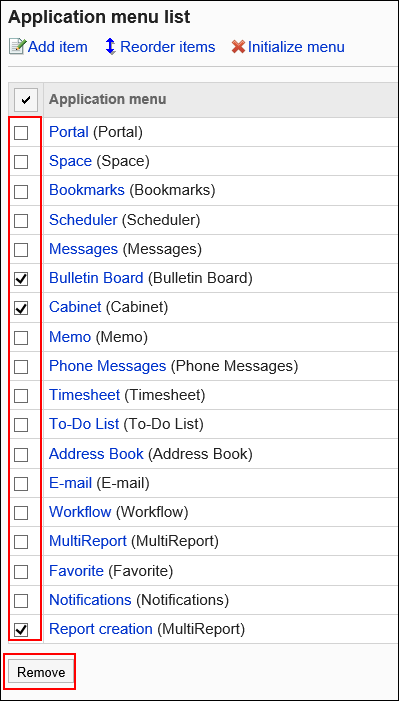
On the Application Menu List screen, select the checkbox of the application menu you want to delete, and then click Delete.
-
Click Yes on the screen for deleting multiple application menus together.
When you initialize the application menu, the type of the menu, the name, the order of the display, and so on are restored.
-
Click the Administration menu icon (gear icon) in the header.
-
Click System settings.
-
Select "Basic system administration" tab.
-
Click Screen.
-
Click Application menu list.
-
On the "Application menu list" screen, click Initialize menu.

-
Click Yes on the Initialize Application Menu screen.