General settings of Screen
On the "General settings" for screens, you can set settings related to user actions screens, such as setting up mobile view and thumbnail view, setting the number of items to be displayed in the list, and width of input fields.
Common Settings
This section describes "Common settings" in "General settings" screen.
Users cannot change the configurations in "Common settings".
Allowing Mobile View
Select whether to allow users to use the mobile view (smartphone view).
The smartphone view supports iOS and Android OS.

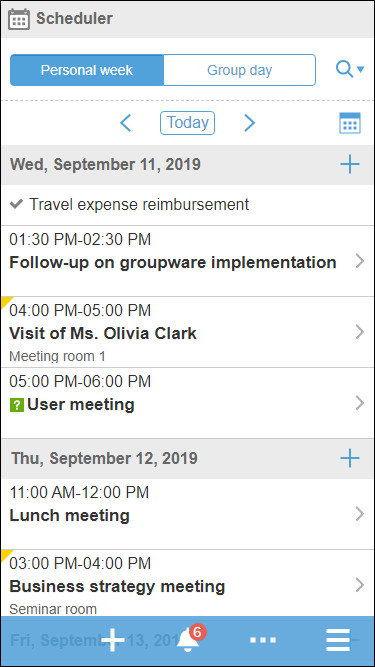
If you allow users to use the mobile view, the following applications can be manipulated on screens suitable for smartphones.
- Space
- Scheduler
- Messages
- Bulletin Board
- Workflow
- MultiReport
- Notifications
-
Click the administration menu icon (gear icon) in the header.
-
Click System settings.
-
Select "Basic system administration" tab.
-
Click Screen.
-
Click General settings.
-
In the "Common settings" field on the "General Settings" screen, select the checkbox to allow mobile view.
-
Confirm your settings and click Save.
Allowing to Show Profile Pictures
Allow users to select whether to show their profile pictures.
If allowed, users can select whether to show their profile pictures in comments and User list.
If not allowed, default user icons are always used.

The image set as a user profile will appear as a user icon in the following screens.
- Comments for the following applications
- Space
- Discussions
- Shared To-Dos
- Scheduler
- Messages
- Bulletin Board
- MultiReport
- Space
- Scheduler
- Group week
- Group day
- Group week view portlet
- Group day view portlet
- User/facility search results
- Address Book
- Users
- Search results in the user list
- User list
- Phone Messages
-
Click the administration menu icon (gear icon) in the header.
-
Click System settings.
-
Select "Basic system administration" tab.
-
Click Screen.
-
Click General settings.
-
In the "Common settings" field on the "General Settings" screen, select the checkbox to allow showing profile images.
-
Confirm your settings and click Save.
Allowing to Show Thumbnail Images
Thumbnail images are applied when both of the following conditions are met.
- The "Enable" checkbox is selected in the item for thumbnail image in general settings.
- The "Show image with body text" checkbox is selected in "Image file (gif, jpeg, etc.)" in the general settings.
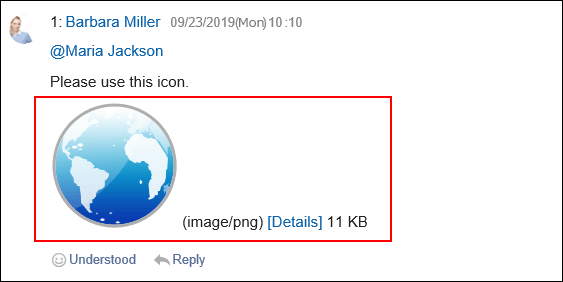
When the thumbnail image is applied, the attached images in the following applications are displayed in a smaller size.
- Scheduler
- Messages
- Bulletin Board
- MultiReport:
Available in Garoon version 5.15.0 or later. - Space:
Images attached in Space are always displayed in reduced size, regardless of the thumbnail image settings.
-
Click the administration menu icon (gear icon) in the header.
-
Click System settings.
-
Select "Basic system administration" tab.
-
Click Screen.
-
Click General settings.
-
In the "Common settings" field on the "General Settings" screen, select the checkbox to allow thumbnail images.
-
Select the "Show image with body text" in "Image file (gif, jpeg, etc.)" in the default value in personal settings.
-
Confirm your settings and click Save.
Default Values for Personal Settings
This section describes the default values for personal settings on the "General Settings" page.
In default values in personal settings, you can set the default value of each item on the "General settings" screen of the personal settings screen.
Users can optionally configure the default values that are set by the system administrator in the fields for default values of personal settings. The number of displays and the width of the input field in the personal settings are also applied to the system administration screen.
The default value will be applied to users who have been added after the change is made. The changes are not applied to existing users.
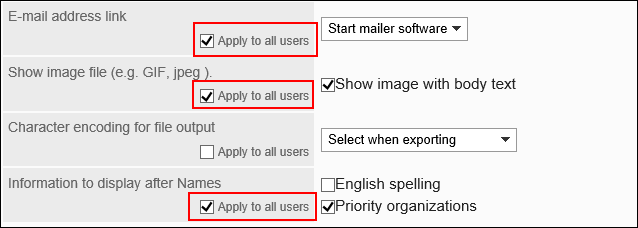
However, if you configure values by selecting "Apply to all users" checkbox, you can apply those default values to all users (including existing users) in bulk.
Default values which are configured with selecting "Apply to all users" checkbox are applied when users logout and login again.

-
Click the administration menu icon (gear icon) in the header.
-
Click System settings.
-
Select "Basic system administration" tab.
-
Click Screen.
-
Click General settings.
-
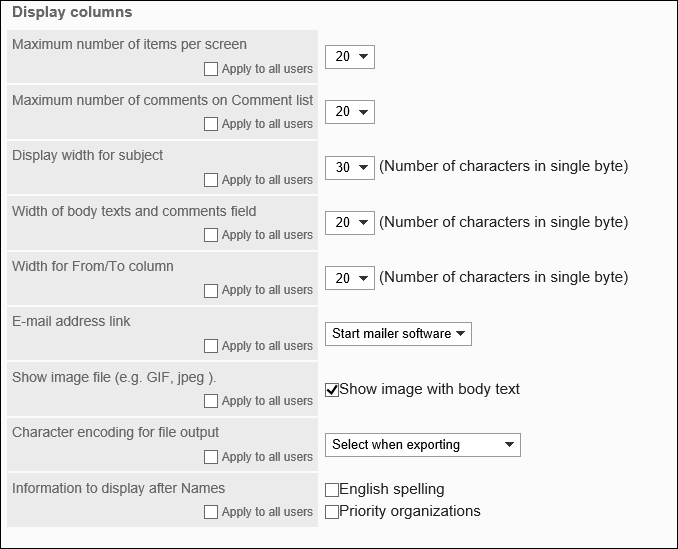
Configure the Display columns.
Example of configuring a display field on the Bulletin Board screen a): Number of items to be displayed on the list screenb): Width to display subjectsc): Width to display excerpts from body text and commentsd): Width to display from/to recipients
- Number of items to be displayed on the list screen:
From the dropdown list, select how many items are displayed on the list screen such as messages and bulletin board. - Maximum number of comments on Comment list:
From the dropdown list, select how many items are displayed on the details screen of messages and bulletin board. - Display width for titles:
Select the width to display the subject from the dropdown. The width is the number of characters in single-byte.
This setting is not applicable for the "Notifications" portlet which uses "Multi-line layout". - Width of body texts and comments field:
Select the width to display the body text and comments from the dropdown. The width is the number of characters in single-byte.
This setting is not applicable for the "Notifications" portlet which uses "Multi-line layout". - Width for From/To column:
Select the width to display the from/to recipients from the dropdown. The width is the number of characters in single-byte. - E-mail address link:
Select the application or screen you want to start when you click the link of an e-mail address that is included in the body and comment.- Start the e-mail program in the Web browser (mailto: link):
The e-mail program associated with the settings of the Web browser starts. - Start the E-mail:
The "Compose E-mail" screen of Garoon is displayed. - Display any Web mail screen:
From the preconfigured Web mail, select the target application.
You can add target applications in the item for setting Web mails. For details, see Configuring Web Mails.
- Start the e-mail program in the Web browser (mailto: link):
- Image files (gif, jpeg, etc.):
 If you select the "Show image with body text" checkbox, the image files attached to messages and topics are displayed with the body text and comments.If you want to allow to show thumbnail images, make sure to select the "Show image with body text" checkbox.
You can display image files in the following formats.- gif
- jpeg
- pjpeg
- png
- Character encoding for file output:
Select a character encoding to use for exporting messages, bulletin board, notes, or e-mails to a text file from the dropdown list.
The following items can be selected:- Select on exporting
When you export a file, you can select a character encoding. - Unicode (UTF-8)
- Japanese (Shift-JIS)
- ASCII
- English (Latin1)
- Simplified Chinese (GBK/GB2312)
- Thai (TIS-620)
- Select on exporting
- Information to display after user name:
After the user name, select whether to display the name in other languages and priority organization.
If no information has been configured, only the user name that has been set to "Standard" in name of the user information is displayed.- English Name:
Configure to display the English name after the name of the user.
"English Name" is the name specified in the English spelling field in the Name section on the User details screen.
- Primary Department:
Configure to display the priority organization name after the name of the user.
- English Name:

- Number of items to be displayed on the list screen:
-
Configure the Entry field.
The following items can be configured for the input field.
- Width of input field for body:
From the dropdown list, select the width of entry field for body text of messages and bulletin board. The width is the number of characters in single-byte.
This setting is not applied to the width of the body of the "E-mail" screen.
In Garoon version 5.5.0 or later, they are not applied to contents in HTML portlets or PHP portlets. - Height of input field for body:
From the dropdown list, select the height of input field for body text of messages and bulletin board. The height is the number of lines.
This setting is not applied to the width of the body of the "E-mail" screen.

- Width of input field for body:
-
If you want to apply settings to all users in bulk, select "Apply to all users" checkbox.

-
Confirm your settings and click Save.
If you have selected the "Apply to all users" checkbox, confirm the settings in the Apply All Settings screen, and then click Yes.