General Settings for Localization
On the general settings screen for localization, set the locale for printing, and the language and time zone that you want to apply to e-mail notifications and phone memos.
Setting Available Languages
You can set languages that users can select.
-
Click the Administration menu icon (gear icon) in the header.
-
Click System settings.
-
Select "Basic system administration" tab.
-
Click Localization.
-
Click General settings.
-
In the "Available languages" field on the "General Settings" screen, select a language.
The following languages can be selected:
- 日本語
- English
- 中文(简体)
- 中文(繁體)
Displayed in Traditional Chinese.
-
Confirm your settings and click Save.
Setting Frequently Used Time Zones
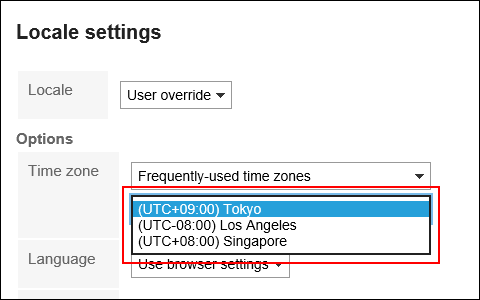
You can add time zones as frequently used time zones. This setting is reflected in the drop-down list to select time zones.

-
Click the Administration menu icon (gear icon) in the header.
-
Click System settings.
-
Select "Basic system administration" tab.
-
Click Localization.
-
Click General settings.
-
On the "General Settings" screen, select a time zone from the "Frequently used time zones" field.
On the Time Zone page, confirm the time zones that you can set. -
Confirm your settings and click Save.
Setting Locales for Printing
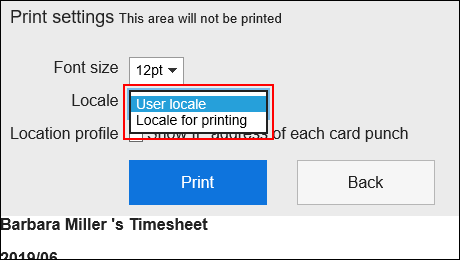
Set the language and date/time format for printing timesheets and schedules.
It is useful to set the locale that is easy to view when printed, according to the intended internal use.
When users print the data, they can select the locale that is set by their system administrators or the locale that they set.

-
Click the Administration menu icon (gear icon) in the header.
-
Click System settings.
-
Select "Basic system administration" tab.
-
Click Localization.
-
Click General settings.
-
In the "Locale for printing" field on the "General Settings" screen, select a language and a format.
The setting fields are as follows:
- language
- Long Date Format
- Short Date Format
- Time Format
-
Confirm your settings and click Save.
Allowing Users to Change Locales and Offices in Their Personal Settings
Select whether to allow users to change the locale and office in their personal settings.
-
Click the Administration menu icon (gear icon) in the header.
-
Click System settings.
-
Select "Basic system administration" tab.
-
Click Localization.
-
Click General settings.
-
In the "Personal settings" field on the "General Settings" screen, select the check boxes of the items you want to allow users to change.
The following items can be selected:
- Allow locale changes
- Allow office changes
-
Confirm your settings and click Save.
Using the English Spelling Field for User Profile
Select whether to use the English spelling field for user name.
-
Click the Administration menu icon (gear icon) in the header.
-
Click System settings.
-
Select "Basic system administration" tab.
-
Click Localization.
-
Click General settings.
-
In the user profile field on the "General settings" screen, select the check box to use the English spelling filed.
-
Confirm your settings and click Save.
Setting Default Locale
You can set default values for display language and time zone.
-
Click the Administration menu icon (gear icon) in the header.
-
Click System settings.
-
Select "Basic system administration" tab.
-
Click Localization.
-
Click General settings.
-
In the "Default locale" field on the "General Settings" screen, select a language and a time zone.
-
Confirm your settings and click Save.