Locale Settings
Locales are settings or information that are configured for each geography and language.
You can set the following items for each locale, if the date and time are displayed differently depending on the region and language in which you want to use Garoon.
- language
- Long Date Format
- Short Date Format
- Time Format

b): Short date format
c): Long date format
Adding Locales
You can add locales.
-
Click the Administration menu icon (gear icon) in the header.
-
Click System settings.
-
Select "Basic system administration" tab.
-
Click "Localization".
-
Click "Locale Settings".
-
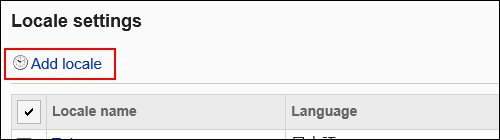
On the "Locale Settings" screen, click "Add a Locale".
-
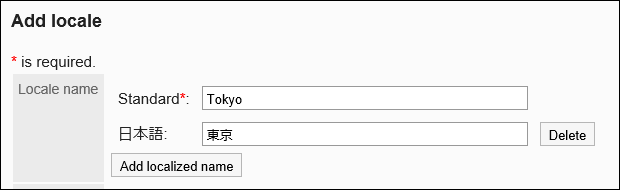
On the screen to add locales, enter the "Locale name" field.
You should set the default locale name.
Clicking "Add localized name allows you to set locale names in multiple languages.
If you do not set the locale name in the user preference language, the default locale name is displayed.
The following languages can be set:- 日本語
- English
- 中文(简体)
- 中文(繁體)
Displayed in Traditional Chinese.
-
Enter the "Locale Code" field.
You should set this locale code.
This is a unique code for identifying a locale.
-
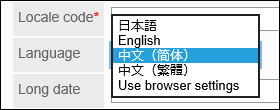
In the "Language" field, set the language that is displayed on the screen.
The following languages can be set:
- 日本語
- English
- 中文(简体)
- 中文(繁體)
Displayed in Traditional Chinese. - Prioritize browser settings
-
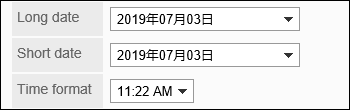
Set the display format to be applied to dates and times, such as date of creation or date of update.
The setting fields are as follows:
- Long Date Format
- Short Date Format
- Time Format
-
Confirm your settings and click Save.
Changing Locale Settings
You can change locale settings.
The changes are reflected in the personal settings of users. However, they are not applied to user-customized locales.
-
Click the Administration menu icon (gear icon) in the header.
-
Click System settings.
-
Select "Basic system administration" tab.
-
Click "Localization".
-
Click "Locale Settings".
-
On the "Locale Settings" screen, click the locale name of the locale you want to change.
-
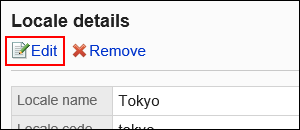
On the locale details screen, click "Edit".
-
On the screen to change locales, change the settings as necessary.
-
Confirm your settings and click Save.
Deleting Locales
You can select locales and delete them.
If a user deletes an office, the user's office settings are inherited as "user-specific settings".
Deleting Locales One by One
You can delete locales one by one.
-
Click the Administration menu icon (gear icon) in the header.
-
Click System settings.
-
Select "Basic system administration" tab.
-
Click "Localization".
-
Click "Locale Settings".
-
On the "Locale Settings" screen, click the locale name of the locale you want to delete.
-
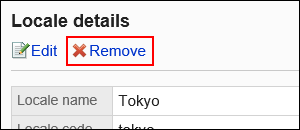
On the locale details screen, click Delete.
-
Click Yes on the screen to delete locales.
Deleting Multiple Locales in Bulk
You can select locales you want to delete, and delete them all together.
-
Click the Administration menu icon (gear icon) in the header.
-
Click System settings.
-
Select "Basic system administration" tab.
-
Click "Localization".
-
Click "Locale Settings".
-
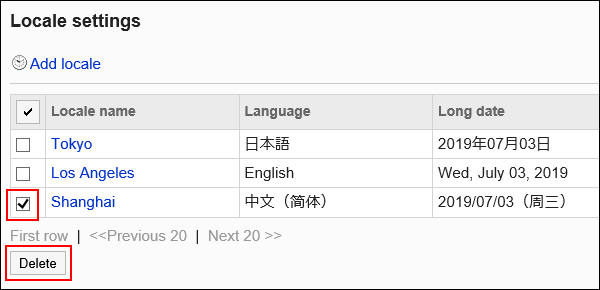
On the "Locale Settings" screen, select the check boxes of the locales you want to delete, and then click Delete.
-
Click Yes on the screen to delete locales in bulk.