Configuring Portlets
Change portlet configurations.
Changing Portlet Display Names
Change the display name of portlets placed in portals.
However, the following portlets cannot change their names.
- Application Menu portlet
- Notices portlet
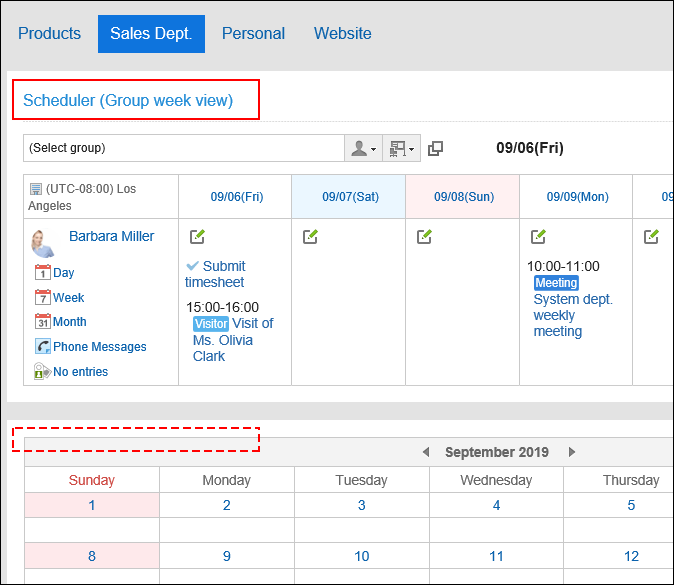
- Calendars portlet
- Quick Send portlet
- HTML portlet portlet
On the user screen, only the display name appears on the portlets. The portlets that you cannot change their display names have no names on them.
If the display name is not changed, the portlet name appears as the display name.
-
Click the Administration menu icon (gear icon) in the header.
-
Click System settings.
-
Select "Application settings" tab.
-
Click Portal.
-
Click Portals.
-
On the "Portals" screen, select a portal.
-
On the screen for portal details, click to change the portlet name on the gear icon
 for the portlet.
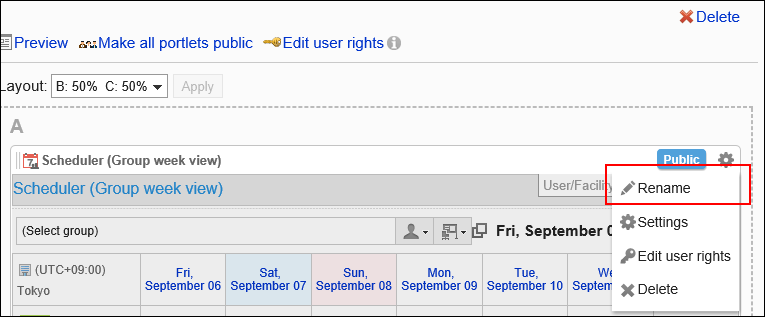
-
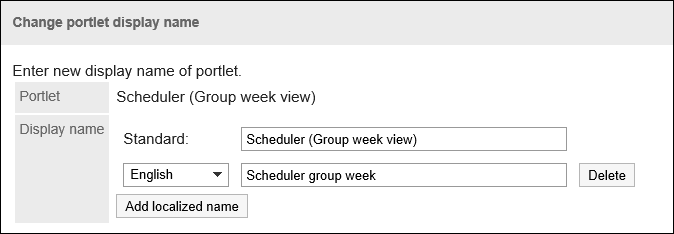
On "Change portlet display name" screen, enter "Display Name" field.
Clicking Add localized name allows you to set display names in multiple languages.
If you do not set the display name in the user preference language, the default display name is displayed.
The following languages can be set:- 日本語
- English
- 中文(简体)
- 中文(繁體)
Displayed in Traditional Chinese.
You can set only the category name or the folder name to the display name for the following portlets:
- "Bulletin Board" portlet
- "Cabinet" portlet
- "E-mail" portlet
- "Workflow" portlet
- "MultiReport" portlet
- "Messages" portlet
- "Bookmarks" portlet
-
Confirm your settings and click Save.
Changing Portlet Settings
Change portlet configurations.
-
Click the administration menu icon (gear icon) in the header.
-
Click System settings.
-
Select "Application settings" tab.
-
Click Portal.
-
Click Portals.
-
On the "Portals" screen, select a portal.
-
On the screen for portal details, click to set for the gear icon
for the portlet to change its settings.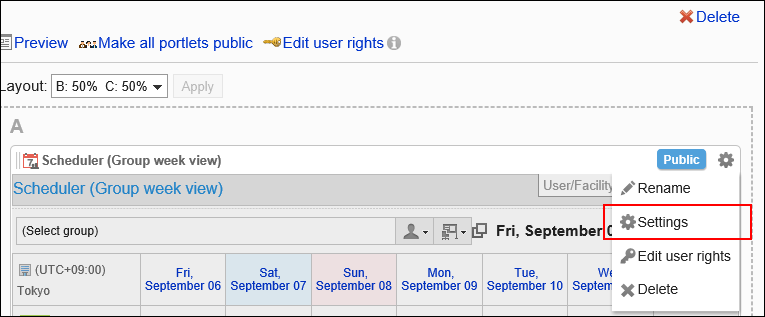
-
On the screen to set portlets, you can change the settings as necessary.
The items that can be set differ depending on the portlet type.
For details, refer to Portlet Types and Settings. -
Confirm your settings and click Save.