Setting Up Access Permissions for Portals
For portals, set the following permissions for departments, users, or roles:
- Access permissions
The permissions for portals vary by the security model applied to the portal.
The default setting is set to "REVOKE (All users have access except users on list)". Therefore, all users are allowed to view portals.
For information on permissions, refer to User Rights and Prioritized Access Permissions.
Setting User Rights
The example shows how to set access permissions when the security model is "GRANT (Only users on list have access)".
-
Click the administration menu icon (gear icon) in the header.
-
Click System settings.
-
Select "Application settings" tab.
-
Click Portal.
-
Click Portals.
-
On the "Portals" screen, select a portal.
-
On the "Portal details" screen, click Edit user rights.

-
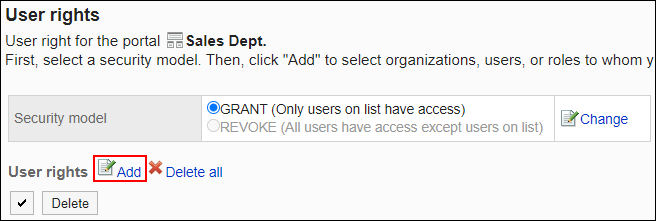
On "User rights" screen, check that the security model is "GRANT (Only users on list have access)".
 If the security model is set as "REVOKE (All users have access except users on list)", click Change to change the setting to "GRANT (Only users on list have access)". For details, refer to Changing the Security Model.
 -
On "User rights" screen, click Add.
-
On "Add new entry" screen, select the department, user, or role to set permissions, and click Add.
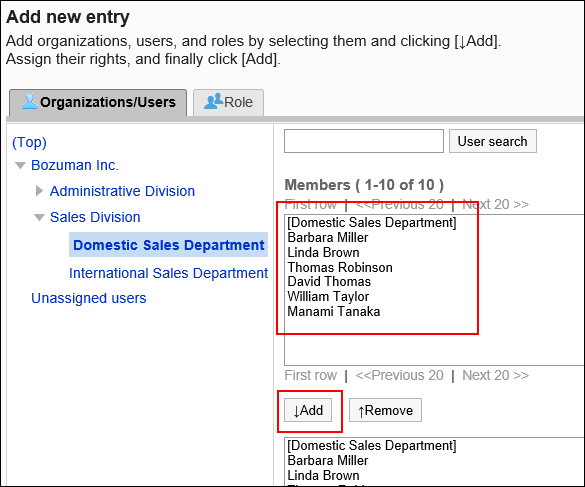 To select a role, switch the view to the Roles tab.
After you click Add then click the tab, the selected departments, users, or roles before you switch tabs are cleared. -
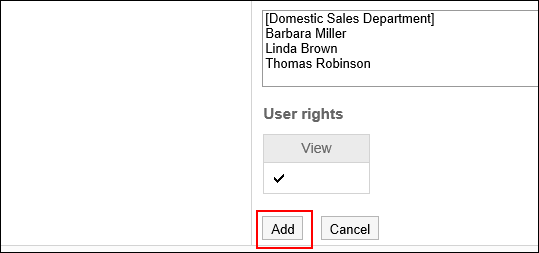
Under "User rights", check the permissions to allow, and then click Add.
Deleting User Rights
Delete user rights granted to users or departments.
If you delete user rights, actions that users can perform changes as follows depending on the security model:
- If the security model is "GRANT (Only users on list have access)":
Users who were deleted the user rights or users who belonged to the departments or roles that lost user rights no longer be able to work with items they previously could. - If the security model is "REVOKE (All users have access except users on list)":
Users who were deleted the user rights or users who belonged to the departments or roles that lost user rights can now work with items they prohibited to use.
Selecting and Deleting User Rights
Select and delete user rights.
-
Click the administration menu icon (gear icon) in the header.
-
Click System settings.
-
Select "Application settings" tab.
-
Click Portal.
-
Click Portals.
-
On the "Portal details" screen, click Edit user rights.
-
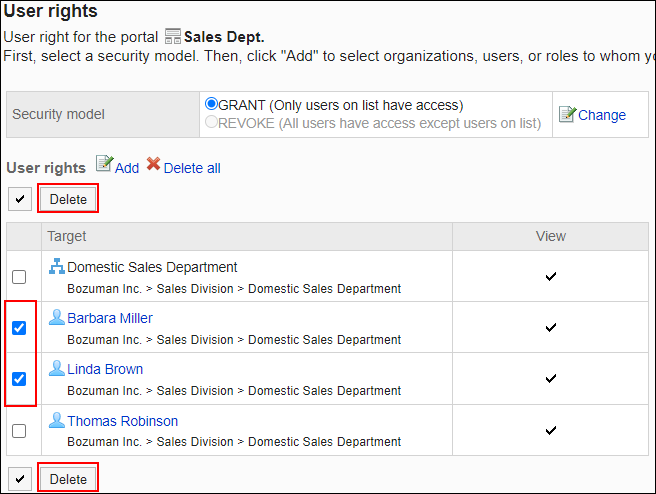
On "User rights" screen, select the checkbox to delete, and then click Delete.
-
Click Yes on "Delete user rights" screen.
Deleting All User Rights
Delete all user rights.
-
Click the administration menu icon (gear icon) in the header.
-
Click System settings.
-
Select "Application settings" tab.
-
Click Portal.
-
Click Portals.
-
On the "Portals" screen, select a portal.
-
On the "Portal details" screen, click Edit user rights.
-
On "User rights" screen, click "Delete all".

-
Click Yes on "Delete all user rights" screen.