Setting Up Shared Links
Describes how to set a shared link or a separator line for a shared category.
Adding Shared Links
Adds a shared link to the shared category.
-
Click the administration menu icon (gear icon) in the header.
-
Click System settings.
-
Select "Application settings" tab.
-
Click Bookmarks.
-
Click Shared bookmarks.
-
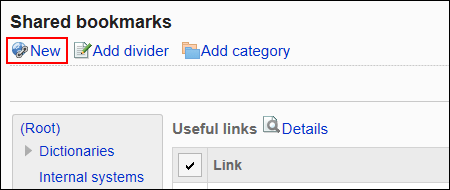
On the "Shared Links" screen, select a shared category and click "Add Shared Links".
-
On the "Add shared Links" screen, enter a title.
This is a required field.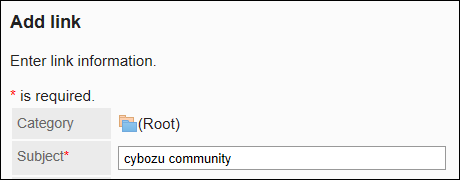
-
In the "URL" field, enter a URL.
The URL is mandatory.
The following characters can be used for the destination URL- a to z
- A-Z
- 0 to 9
- Symbols:
- % : / ? # [ ] @ ! $ & ' ( ) * + , ; = - . _ ~
URLS starting with "MMS://" cannot be used for shared links.
- % : / ? # [ ] @ ! $ & ' ( ) * + , ; = - . _ ~

-
Set the Notes field as needed.
Enter a description of the shared link.
The contents entered in the "Notes" field are displayed on the "Link details" screen.
-
Configure the "Single Sign-On" item as required.
Select this to include user profile items in the login information used to log in with single sign-on to another system. Select from the configured single sign-on.
-
Confirm your settings and click Add.
Changing Shared Links
Change shared links.
-
Click the administration menu icon (gear icon) in the header.
-
Click System settings.
-
Select "Application settings" tab.
-
Click Bookmarks.
-
Click Shared bookmarks.
-
On the "Shared Links" screen, select a shared category, and then click Details for the shared link you want to change.

-
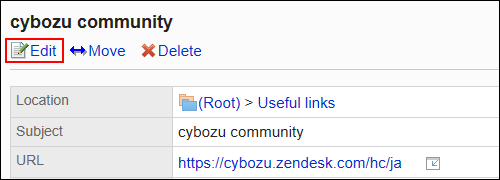
On the "Shared Link Details" screen, click Edit.
-
On the "Edit Shared link Information" screen, you can change the fields as necessary.
-
Confirm your settings and click Save.
Moving Shared Links
Move the shared link to another shared category.
-
Click the administration menu icon (gear icon) in the header.
-
Click System settings.
-
Select "Application settings" tab.
-
Click Bookmarks.
-
Click Shared bookmarks.
-
On the "Shared Links" screen, select a shared category, and click Details on the shared links you want to move.

-
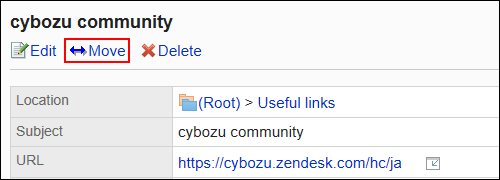
On the "Shared Link Details" screen, click "Move".
-
Select the shared category where you want to move it, and then click "Move".
You can search for a shared category by entering keywords and clicking "Search category".
When you click "Up one", you can move up one shared category.
Clicking a shared category name moves it to the subcategory you clicked.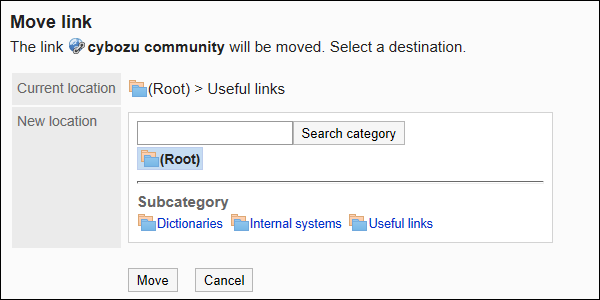
-
Confirm your settings and click "Move".
Adding Dividers
Adds a separator line to the shared category.
-
Click the administration menu icon (gear icon) in the header.
-
Click System settings.
-
Select "Application settings" tab.
-
Click Bookmarks.
-
Click Shared bookmarks.
-
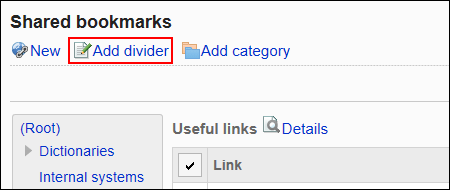
On the "Shared Links" screen, select a shared category and click "Add Shared Separator".
-
Click Yes on the "Add shared separator" screen.
The added separator lines are displayed at the bottom of the shared category.
Reorder Shared Links and Dividers
Change the link of a shared category, or the order of the separator lines.
You can change the order of shared links or separator lines only in the same category.
-
Click the administration menu icon (gear icon) in the header.
-
Click System settings.
-
Select "Application settings" tab.
-
Click Bookmarks.
-
Click Shared bookmarks.
-
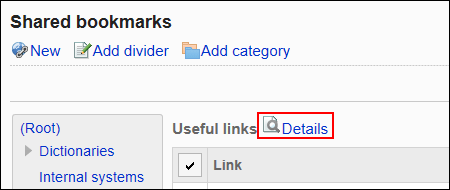
On the "Shared bookmarks" screen, select a shared category, and then click Details.
-
On the "Shared category Details" screen, click "Reorder Shared Links/separators".

-
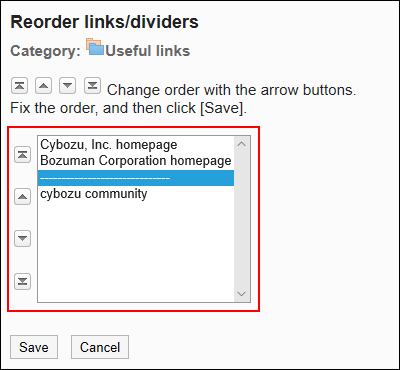
On the "Reorder shared links/separators" screen, reorder shared links and separator lines.
-
Confirm your settings and click Save.
Deleting Shared Links and Dividers
Delete shared links or separator lines in shared categories.
Delete Shared Links One by One
Delete Shared links.
-
Click the Administration menu icon (gear icon) in the header.
-
Click System settings.
-
Select "Application settings" tab.
-
Click Bookmarks.
-
Click Shared bookmarks.
-
On the "Shared Links" screen, select a shared category, and then click Details for the shared link you want to delete.

-
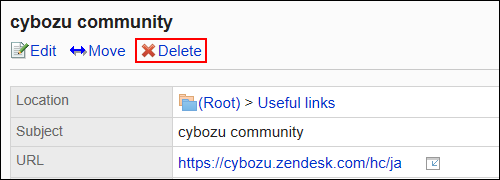
On the "Shared Link Details" screen, click Delete.
-
Click Yes on the "delete shared Links" screen.
Deleting Multiple Shared Links and Dividers Together
Select a shared link of a shared category, or a separator line, and delete it all together.
-
Click the administration menu icon (gear icon) in the header.
-
Click System settings.
-
Select "Application settings" tab.
-
Click Bookmarks.
-
Click Shared bookmarks.
-
On the "Shared Links" screen, select a shared category.
-
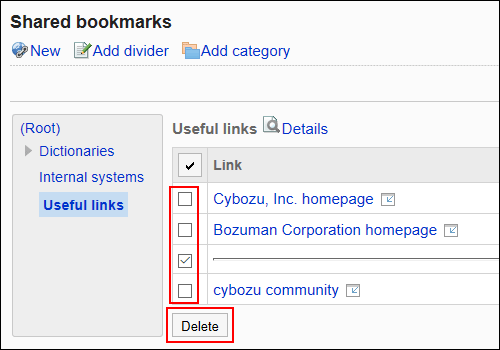
Select the checkbox for the shared link or separator line you want to delete, and then click Delete.
-
Click Yes on the "delete shared links/separator lines" screen.