Single Sign-On Settings
"Single sign-on" is a feature to pass the logged-in user's authentication information from Garoon to other systems.
Once users have logged in to Garoon, they do not need to enter account and password for authentication when they access other systems from Garoon.
For details on authentication methods to log in to Garoon and how to keep the authentication information after login, see Authentication System.
- GET Authentication
This is a form authentication. Systems authenticate users using parameters set in the URL.
Logged-in users' information is sent as parameters in URL. - POST Authentication
This is a form authentication. Systems authenticate users using parameters sent (POST'ed) from Web pages.
Logged-in users' information is sent using the POST Method.
Adding Single Sign-On
You can add a single sign-on configuration between Garoon and other systems including Cybozu products other than Garoon.
-
Click the Administration menu icon (gear icon) in the header.
-
Click "System settings".
-
Select "Basic system administration" tab.
-
Click "Single sign-on".
-
Click "Single sign-on" settings.
-
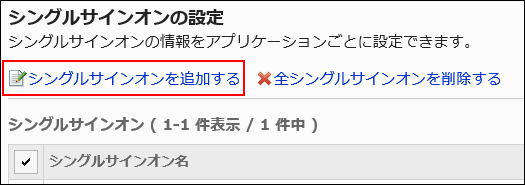
On the single sign-on settings screen, click "Add a configuration".
-
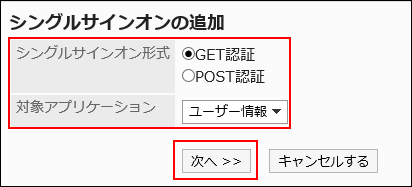
On the "Add a configuration screen, select Single sign-on method and Target application, and click "Next".
- Single sign-on method:
Select either of the following authentication methods.- GET Authentication
- POST Authentication
- Target application:
Select the application which contains the data to be sent. Depending on the feature/application you select, items used for GET or POST in step 8 vary.
Available features and applications are as follows.- User profile
- Bookmarks
- Phone Messages
- Address Book
- Single sign-on method:
-
On the "Add a configuration" screen, set the required items.
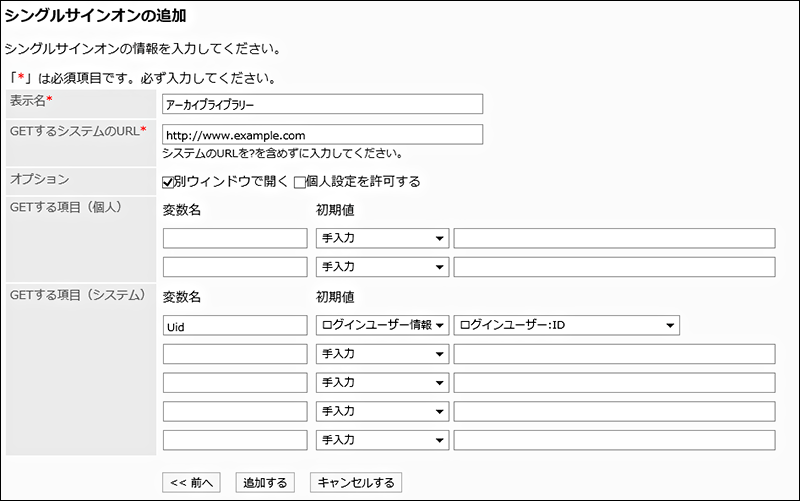 Items for setting up single sign-on
Item Description Name The name is mandatory.
Enter the display name for the single sign-on.System URL for GET
or
System URL for POSTThe URL is mandatory.
Enter the target system URL to send the authentication information using GET or POST.Options - Open in new window:
A new window is opened to access the system using the single sign-on. - Allow users to change:
Allow users to change the single sign-on settings in Personal Settings.
GET items (for users)
or
POST items (for users)- Variable name:
Enter user variable names. - Default1:
Select how to enter the user variables from the followings.
- Type:
Enter the value of the valuable in the input field. - Logged-in user information:
Select the variable from the user information of the logged-in user. - Application data:
Select the variable from the application data you have selected. Applications you can select are as follows.
- User profile
- Bookmarks
- Phone Messages
- Address Book
- Type:
- User variables
In the drop-down list, select either the logged-in user information or the item of the selected application.
Enter the value of the valuable when you want to set the value manually.
GET items (for system)
or
POST items (for system)- Variable name:
Enter system variable names. - Default1:
Select how to enter the user variable from the followings.
- Type:
Enter the value of the valuable in the input field. - Logged-in user information:
Select the variable from the user information of the logged-in user. - Application data:
Select the variable from the application data you have selected. Applications you can select are as follows.
- User profile
- Bookmarks
- Phone Messages
- Address Book
- Type:
- System variable:
In the drop-down list, select either the logged-in user information or the item of the selected application.
Enter the value of the valuable when you want to set the value manually.
1: The value of this item is used when a user initializes the settings in Personal Settings. - Open in new window:
-
Confirm your settings and click Add.
Changing Single Sign-On
You can change the single sign-on configuration.
However, you cannot change the target application for variables.
-
Click the Administration menu icon (gear icon) in the header.
-
Click "System settings".
-
Select "Basic system administration" tab.
-
Click "Single sign-on".
-
Click "Single sign-on" settings.
-
On the single sign-on settings screen, select the single sign-on name you want to change.
-
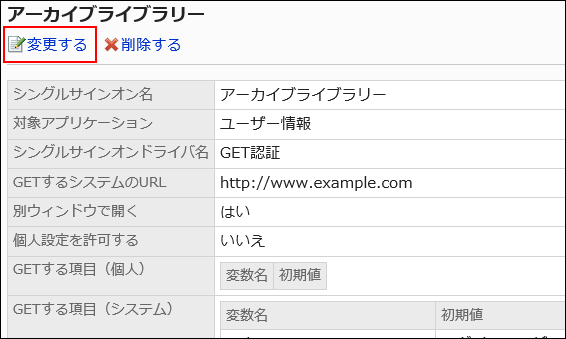
On the single sign-on details screen, click "Edit".
-
On the "Change single sign-on configuration" screen, change the fields as necessary.
-
Confirm your settings and click Save.
Removing Single Sign-On Configuration
You can remove the single sign-on settings.
If you remove the single sign-on settings for products/systems other than Garoon, you need the authentication information such as account and password to access them.
Removing Single Sign-On Configuration One by One
You can remove the single sign-on configuration one by one.
-
Click the Administration menu icon (gear icon) in the header.
-
Click "System settings".
-
Select "Basic system administration" tab.
-
Click "Single sign-on".
-
Click "Single sign-on" settings.
-
On the single sign-on settings screen, select the single sign-on name you want to remove.
-
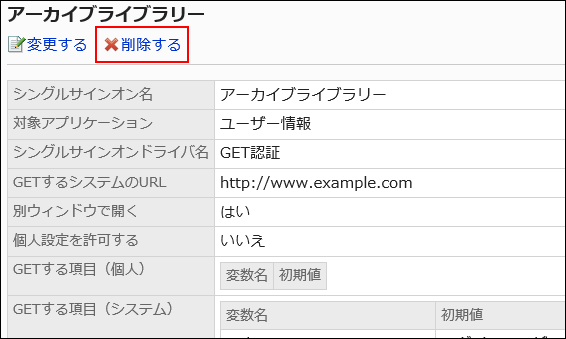
On the single sign-on details screen, click "Remove".
-
Click "Yes" on the "Remove configuration" screen.
Removing Multiple Single Sign-On Configurations in Bulk
You can select single sign-on configurations and delete them all together.
-
Click the Administration menu icon (gear icon) in the header.
-
Click "System settings".
-
Select "Basic system administration" tab.
-
Click "Single sign-on".
-
Click "Single sign-on" settings.
-
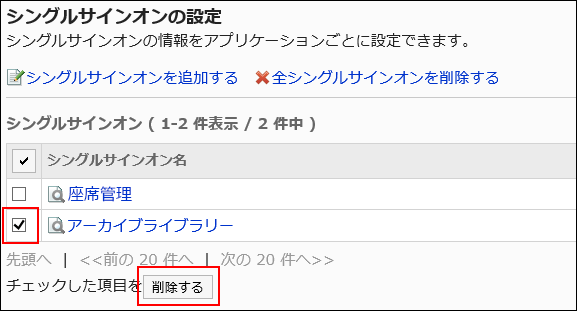
On the single sign-on settings screen, select the single sign-on check boxes that you want to remove and click "Remove".
-
Click "Yes" on the "Remove configurations" screen.
Removing All Single Sign-On Configurations
You can remove all single sign-on configurations.
-
Click the Administration menu icon (gear icon) in the header.
-
Click "System settings".
-
Select "Basic system administration" tab.
-
Click "Single sign-on".
-
Click "Single sign-on" settings.
-
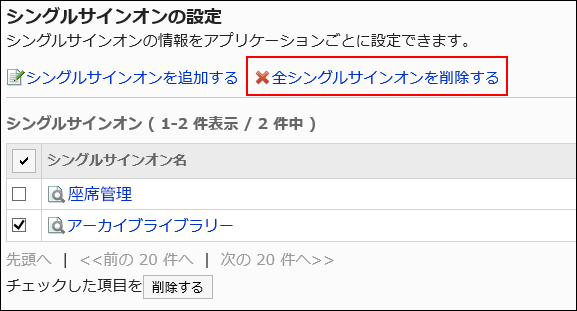
On the single sign-on settings screen, click "Remove all configurations".
-
Click "Yes" on the "Remove all configurations" screen.