Managing Access Permissions Using CSV Files
Manage access permissions for Phone Messages using CSV files.
Importing Data from a CSV File
Import access permissions for Phone Messages from a CSV file.
If an error occurs while importing a CSV file, the import process will be terminated. The data which has been imported will be eliminated.
-
Create a CSV file to import data.
For information on items that can be managed in CSV files, refer to the topic about Phone Messages CSV format. -
Click the administration menu icon (gear icon) in the header.
-
Click System settings.
-
Select "Application settings" tab.
-
Click Phone Messages.
-
Click Import user rights data.
-
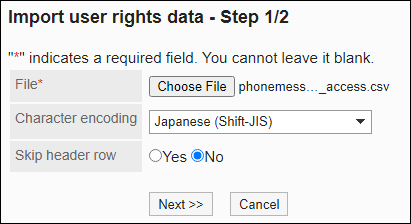
On the screen to import the user rights step 1/2, select the CSV file that you created in step 1.
-
Set the data to import, and click Next.
The setting fields are as follows:
- Character encoding:
Encodes data from a CSV file with the selected character code.
The following character codes can be selected.- Unicode (UTF-8)
- Japanese (Shift-JIS)
- ASCII
- English (Latin1)
- Simplified Chinese (GBK/GB2312)
- Thai (TIS-620)
- Skip the first row:
If the header row contains information other than data such as an item name and a comment, select "Yes".
- Character encoding:
-
On the screen to import the user rights step 2/2, check the contents in the CSV file, and click Import.
Exporting Data to a CSV File
Export access permissions for Phone Messages to a CSV file.
-
Click the administration menu icon (gear icon) in the header.
-
Click System settings.
-
Select "Application settings" tab.
-
Click Phone Messages.
-
Click Export user rights data.
-
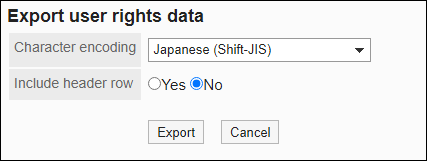
On the screen to export user rights, set the required items to export data.
The setting fields are as follows:
- Character encoding:
Select the character code that you want to use for encoding.
The following character codes can be selected.- Unicode (UTF-8)
You can select with BOM as required. - Japanese (Shift-JIS)
- ASCII
- English (Latin1)
- Simplified Chinese (GBK/GB2312)
- Thai (TIS-620)
- Unicode (UTF-8)
- Include header row:
To export an item name to the header row of a CSV file, select "Yes".
- Character encoding:
-
Confirm your settings and click Export.
-
Save the file with a function provided by your Web browser.