Calendar Settings
You can set up calendars based on the workdays for each organization and office.
Created calendars are used in portals and schedulers.
Calendar Types
The calendar types are as follows.
- Default Calendar:
Calendar that is pre-registered in Garoon. By default, Japanese holidays are added as events.
System administrators can add holidays, workdays, and memos as events. - System Calendar:
Calendars created by your system administrator. They can be created for certain purposes, such as creating them for organizations or offices.
You can add holidays, workdays, and memos as events. - My Calendar:
Calendars created by users. Only users who have created them can use them.
Anniversaries and memos can be added as events.
For details, refer to the "My Calendar Settings" section.
Adding Calendars
You can add a system calendar.
-
Click the Administration menu icon (gear icon) in the header.
The gear-shaped icon appears only on the screen for the users with administrative privileges. -
Click Garoon System Administration.
-
Select "Basic system administration" tab.
-
Click Calendar.
-
Click Calendar Settings.
-
On the "Calendar Settings" screen, click Add calendar.
-
On the screen to add calendars, enter a calendar name and a calendar code.
You must set a calendar name and a calendar code.
- Calendar name:
Enter a display name for the calendar. - Calendar code:
This is a unique code for identifying a calendar.

- Calendar name:
-
Confirm your settings and click Add.
Importing Japanese Public Holidays Automatically
You can configure whether you want to import Japanese public holidays automatically or not for each calendar.
If you configure to import holidays automatically, you will not need to update holidays manually.
-
Click the Administration menu icon (gear icon) in the header.
The gear-shaped icon appears only on the screen for the users with administrative privileges. -
Click Garoon System Administration.
-
Select "Basic system administration" tab.
-
Click Calendar.
-
Click Calendar Settings.
-
On the "Calendar settings" screen, select a calendar to import holiday data automatically.
-
Select the "Import automatically" checkbox.
 You have completed the automatic import configuration.
Update Japanese Holiday Data Manually
You can import Japanese holiday data manually.
If you import the holiday data manually, it will be applied to the calendar instantly.
-
Click the Administration menu icon (gear icon) in the header.
The gear-shaped icon appears only on the screen for the users with administrative privileges. -
Click Garoon System Administration.
-
Select "Basic system administration" tab.
-
Click Calendar.
-
Click Calendar Settings.
-
On the "Calendar settings" screen, select a calendar to import holiday data.
-
Click Import manually.

Changing Calendar Information
You can change calendar information.
You cannot change the calendar information for the default calendar.
-
Click the Administration menu icon (gear icon) in the header.
The gear-shaped icon appears only on the screen for the users with administrative privileges. -
Click Garoon System Administration.
-
Select "Basic system administration" tab.
-
Click Calendar.
-
Click Calendar Settings.
-
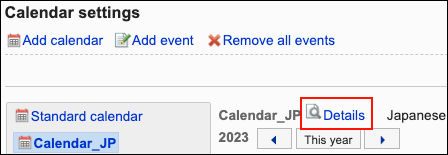
On the "Calendar settings" screen, select a calendar that contains information you want to change.
-
Click Details.
-
On the calendar details screen, click Edit.
-
On the screen to change calendar Information, set the required items.
-
Confirm your settings and click Save.
Deleting Calendars
You can delete the system calendar.
If you delete a calendar, events included in that calendar are also deleted.
If a user deletes a calendar, the default calendar is applied to that user.
You cannot delete the default calendar.
-
Click the Administration menu icon (gear icon) in the header.
The gear-shaped icon appears only on the screen for the users with administrative privileges. -
Click Garoon System Administration.
-
Select "Basic system administration" tab.
-
Click Calendar.
-
Click Calendar Settings.
-
On the "Calendar Settings" screen, select a calendar to delete.
-
Click Details.
-
On the calendar details screen, click Delete.
-
On the screen to delete calendars, click Yes.