OAuth client settings
To use OAuth for sending and receiving e-mails, you need to configure OAuth client settings for both providers and Garoon.
For details, refer to how to add OAuth clients.
Adding OAuth Clients
Add your OAuth client.
-
On the provider's screen, configure OAuth client, and copy the provided client ID and the client secret to a text editor such as Notepad.
You can find a sample configuration in the OAuth authentication page in the Support Guide. -
Click the administration menu icon (gear icon) in the header.
-
Click "System settings".
-
Select "Basic system administration" tab.
-
Click the item for external servers.
-
Click OAuth client settings.
-
On the "OAuth client settings" screen, click Add.

-
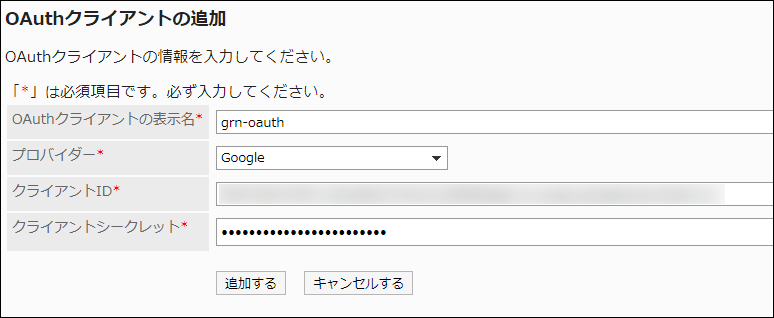
On the "Add OAuth client" screen, enter OAuth client information.
You must provide all information about your OAuth client.
- Display name of OAuth client:
The display name you specify here will be shown in the drop-down list of OAuth clients on the "Add mail server" and the "Change mail server" screens. - Provider:
Select a provider to use.
You can select from the following providers.- Microsoft
- Client ID:
Enter the client ID you copied in Step 1. - Client secret:
Enter the client secret you copied in Step 1.

- Display name of OAuth client:
-
Confirm your settings and click Add.
Changing OAuth Clients
Change your OAuth client.
-
Click the administration menu icon (gear icon) in the header.
-
Click "System settings".
-
Select "Basic system administration" tab.
-
Click the item for external servers.
-
Click OAuth client settings.
-
On the "OAuth client settings" screen, select the display name of the OAuth client you want to change.
-
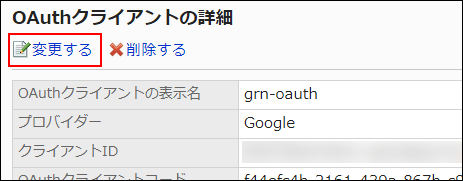
On the "OAuth client details" screen, click Change.

-
On the "Edit OAuth client" screen, set the fields as needed.
For details on the fields to configure, refer to how to add OAuth clients. -
Confirm your settings and click "Save".
Deleting OAuth Clients
Delete your OAuth client.
You cannot delete the OAuth client configured in the e-mail server setting. Make sure you change or delete the OAuth client in the e-mail server setting before deleting it.
-
Click the administration menu icon (gear icon) in the header.
-
Click "System settings".
-
Select "Basic system administration" tab.
-
Click the item for external servers.
-
Click OAuth client settings.
-
On the "OAuth client settings" screen, select the display name of the OAuth client you want to delete.
-
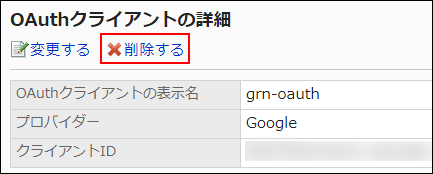
On the "OAuth client details" screen, click Delete.

-
On the "Delete OAuth client" screen, click Yes.