Office Settings
You can set up offices.
This is useful if you have a number of offices, such as overseas branches and factories, and each office has different workdays and working hours.
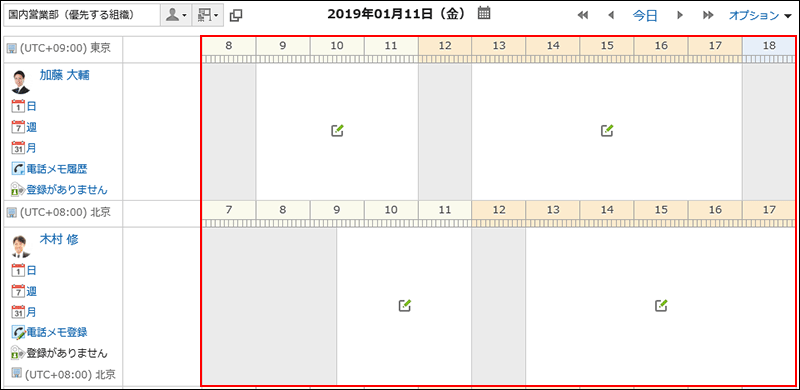
You can check users' schedulers during the workdays and the working hours of each office.

Adding Offices
You can add offices.
-
Click the Administration menu icon (gear icon) in the header.
-
Click "System settings".
-
Select "Basic system administration" tab.
-
Click Calendar.
-
Click Office Settings.
-
On the screen to set offices, Click Add office.

-
On the screen to add offices, enter the office name.
You must set a standard office name.
Clicking Add localized name allows you to set office names in multiple languages.
If you do not set the office name in the user preference language, the default office name is displayed.
The following languages can be set:- 日本語
- English
- 中文(简体)
- 中文(繁體)
Displayed in Traditional Chinese.

-
Enter the value in the office code field.
The office code must be set.
This is a unique code for identifying an office.
-
In the "Work Days" field, set the workdays by specifying the days of the week.
Select the checkboxes for the days of the week that you want to specify as workdays.
-
In the "Working hours" field, set the time period to perform daily operations.
By clicking Add time range, you can set multiple office (working) hours. For example, you can exclude lunchtime and set the working hours in the morning and the afternoon. During the non-working hours, the icon
 to register appointments does not appear on the "Group Day View" screen of the scheduler.

-
In the "Calendar" field, select a calendar to use for the office.
To apply the calendar workdays to the office, select the "Apply Calendar workdays" checkbox. If you do not apply them, events on the workdays are displayed in the calendar, but the background color does not change.
For details on workdays, refer to the "Setting Up Events" section.
-
Confirm your settings and click Save.
Changing Offices
You can change the office settings.
-
Click the Administration menu icon (gear icon) in the header.
-
Click "System settings".
-
Select "Basic system administration" tab.
-
Click Calendar.
-
Click Office Settings.
-
On the screen to set offices, click the name of the office you want to change.
-
On the office details screen, click Change.

-
On the screen to change offices, set the required items.
-
Confirm your settings and click Save.
Deleting Offices
You can delete offices.
If a user deletes an office, the user's office settings are inherited as "user-specific settings".
Deleting Offices One by One
You can delete offices one by one.
-
Click the Administration menu icon (gear icon) in the header.
-
Click "System settings".
-
Select "Basic system administration" tab.
-
Click Calendar.
-
Click Office Settings.
-
On the screen to set offices, click the name of the office you want to delete.
-
On the office details screen, click Delete.

-
Click Yes on the screen to delete offices.
Deleting Multiple Offices in Bulk
Select the offices you want to delete, and delete them all together.
-
Click the Administration menu icon (gear icon) in the header.
-
Click "System settings".
-
Select "Basic system administration" tab.
-
Click Calendar.
-
Click Office Settings.
-
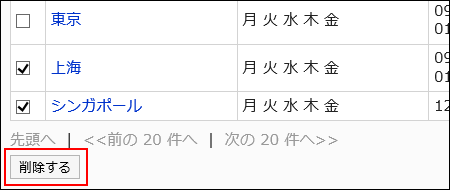
On the office settings screen, select the checkboxes for the offices you want to delete, and then click Delete.

-
On the screen to delete offices in bulk, click Yes.