Setting up Proxies
Proxies are users who can change the presence information on behalf of individual users.
When you set a proxy for an department, the proxy user is set as a proxy for all users belonging to the department.
If your system administrator allows users to set their proxies, users can change and delete their proxies from the personal settings.
Adding Proxies
Add proxies for departments or users.
-
Click the Administration menu icon (gear icon) in the header.
-
Click "System settings".
-
Select "Application settings" tab.
-
Click Presence indicators.
-
Click Proxy settings.
-
On the screen to set proxies, select the organization or user to set a proxy for.
-
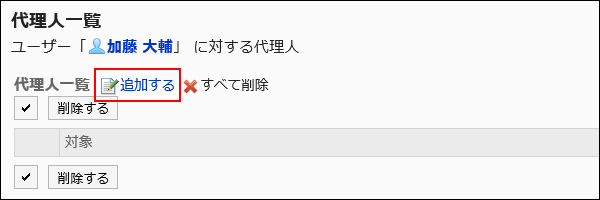
On the proxy list screen, click Add.

-
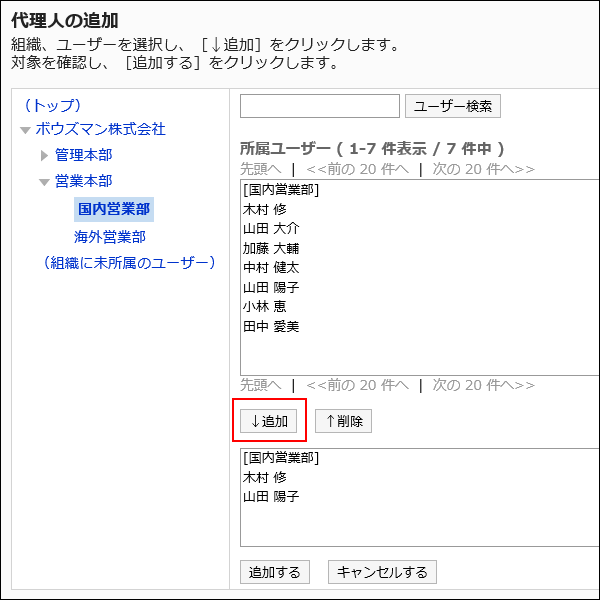
On the screen to add proxies, select the department or user to set a proxy, and click Add.

-
Confirm your settings and click Add.
Deleting Proxies
Delete proxies from departments or users.
Selecting Proxies to Delete
Select a proxy to delete.
-
Click the Administration menu icon (gear icon) in the header.
-
Click "System settings".
-
Select "Application settings" tab.
-
Click Presence indicators.
-
Click Proxy settings.
-
On the screen to set proxies, select the organization or user to delete their proxy.
-
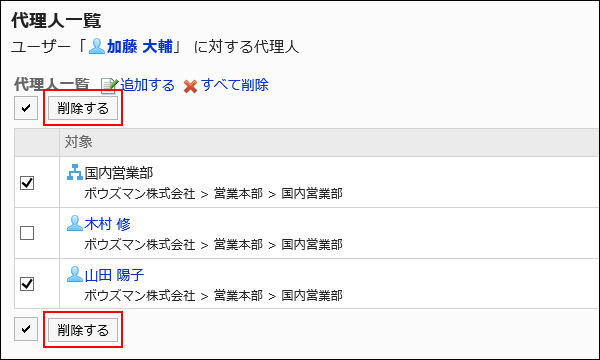
On the proxy list screen, select the checkboxes of the departments or users to delete from proxies, and then click Delete.

-
Click Yes on the screen to delete proxies.
Delete All Proxies
Delete all proxies.
-
Click the administration menu icon (gear icon) in the header.
-
Click "System settings".
-
Select "Application settings" tab.
-
Click Presence indicators.
-
Click Proxy settings.
-
On the screen to set proxies, select the organization or user to delete their proxy.
-
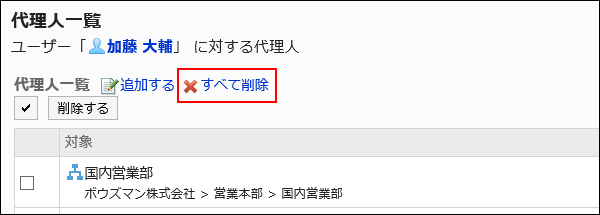
On the proxy list screen, click "Delete all".

-
Click Yes on the delete all proxies screen.