Plug-in settings
The following describes the steps to apply a plug-in to Garoon.
Adding Plug-Ins
You can add a plug-in by importing a plug-in file in zip format.
-
Prepare a plug-in file.
You can find the plug-ins applicable to Garoon on the product site. For details, refer to Searching Products for Integration and Plug-Ins.
This section describes the questionnaire plug-in as an example. -
Click the Administration menu icon (gear icon) in the header.
The gear-shaped icon appears only on the screen for the users with administrative privileges. -
Click Garoon System Administration.
-
Select "Basic system administration" tab.
-
Click Plug-in.
-
Click Plug-in settings.
-
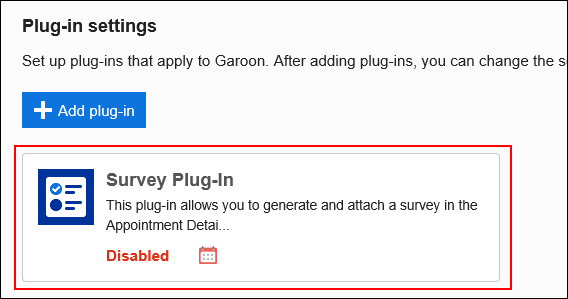
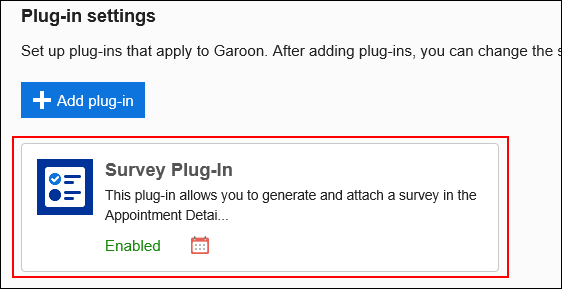
On the "Plug-in settings" screen, click Add plug-in.

-
In the "Add plug-in" dialog, attach a plug-in file.
You can import a plug-in file only with the ".zip" extension.
The maximum size of the file you can upload is 100MB. -
Ensure that the plug-in file in zip format is attached, and click Add.
Once you added a plug-in, the settings are configured as below. Change the settings according to your needs.
- Use plug-in: Disabled
- Applied to: Login user
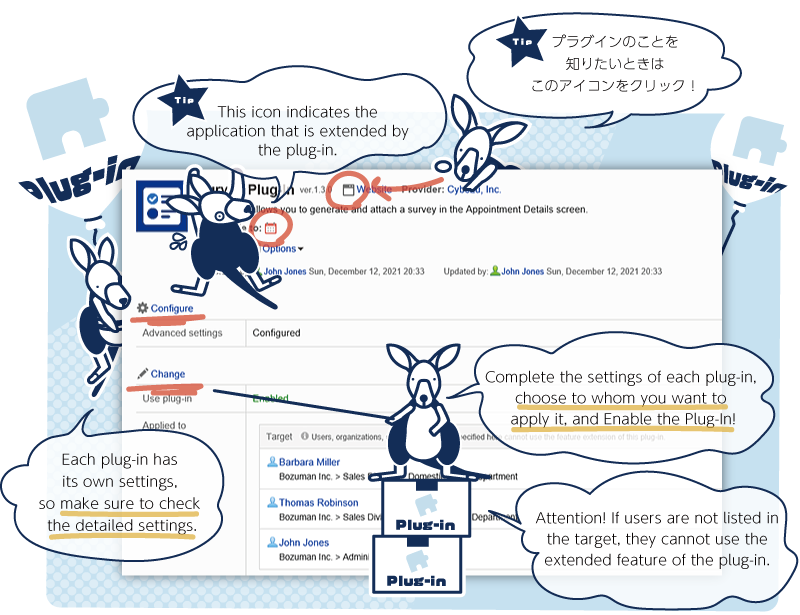
Configuring Plug-in Details
Configure plug-in details. The fields you need to configure depend on each plug-in.
-
Click the Administration menu icon (gear icon) in the header.
The gear-shaped icon appears only on the screen for the users with administrative privileges. -
Click Garoon System Administration.
-
Select "Basic system administration" tab.
-
Click Plug-in.
-
Click Plug-in settings.
-
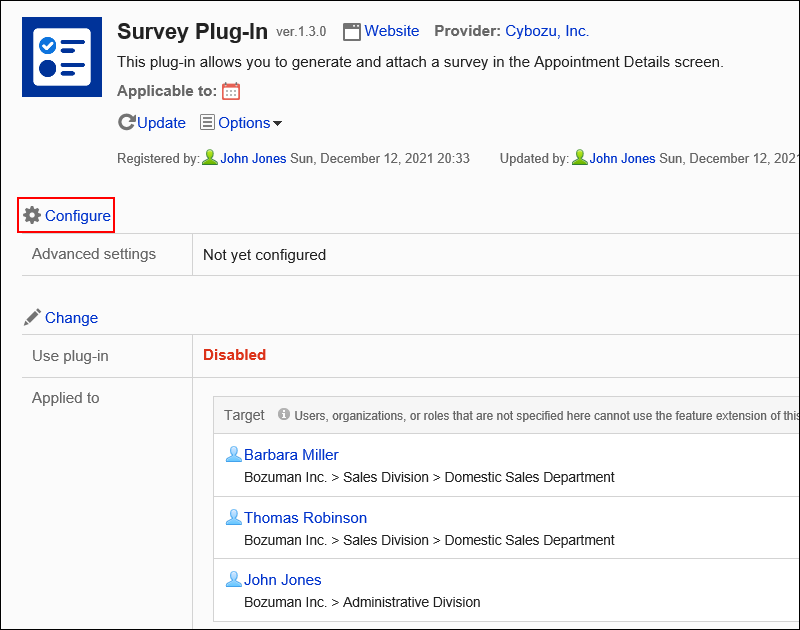
On the "Plug-in settings" screen, click the plug-in to configure the detailed settings.
-
On the "Plug-in details" screen, click Configure.
-
On the "Advanced settings" screen, configure required fields.
Configuring Target to Apply a Plug-In
Configure users, organizations, and/or roles to apply a plug-in.
-
Click the Administration menu icon (gear icon) in the header.
The gear-shaped icon appears only on the screen for the users with administrative privileges. -
Click Garoon System Administration.
-
Select "Basic system administration" tab.
-
Click Plug-in.
-
Click Plug-in settings.
-
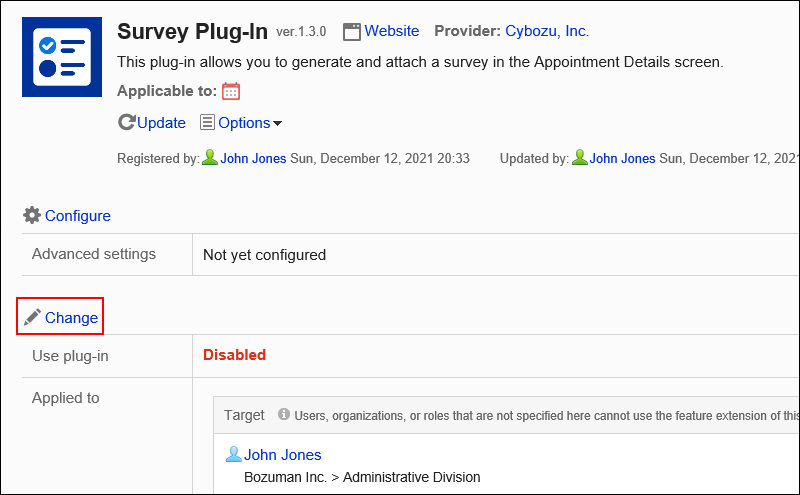
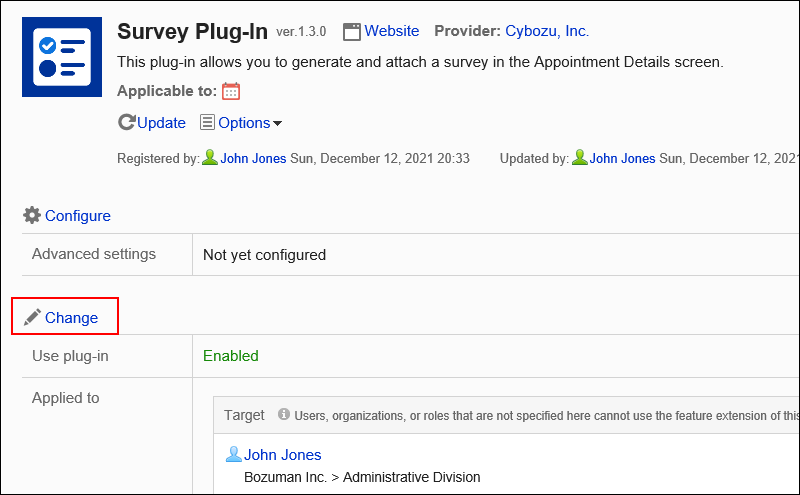
On the "Plug-in settings" screen, click the plug-in to configure targets.
-
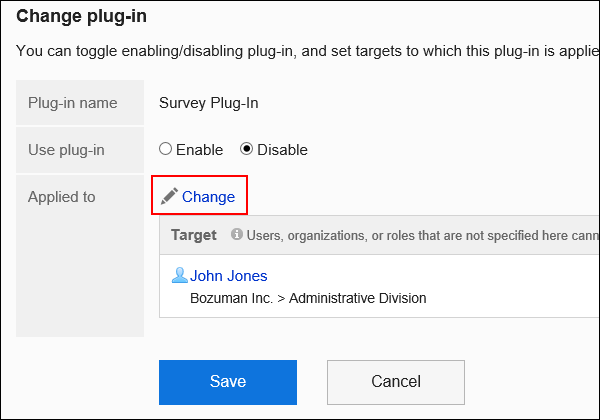
On the "Plug-in details" screen, click Change.
-
On the "Change plug-in" screen, click Change.
-
In the "Select users, organizations, or roles" dialog, select the plug-in targets and click Apply.
Select the target from the user, organization, or role. By default, the logged-in user has been set for the target.
The order to display the targets are set automatically. You cannot change it.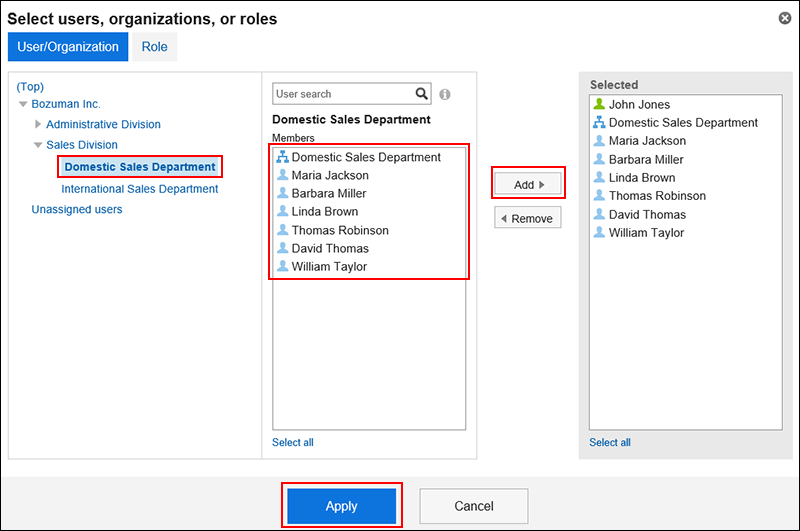
-
On the "Change plug-in" screen, check the settings and click Change.
Enabling Plug-Ins
If you enable a plug-in, it will be applied to the users configured as targets. You can enable up to 10 plug-ins.
-
Click the Administration menu icon (gear icon) in the header.
The gear-shaped icon appears only on the screen for the users with administrative privileges. -
Click Garoon System Administration.
-
Select "Basic system administration" tab.
-
Click Plug-in.
-
Click Plug-in settings.
-
On the "Plug-in settings" screen, click the plug-in to enable.
-
On the "Plug-in details" screen, click Change.

-
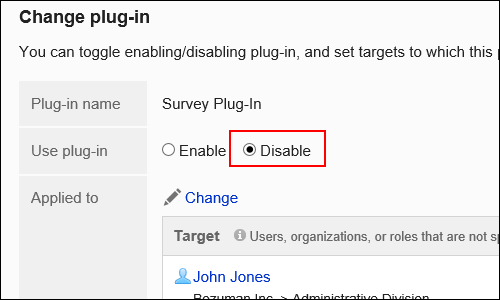
On the "Change plug-in" screen, select "Enable" in the "Use plug-in" field.
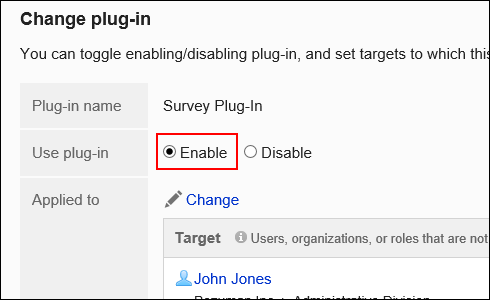
-
Confirm your settings and click Save.
Disabling Plug-Ins
You can disable plug-ins. Even after disabling the plug-in, "Plug-in details" and "Applied to" settings are retained.
-
Click the Administration menu icon (gear icon) in the header.
The gear-shaped icon appears only on the screen for the users with administrative privileges. -
Click Garoon System Administration.
-
Select "Basic system administration" tab.
-
Click Plug-in.
-
Click Plug-in settings.
-
On the "Plug-in settings" screen, click the plug-in to disable it.
-
On the "Plug-in details" screen, click Change.
-
On the "Change plug-in" screen, select "Disable" in the "Use plug-in" field.
-
Confirm your settings and click Save.
Updating Plug-Ins
You can update plug-ins. Even after updating the plug-in, "Plug-in details", "Use plug-in" (enable/disable), and "Applied to" settings are retained.
-
Click the Administration menu icon (gear icon) in the header.
The gear-shaped icon appears only on the screen for the users with administrative privileges. -
Click Garoon System Administration.
-
Select "Basic system administration" tab.
-
Click Plug-in.
-
Click Plug-in settings.
-
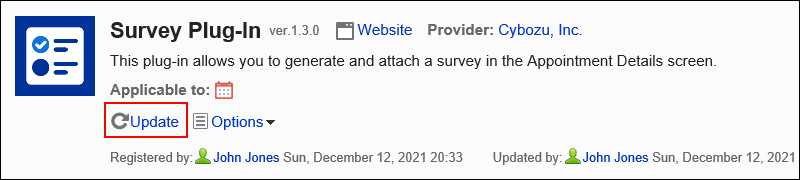
On the "Plug-in settings" screen, click the plug-in to update.
-
On the "Plug-in details" screen, click Update.
-
In the "Update plug-in" dialog, attach a plug-in file.
You can import a plug-in file only with the ".zip" extension.
The maximum size of the file you can upload is 100MB. -
Ensure that the specified plug-in file is correct, and click Update.
Deleting Plug-Ins
You can delete plug-ins.
-
Click the Administration menu icon (gear icon) in the header.
The gear-shaped icon appears only on the screen for the users with administrative privileges. -
Click Garoon System Administration.
-
Select "Basic system administration" tab.
-
Click Plug-in.
-
Click Plug-in settings.
-
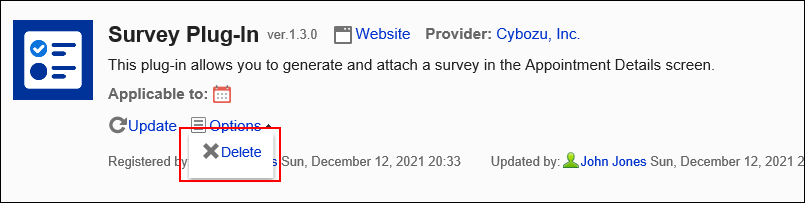
On the "Plug-in settings" screen, click the plug-in to delete.
-
On the "Plug-in details" screen, click Options and click Delete.
-
In the "Delete plug-in" dialog, click Delete plug-in.