Feature activation
The Feature activation screen allows you to disable and re-enable some features.
You can also configure email notification settings.
Opening the "Feature activation" screen
Only kintone administrators and cybozu.com administrators can open the Feature activation screen.
To open the Feature activation screen, follow the steps below.
-
Click the Settings icon (the gear-shaped icon) at the top of kintone, then click kintone administration.
Reference: Opening the kintone administration screen -
Click Feature activation under Other.
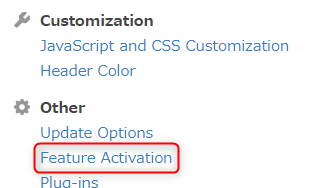
The Feature activation screen will open.
For an overview of the settings on this screen, see below.
"Email notifications"
The Email Notifications feature lets you send out kintone notifications via email. This makes it possible for users to check their notifications in their inboxes as well as on kintone.
By default, the feature is enabled and "To me" notifications are sent out via email in HTML format.
For details on these settings, refer to Settings to activate email notifications.
"Spaces and People"
- Activate spaces
You can configure whether to enable the Space feature.
When the checkbox for this feature is selected, you can choose to enable or disable the Allow users to create apps that do not belong to any space option.
Blank space
Allow users to create apps that do not belong to any space - Activate guest spaces
If the checkbox for Activate spaces is selected, you can configure whether or not to use the Guest space feature.
Guest spaces - Activate People and Private messages
You can configure whether to use the People and Private Message features.
People
Messages
Allow users to create apps that do not belong to any space
This is a setting option that enables you to configure whether to allow users to create apps that do not belong to any space.
Apps are placed either on Portal (top page) or in a space. "Apps that do not belong to any space" refer to the apps that are placed on Portal.
- If this checkbox is selected:
Users can create both apps that belong to a space (in-space apps) and those that do not belong to any space. - If this checkbox is not selected:
Users are only able to create apps that belong to a space (in-space apps). Users cannot create apps that do not belong to any space. Deselecting this checkbox will not affect any existing apps.
Related information: App groups when "Allow users to create apps that do not belong to any space" is disabled
An app group is always set for an app. When you create an app, it is automatically set with the app group specified as the default app group, though the app group can also be changed. However, the "Public" app group is always set for the apps that belong to a space (in-space apps), and you cannot change the app group for these apps.
If you deselect the Allow users to create apps that do not belong to any space checkbox, users will only be able to create apps that belong to a space (in-space apps). This means that apps created will always belong to the "Public" app group, and you cannot change the app group for the apps. In other words, if you deselect the Allow users to create apps that do not belong to any space checkbox, it means that you will not allow users to create apps that do not belong to the "Public" app group (including apps that belong to the "Private" app group).
If you are using some apps that belong to an app group other than the "Public" app group, please take this into consideration before configuring the setting.