Creating an app
In kintone, you can create apps that are tailored to various business needs. This topic describes how to create a simple app by dragging and dropping items.
Try following the steps below to create an app and get a better idea of how kintone apps work and what you can do with them.
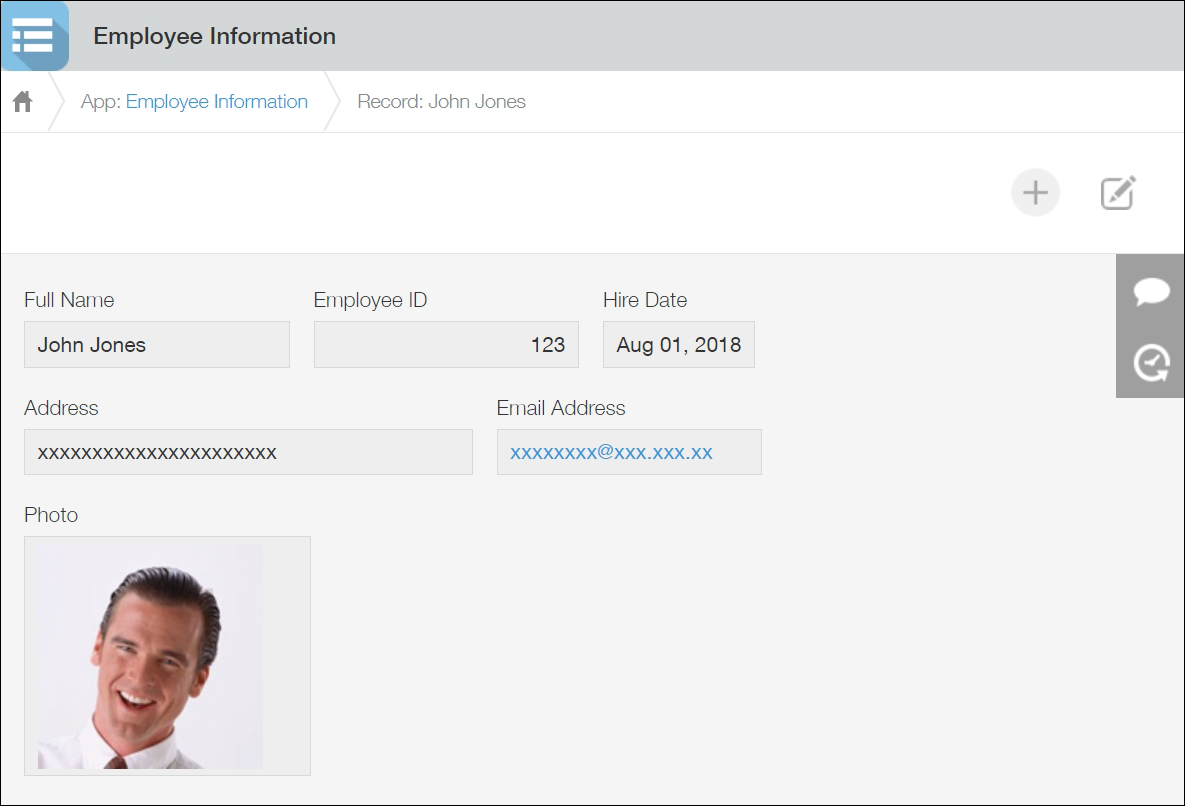
As an example, we will create an app called "Employee Information" that manages employee information. We will need to add some input fields, including fields for entering a full name, hire date, address, and e-mail address. In the steps below, we will place these fields on the app by dragging and dropping them.
How the completed app will look
Now, let's create the "Employee Information" app.
-
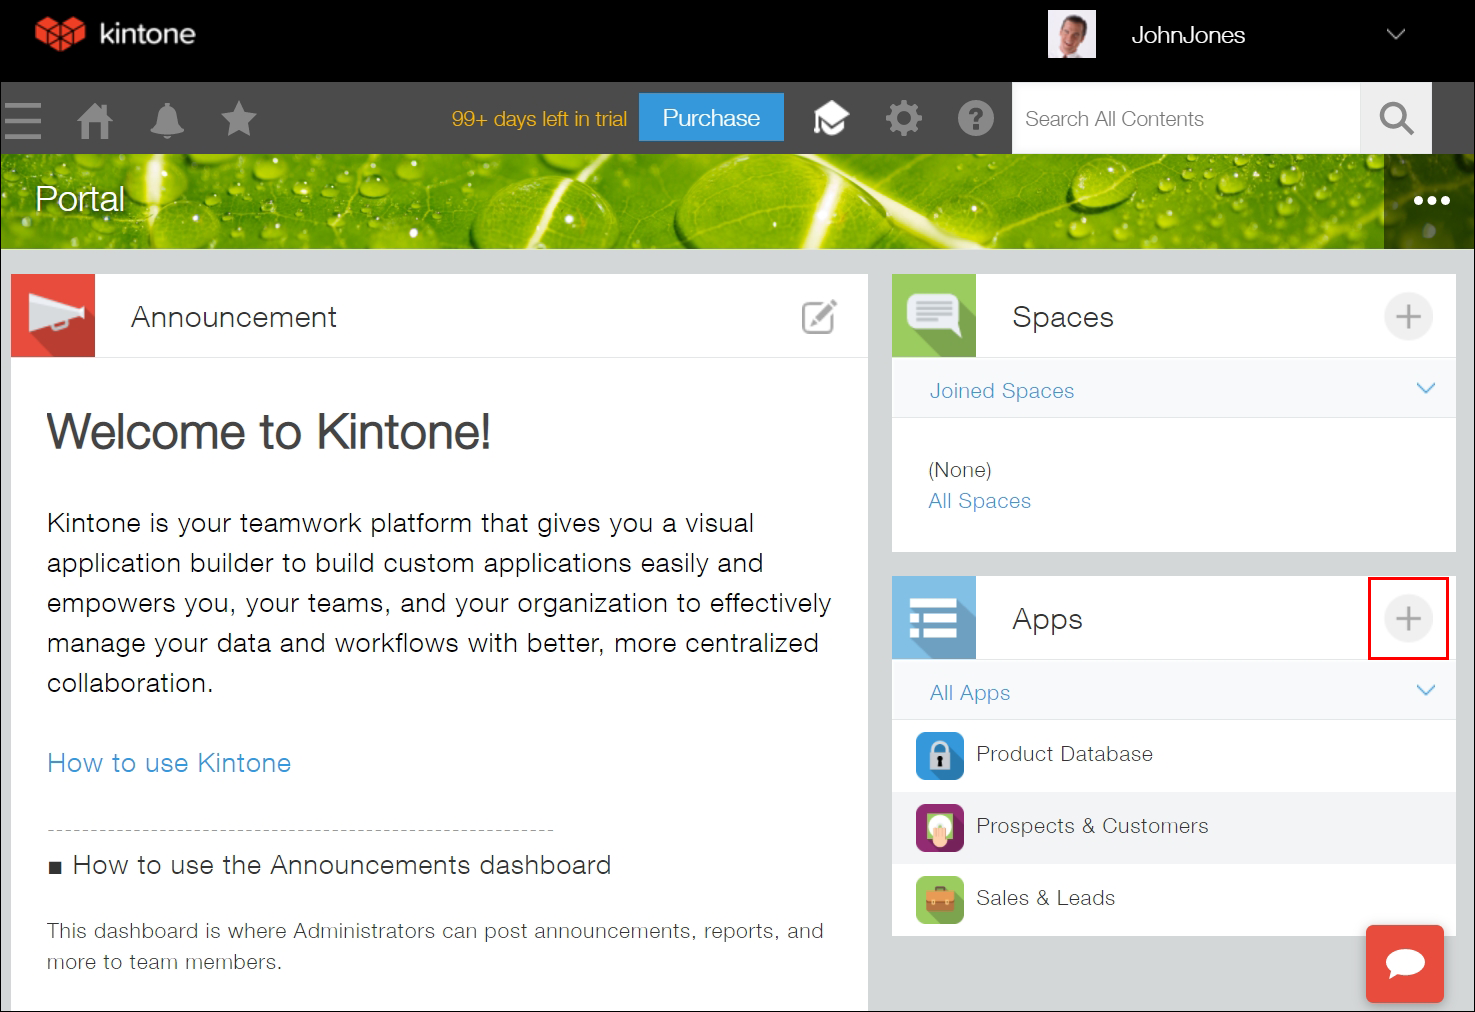
On the kintone Portal, click the Create App icon (the plus sign-shaped icon in the Apps section).
-
Click Create App from Scratch.
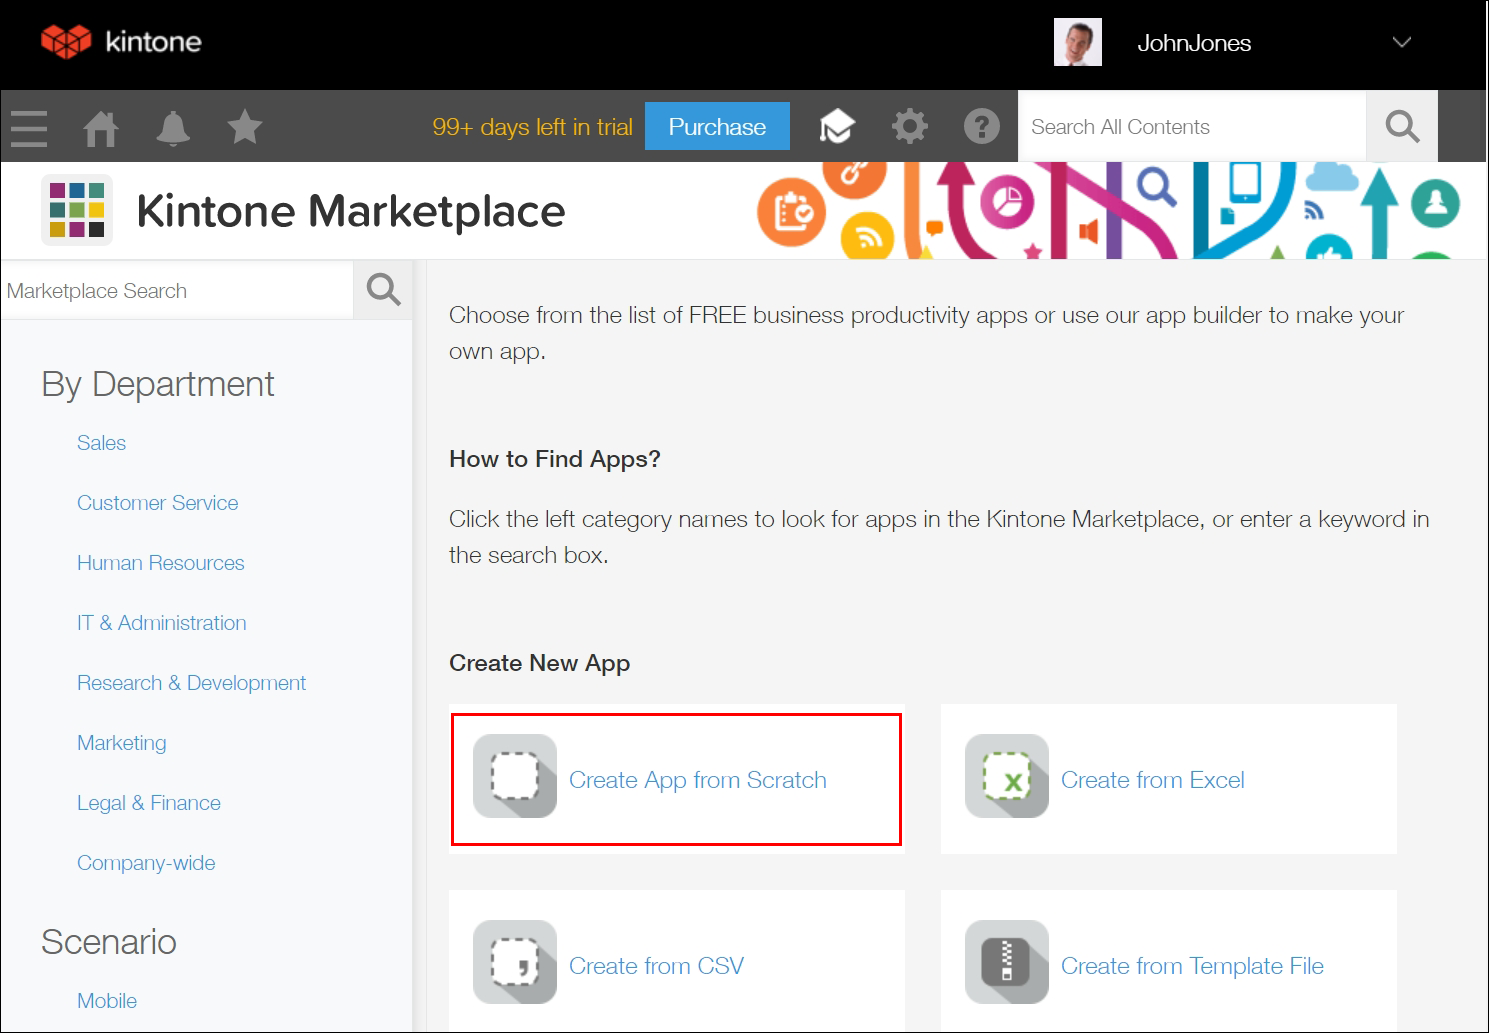 A screen to create a new app is displayed.
 -
Enter "Employee Information" in the app name field.

-
From the list of fields on the left side of the screen, drag a "Text" field onto the area on the right side of the screen. This field will be used for entering employee names.
-
Hover your cursor over the top right of the "Text" field that you placed in step 4. When the Settings icon (the gear-shaped icon) at the top right of the field appears, click Settings.
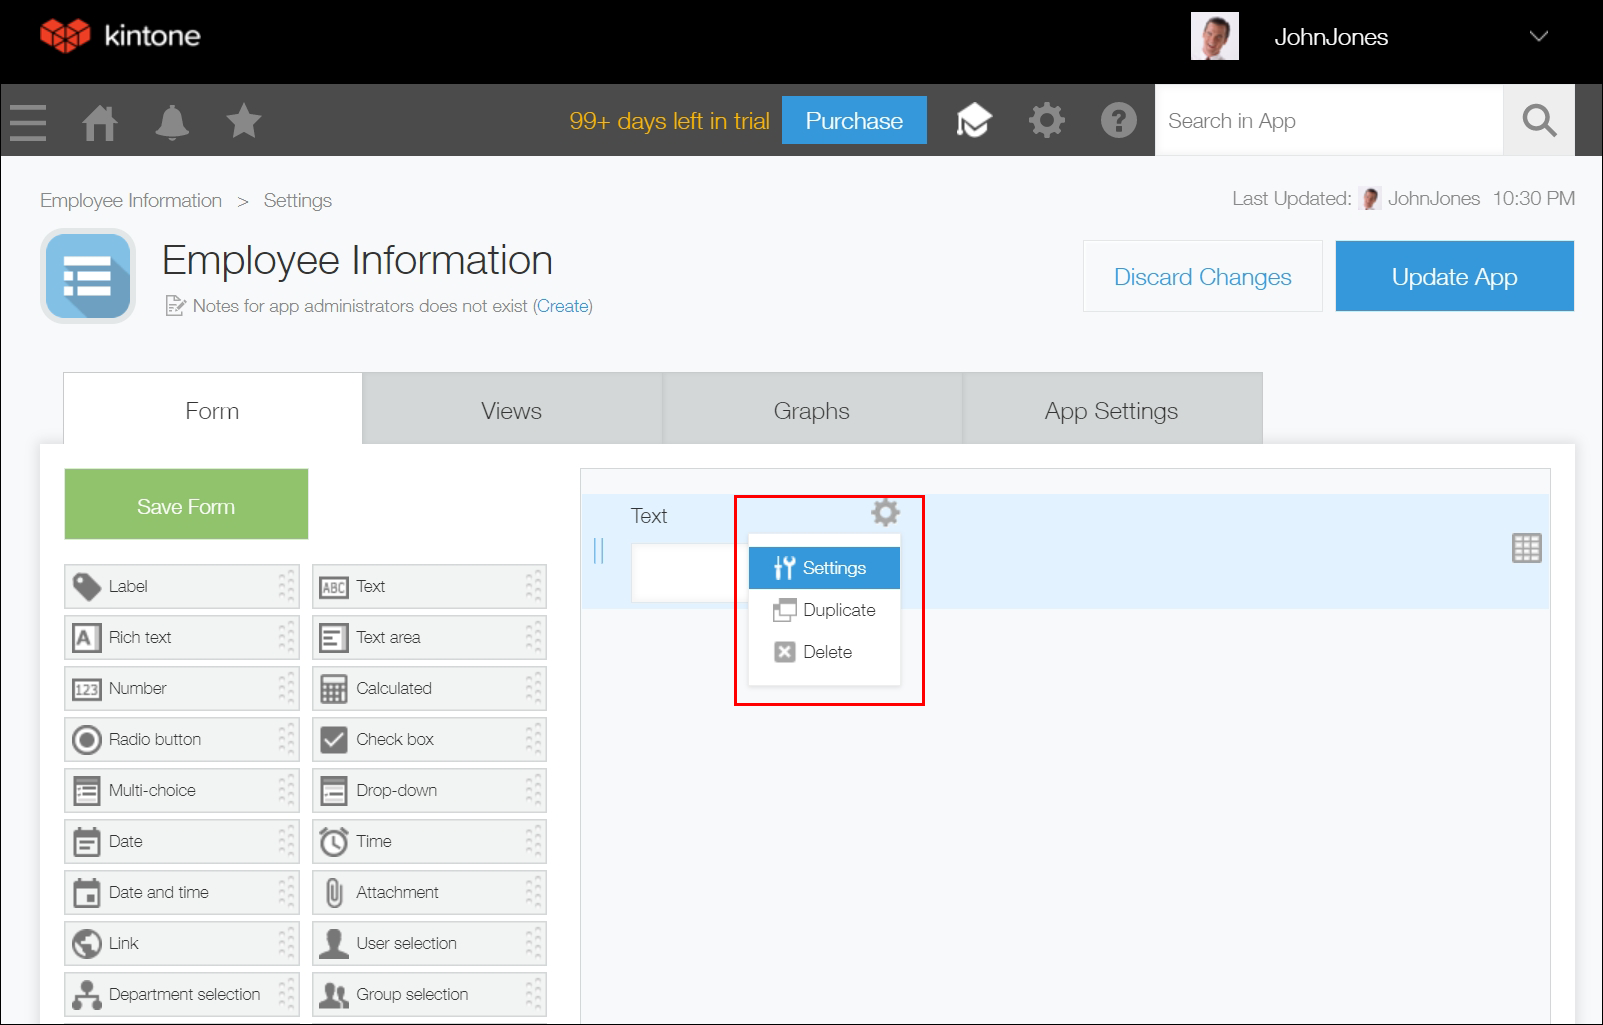
-
Enter "Full Name" in the Name field and click Save.
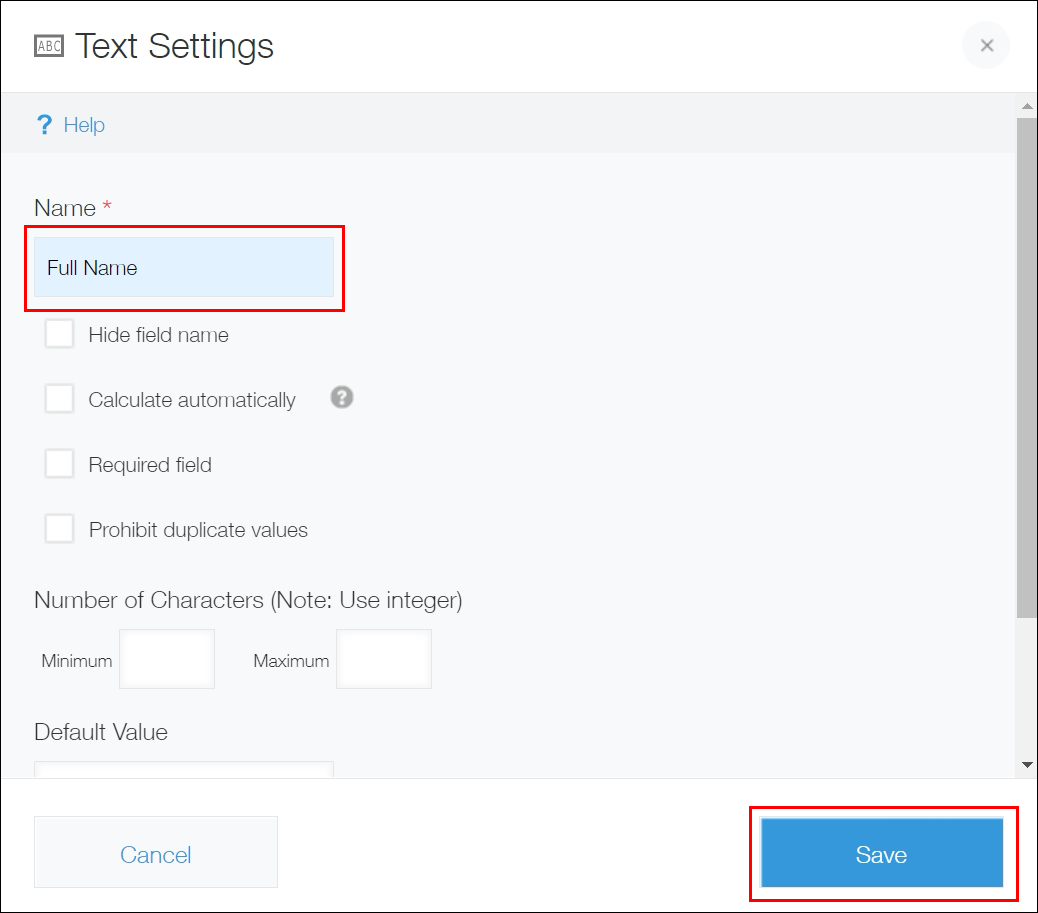 Now the "Full Name" input field has been added.
 -
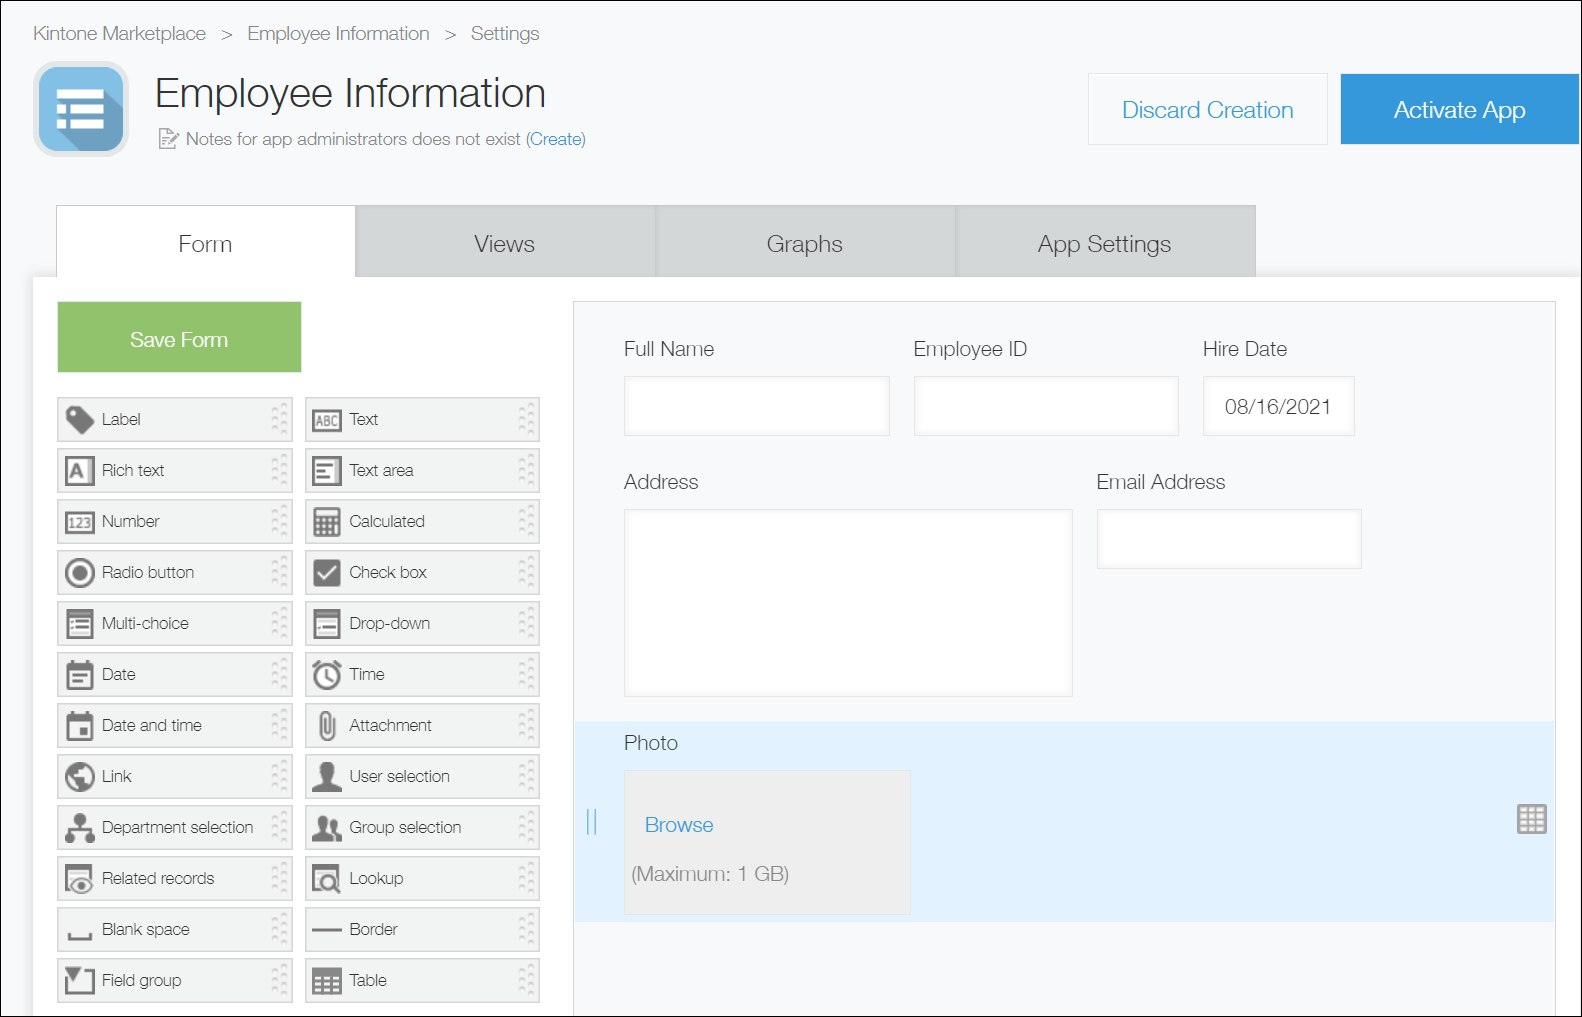
Repeat steps 4 to 6 for the following fields to place them on the app and specify their names. If necessary, you can adjust the position of a field on the app by dragging and dropping it.
- "Number" field:
Specify the field name as "Employee ID". - "Date" field:
Specify the field name as "Hire Date". - "Text area" field:
Specify the field name as "Address". - "Link" field:
Specify the field name as "E-mail Address".
Note: Select E-mail address under Type on the "Link Settings" screen. This makes it so that when you click the entered e-mail address, an e-mail app such as Outlook will launch so you can send an e-mail. - "Attachment" field:
Specify the field name as "Photo".
When you have placed all of the fields above on your app, it should look like the image below.
- "Number" field:
-
Click Save Form on the upper left side of the screen.
The settings you configured for the form are saved. As your settings in the app have not been applied yet at this point, you can change and save the settings as many times as you need. -
Click the Activate App on the upper right side of the screen.
Clicking this button makes your app public, which allows other users to use it. Your app will not be made public until you click Activate App.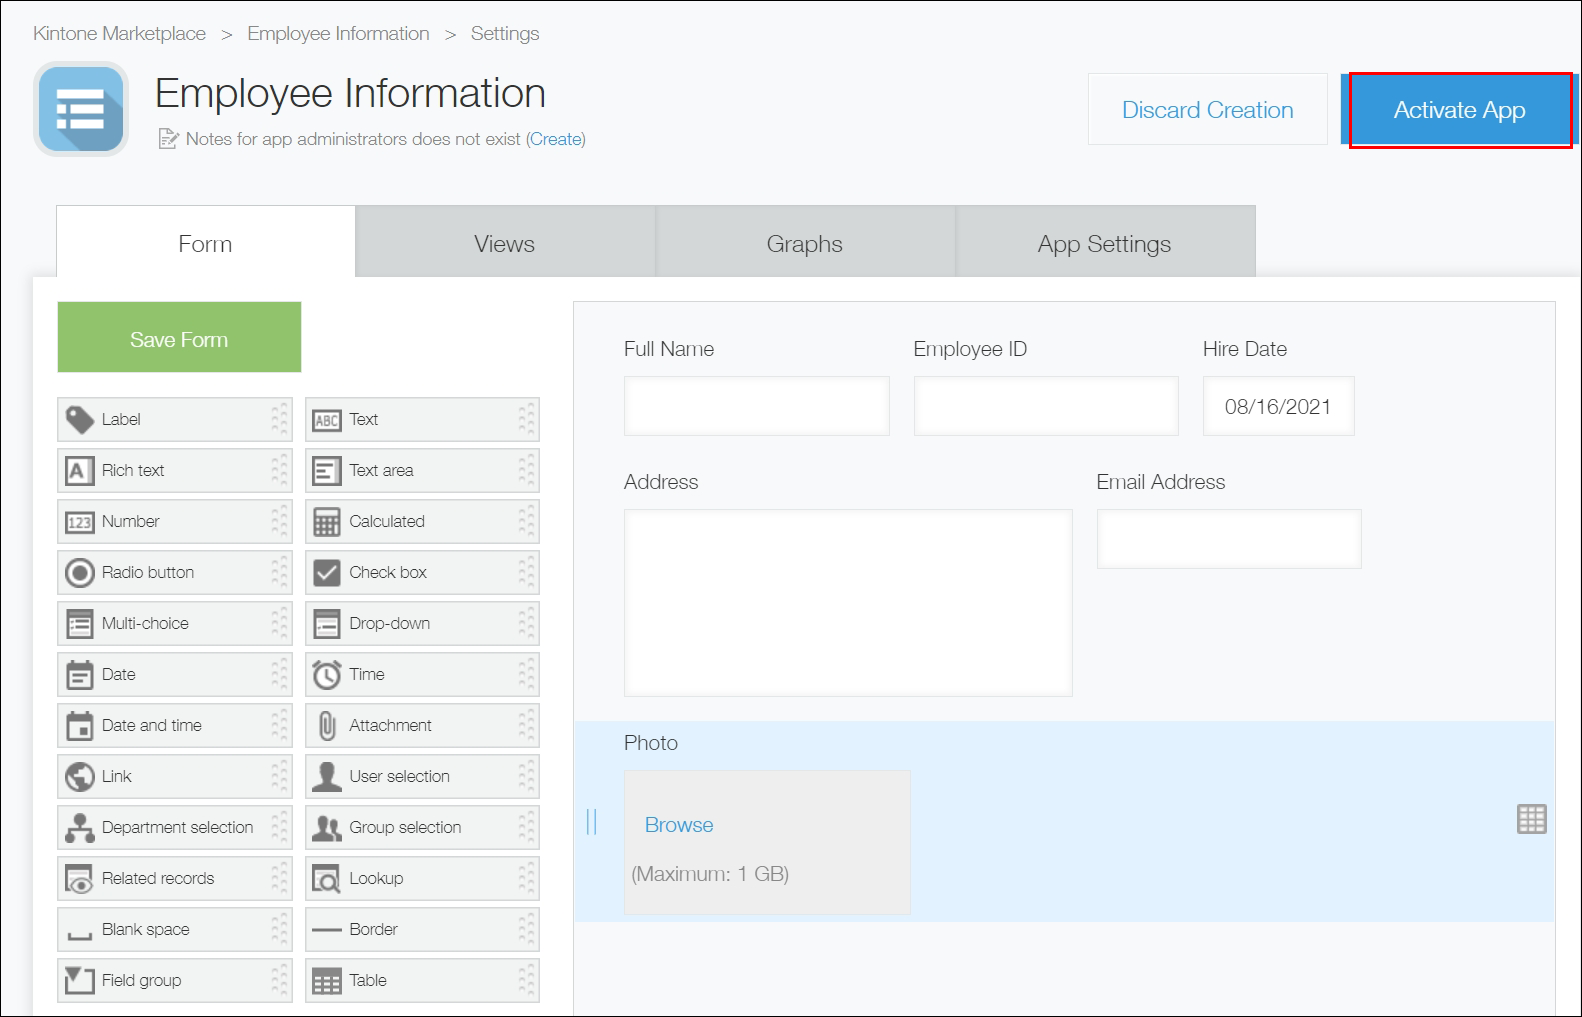
The "Employee Information" app is now complete. Next, try adding employee information to this app by following the steps described in Registering Data in an App.