Configuring client certificate authentication
Note that this is a paid option.
You cannot perform the configuration steps described on this page before starting your trial or subscription of Client certificate authentication.
Allowing users to use client certificate authentication
Allow users to use Client certificate authentication.
You can use either of the following procedures:
Issuing client certificates
Issue a client certificate for each user you allowed to use Client certificate authentication.
-
Access Administration.
Accessing Administration -
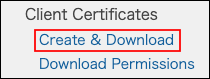
Click Create & download.
-
Select the checkbox for a user to whom you want to issue a client certificate.
You can select multiple users.

-
Set the expiration date.
By default, the date is set to one year later.
Expiration date of client certificate
-
Click Create.
Installing client certificates on devices
Install the client certificate on a device using one of the following methods.
Method 1: When a user installs the client certificate on a device
Inform users of the following page:
Installing client certificates on devices
Method 2: When an administrator installs the client certificate on a device
This section describes the steps for administrators to install the client certificate on a device and distribute the device to a user.
-
Download client certificates.
Downloading client certificates in bulk -
Extract the downloaded zip file.
The extracted folder contains zip files with the users' login names included in their names. -
Extract the zip file with the desired user's login name.
The extracted folder contains the client certificate file and a text file describing the password for the client certificate. -
Install the client certificate on a device.
As for the detailed steps, refer to the following page:
How to install a client certificate
Downloading client certificates in bulk
-
In the "Create & download Client certificates" screen, select "Valid".

-
Select the checkbox for the user you want.

-
Click Download.
Configuring IP address restrictions
For details, refer to the following page:
IP address restrictions