Setting Access Permissions to Use Cybozu Office 10
This section describes how to set access permissions required for the Cybozu Office 10.
If you do not set access permissions, the following symptoms may occur.
- "Error Number: 501 Data cannot be found." is displayed
- "Error Number: 401 Data file could not be opened." is displayed
- "HTTP 404" or "Not found" is displayed
- "HTTP 403" or "Forbidden" is displayed
When the above symptoms occur, the reason can be either of the following.
- The access permission settings for the installation directory are not completed.
Except when Cybozu Office 10 has been newly installed - The access permission settings for the data directory are not completed.
Confirm whether or not the access permission settings have been properly configured.
What Is the Installation Directory?
The "CGI directory + installation identifier" is called the installation directory. The CGI directory contains the executable files of the product.
An example of an installation directory using the default installation identifier is as follows:
- C:\inetpub\scripts\cbag\
- CGI Directory: C:\Inetpub\scripts\
- Installation identifier: cbag
What Is the Data Directory?
The data directory is a directory that stores data required to run the Cybozu Office 10.
This directory is created when either of the following conditions is met.
An example of a data directory is as follows:
- C:\cybozu\office\cbag\
Before Setting Up
User Rights
The following users must log in to the server where the product is installed.
- On Windows:
Users who have Administrator rights on the server where IIS will be installed.
How to Check the Installation Directory and the Data Directory
You can check the installation directory and the data directory in the environment where the product is running.
- Cybozu Office 10: Verifying the server environment
For Windows Server 2016/2019
This section explains the following scenario as an example.
- Windows: Windows Server 2016 or Windows Server 2019
- Installation identifier: cbag
-
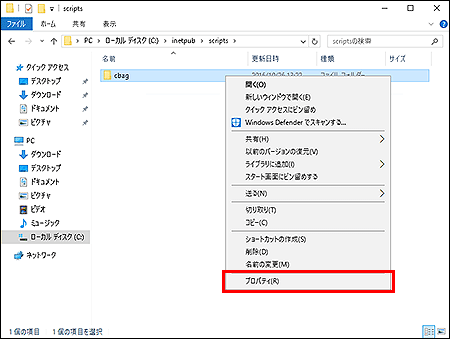
In Windows Explorer, open the following folder.
-
When you set access permissions for the installation directory:
C:\inetpub\scripts -
When you set access permissions for the data directory:
This is an example for Cybozu Office 10.C:\cybozu\office
-
-
Right-click the target folder, and select Properties.
-
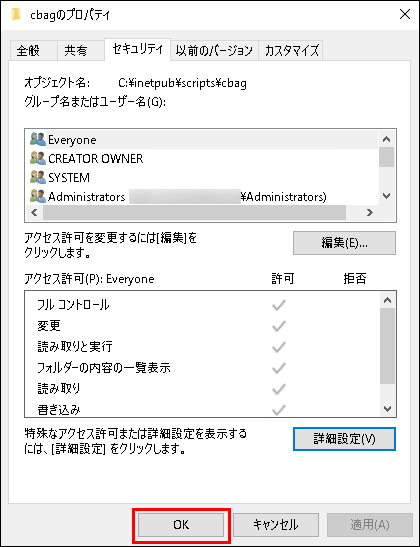
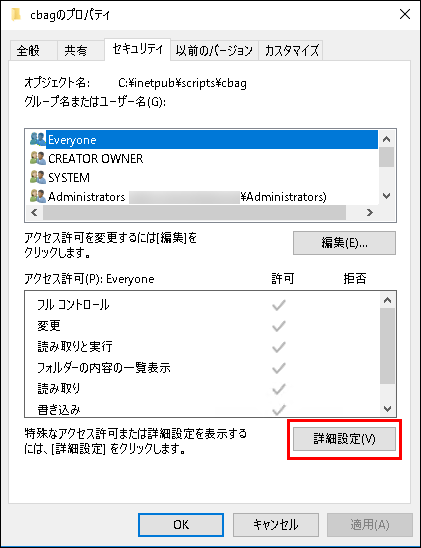
On the "Properties" screen, select the "Security" tab, and then confirm whether "Everyone" is displayed or not in the "Group or user names:" section.
-
When "Everyone" exists:
Select "Everyone" in the "Group or user names:" section, and then confirm whether "Allow" is selected for "Full control" in the "Permissions for Everyone" section.- If "Allow" is not selected, proceed to step 7.
- If "Allow" is selected, proceed to step 8.
-
When "Everyone" does not exist:
Proceed to step 4.
-
-
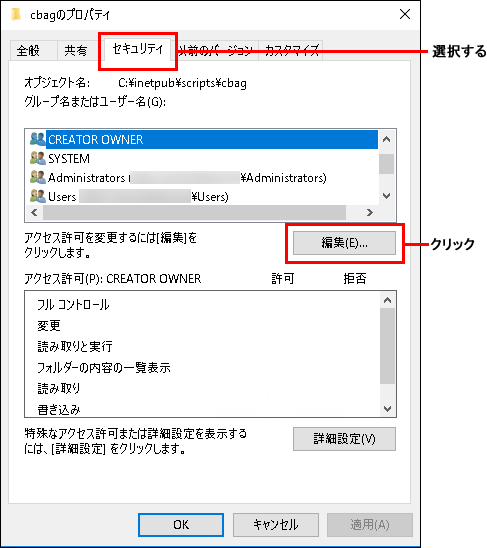
On the "Properties" screen, select the "Security" tab, and click Edit.
-
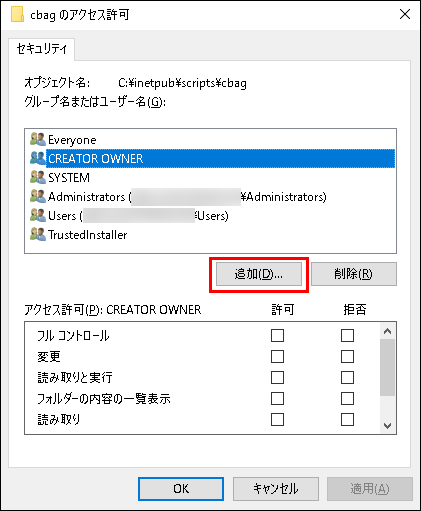
On the "Permissions" screen, click Add.
-
On the "Select Users or Groups" screen, type "Everyone" and click OK.
You can also search for and enter "Everyone" by clicking Advanced.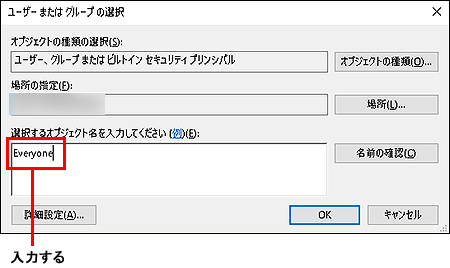
-
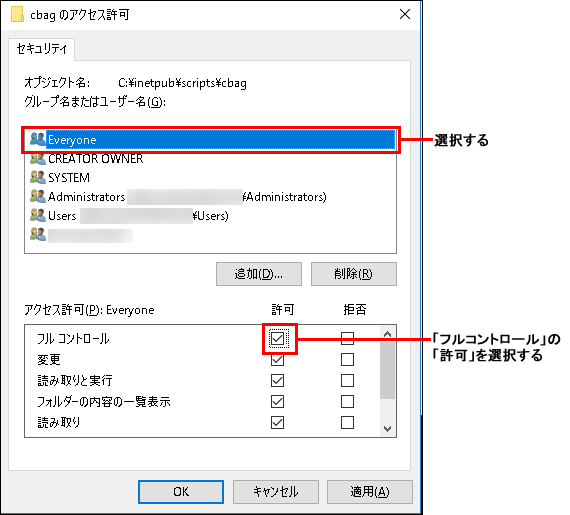
On the "Permissions" screen, select "Everyone" and select the "Allow" check box in "Full Control", and then click OK.
-
On the "Properties" screen, click Advanced.
-
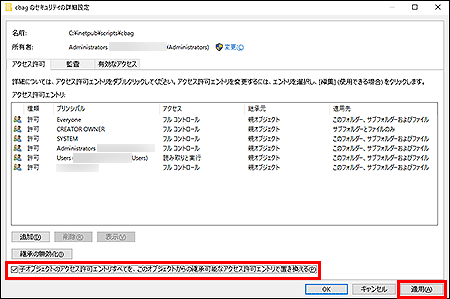
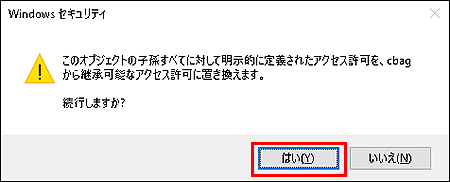
On the "Advanced Security Settings" screen, select the check box for "Replace all child object permission entries with inheritable permission entries from this object", and then click Apply.
-
Click Yes on the "Windows Security" screen.
-
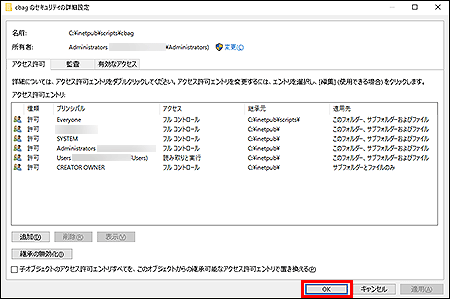
On the "Advanced Security Settings" screen, click OK.
-
On the "Properties" screen, click OK.