Auto-populating the assigned user when creating a record
You can configure your app to auto-populate an assignee field for records with the user (the logged-in user) who creates them. This saves you the trouble of having to select yourself as the assigned user every time you create a record.
Set up an assignee field on your app
On your app, set up a field for entering an assigned user. "Created by" fields and "User selection" fields are the fields that can be auto-populated with a user name when you create a record. "Created by" fields do not allow changes to the value afterward.
Created by
User selection
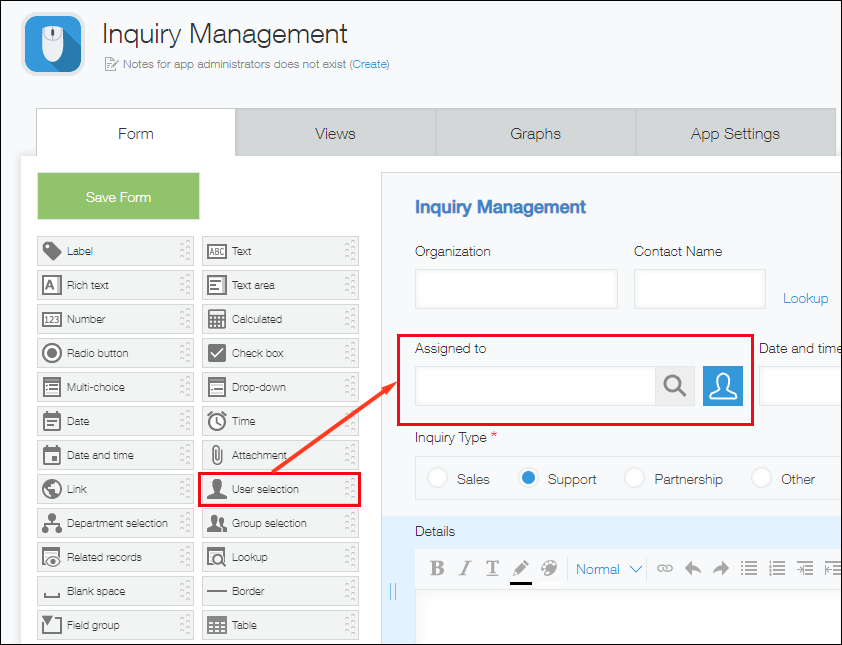
This example will use the "User selection" field, which allows you to change the selected user later on.
Before you can create a personalized view, you need to place a field for entering an assigned user on the app form.
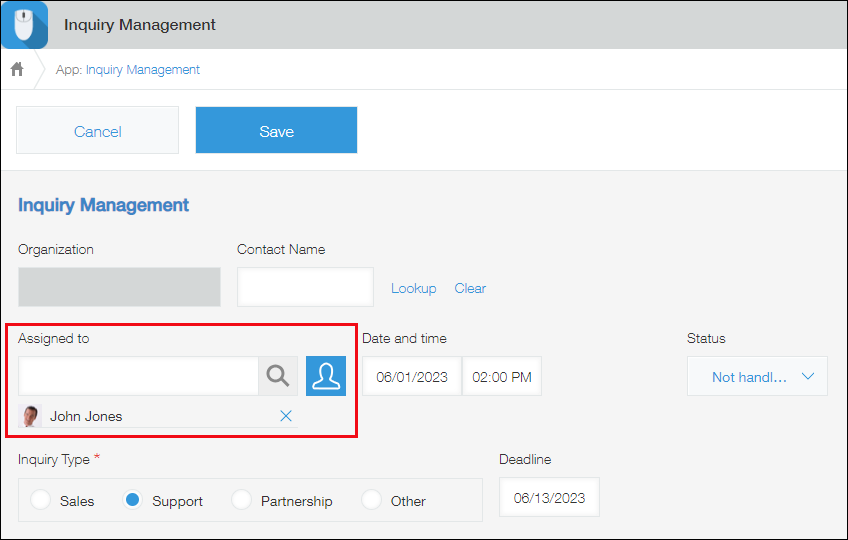
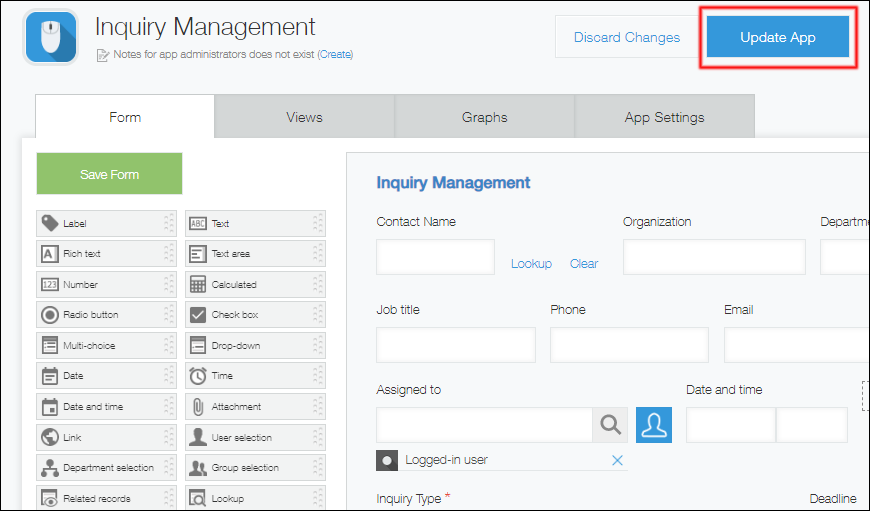
In this example, a "User selection" field is placed on the app form and named "Assigned to."
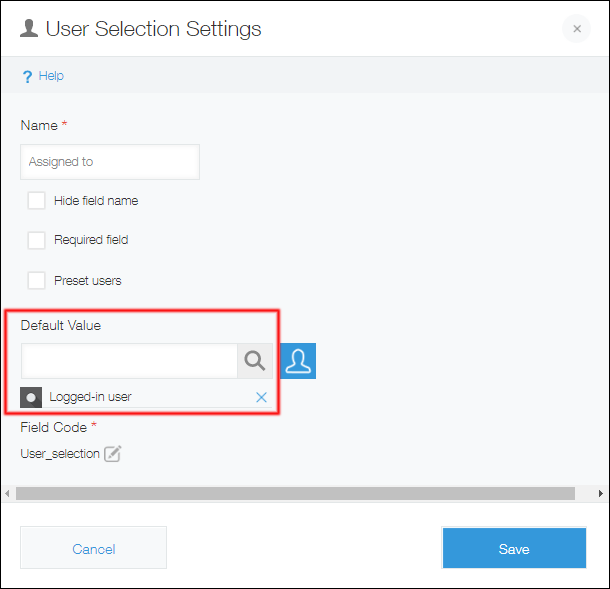
Set the default value for the assignee field
-
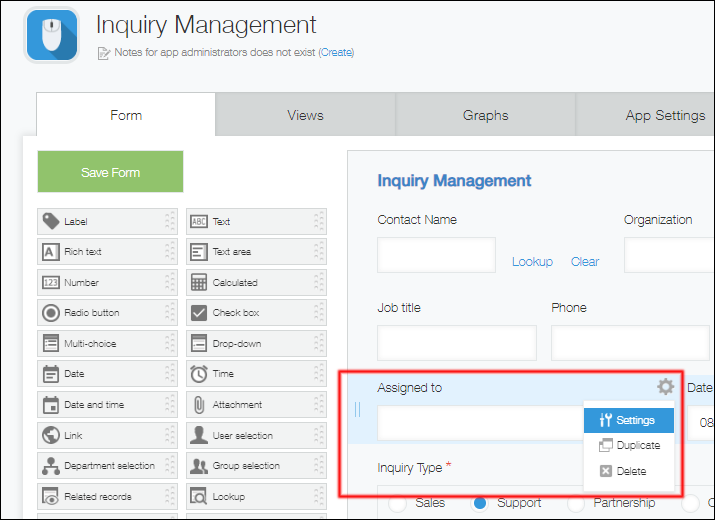
On the Form tab, hover over the Field settings icon of the "Assigned to" field, then click Settings.
-
Type "Logged-in user" in the Default value input field and click Logged-in user when it appears as a suggestion.
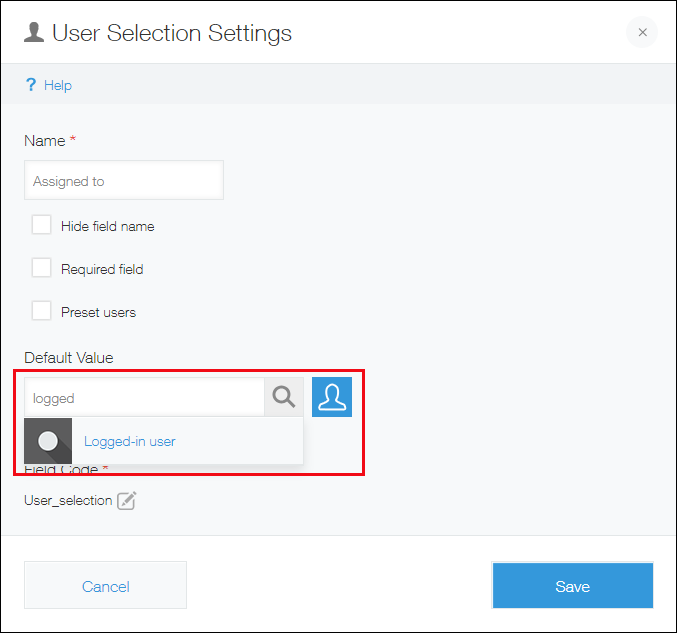
Logged-in user is added as the default value.
-
Click Save at the bottom right.
-
Click Update app at the upper right of the screen.
-
On the confirmation dialog, click Update app.
After completing the steps above, the field will be auto-populated with the logged-in user name (your name) when you create a record.
You can also create and save a personalized view that displays only the records assigned to you.
For the steps to do so, refer to Displaying a list of the records assigned to you.