Combining a Date and Character String into a Single Character String
By using the DATE_FORMAT function in a formula, date, date & time, and time can be treated as strings.
If you specify a formula without using the DATE_FORMAT function but using field codes instead, the formula does not display the date in a recognizable format. For example, "Report creation date 1575504000" is displayed if you specify the following formula: "Report creation date " & Date. This is because the date values are treated as UNIX time.
If you specify a formula using the Date_FORMAT function, the date will be displayed in a recognizable format. For example, "Report creation date 12-05" is displayed if you specify the following formula: "Report creation date " & DATE_FORMAT(Date, "MM-dd", "Etc/GMT").
Example
This section describes how to combine the DATE_FORMAT function and a string, using an example of a work report app.
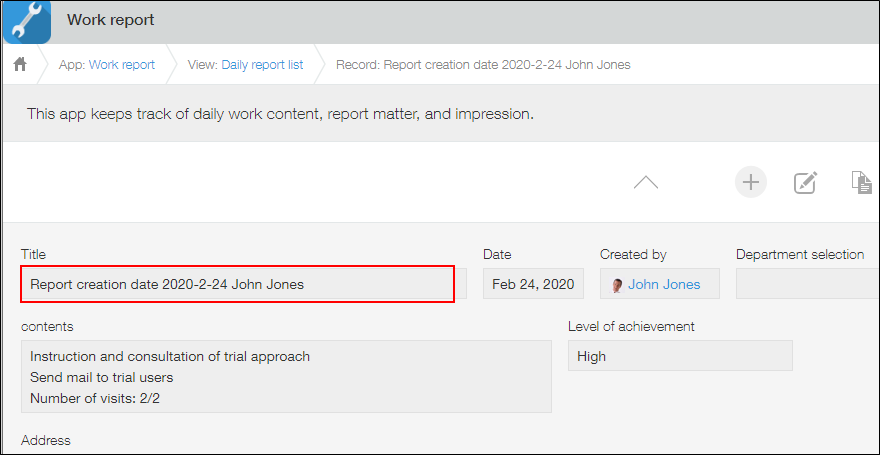
Image of the app with configured fields:
-
Click the App Settings icon (the gear-shaped icon) at the upper right of the "View" screen.

-
On the "App Settings" screen, click Form tab.
-
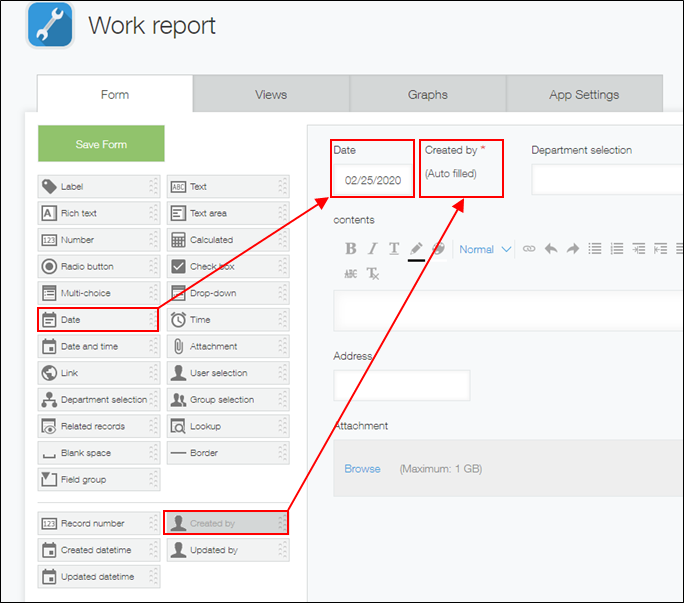
Place a "Date" field and "Created by" field on the app form by dragging the "Date" field and "Created by" field displayed in the list of fields on the left side of the screen and then dropping them onto the right area of the screen.
-
Place a "Text" field to be used for displaying a title.
Adjust the width of the field so that title will be displayed in one line.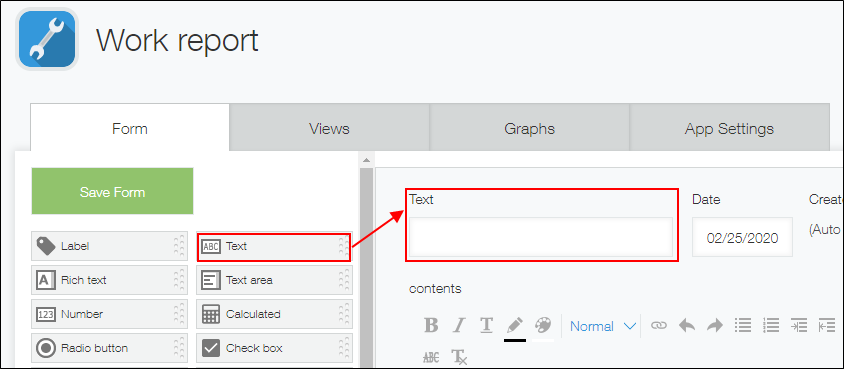
-
Open the field setting screen of the "Text" field and change the field name to "Title".
Keep the field setting screen open.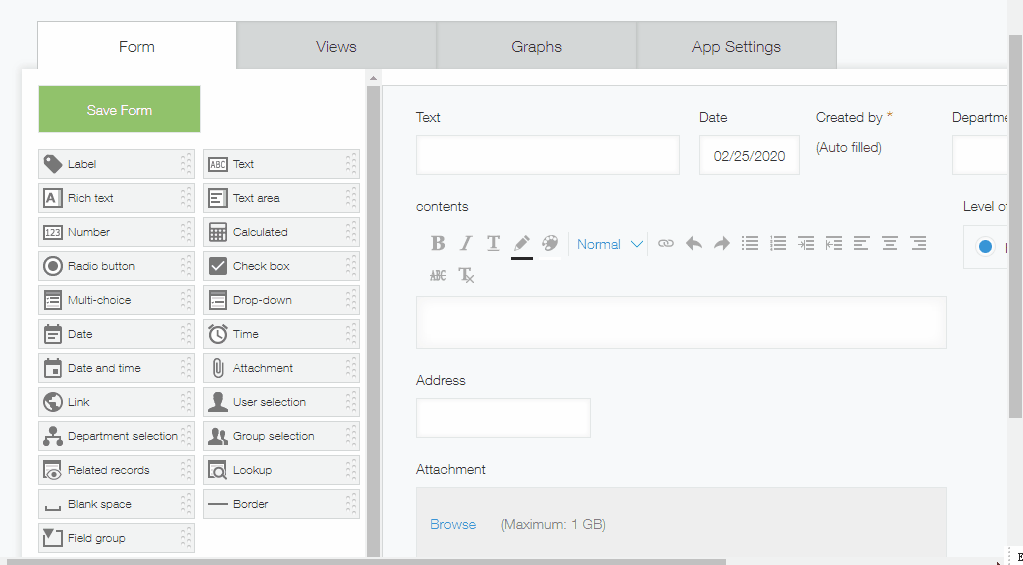
-
Select Calculate automatically and enter the formula.
- Formula:
"Report creation date" & " " & DATE_FORMAT(Date, "MM-dd", "Etc/GMT") & " " & Created by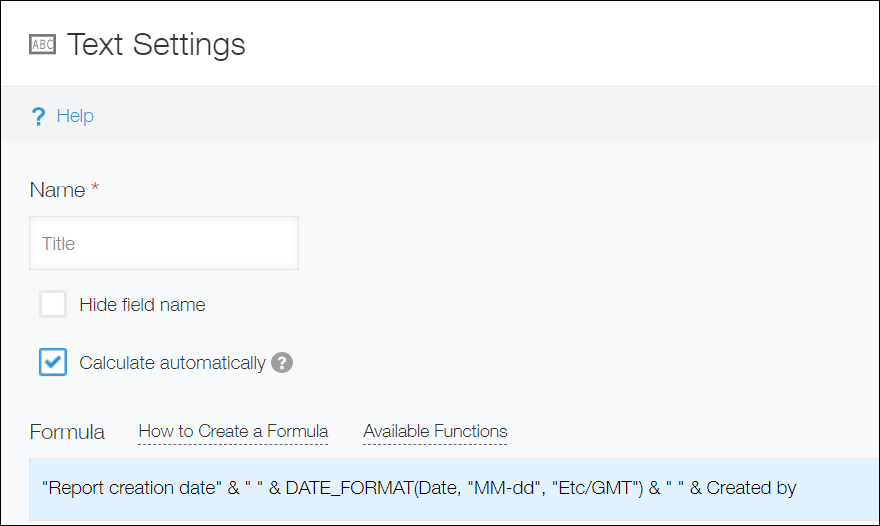
- Formula:
-
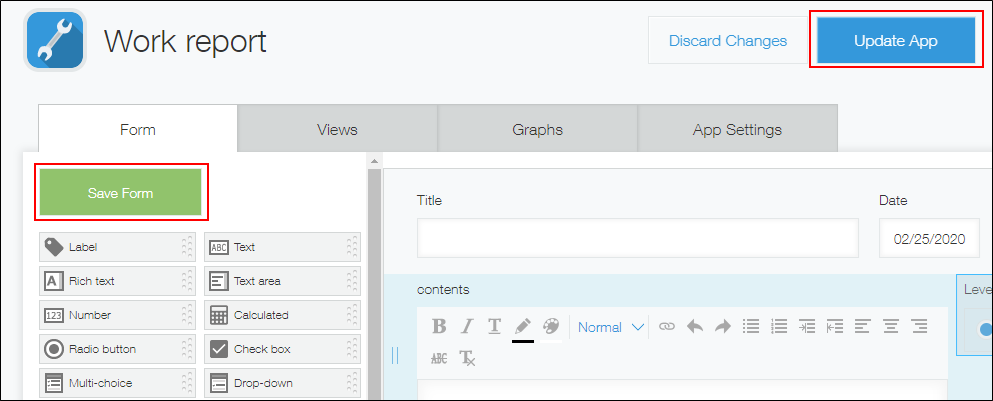
Click Save on the field setting screen.
-
Click Save Form on the upper left side of the screen, and then click Update App on the upper right side of the screen.
-
On the confirmation dialog, click Update App.
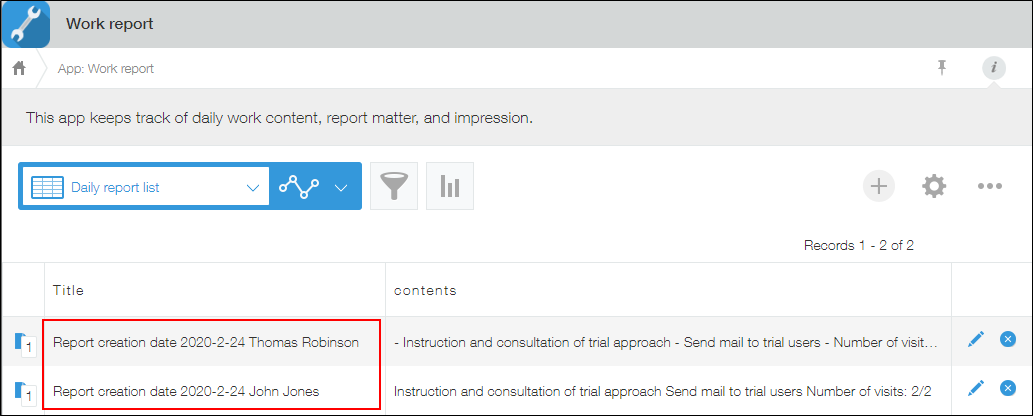
The string "Record creation date" and the values of "Date" and "Created by" fields are combined to display a single value when a record is created on the work report app.
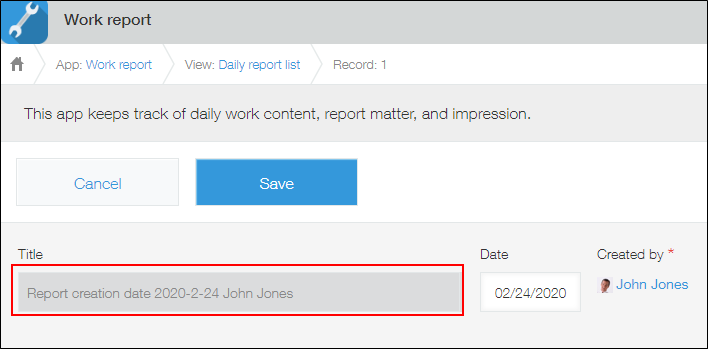
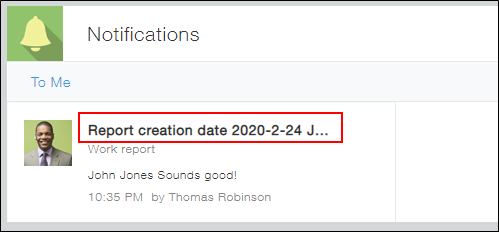
If you set the "Title" field as the record title, the field value be displayed as the notification title. You can also display it in the list of records.
 Reference: Setting Title Field
Reference: Configuring Views
This is also useful when you want to sort records by dates or by user names (in a "Task Management" app, etc.).