Integrating Microsoft Power Automate with kintone
Microsoft Power Automate enables kintone to exchange data with other web services. For example, you can set up an integration in such a way that a message is automatically posted in a chat app, such as Slack, each time a record is added on kintone, or oppositely, a record is automatically added on kintone each time a post that contains a specific keyword is created on the chat app.
This article explains integration between Microsoft Power Automate and kintone, using Outlook and Gmail as examples.
Example setting: Sending an e-mail from Outlook each time a record is added on kintone
-
Create a kintone app.
Prepare the following fields, which will be used for entering information to be included in the e-mail.Field name Field type Date "Date" field Store "Drop-down" field Sales "Number" field 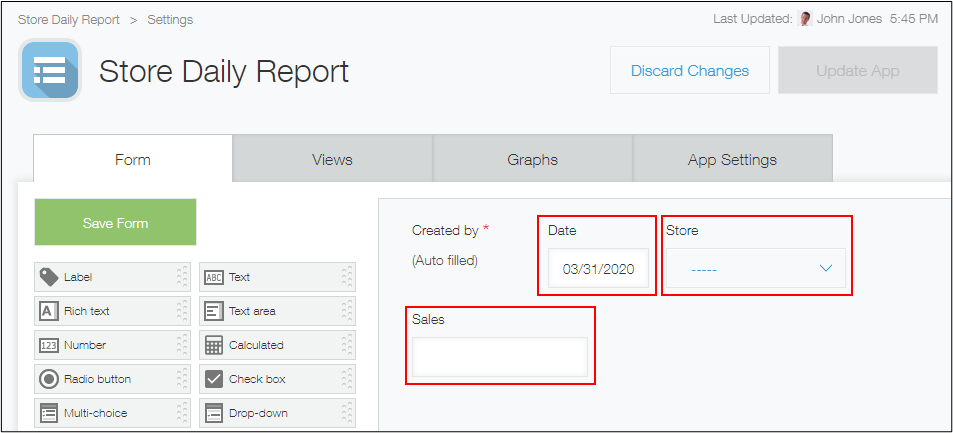
-
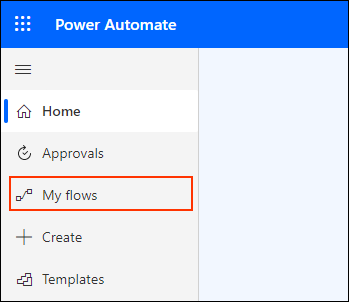
Sign in to Microsoft Power Automate and click My flows on the menu displayed on the left side.
Microsoft Power Automate (Microsoft Power Automate site)
In Microsoft Power Automate, an integration workflow is called a flow.
-
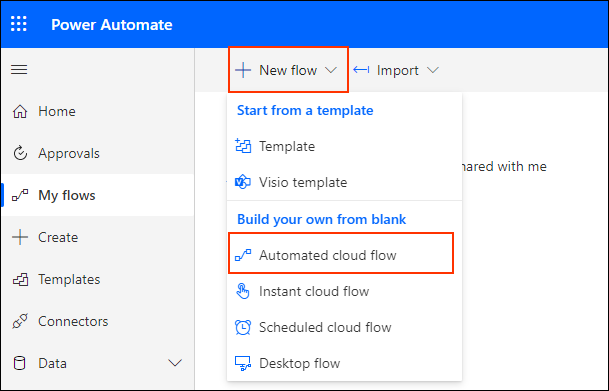
Click New flow and then Automated cloud flow.
-
Enter any name for the flow. Then, enter "kintone" in the Search all triggers search box to search for a trigger.

-
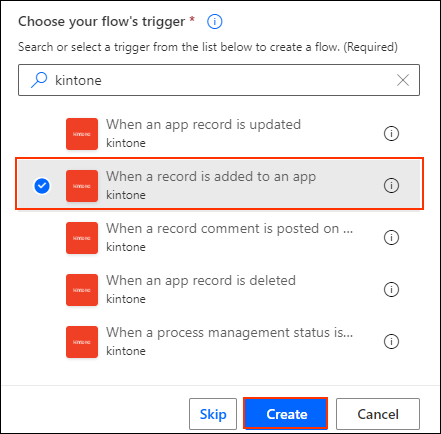
Click When a record is added to an app and then click Create.
-
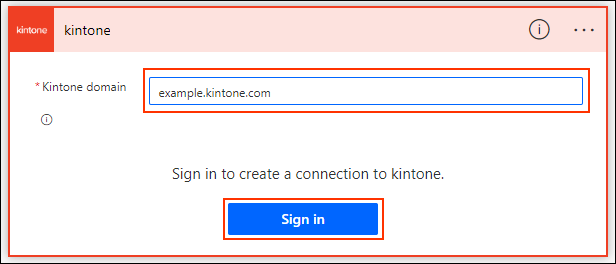
Enter the kintone domain you want to integrate with Microsoft Power Automate. Then, click Sign in.
- A kintone domain refers to the following part of the kintone URL: subdomain name.cybozu.com
For example, if the URL is "https://example.cybozu.com/k/#/portal", the domain is "example.cybozu.com".
- A kintone domain refers to the following part of the kintone URL: subdomain name.cybozu.com
-
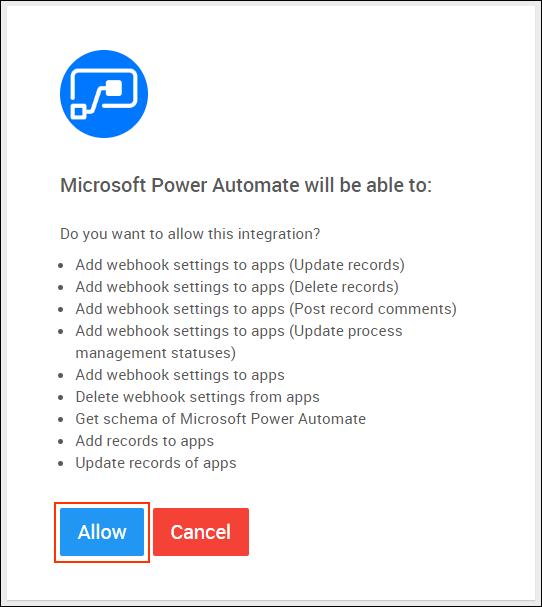
When you are prompted with a screen that asks whether to allow integration, click Allow.
-
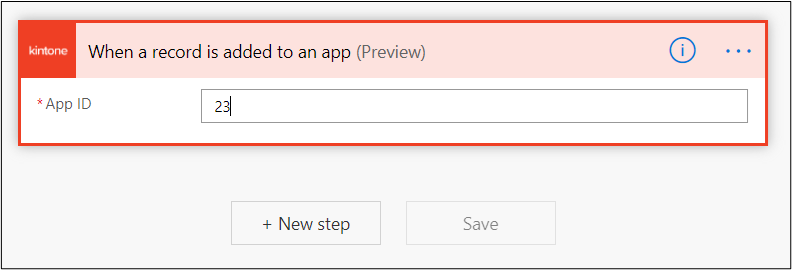
Enter the ID of the app you want to use for the integration.
- You can find the app ID in the URL of the app.
For example, if the URL of the app is "https://example.cybozu.com/k/23/", the app ID is "23".
- You can find the app ID in the URL of the app.
-
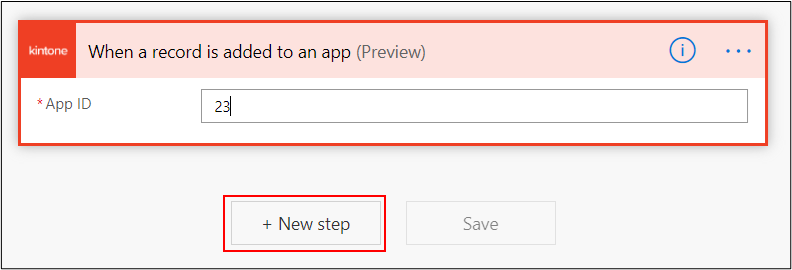
Click New step.
-
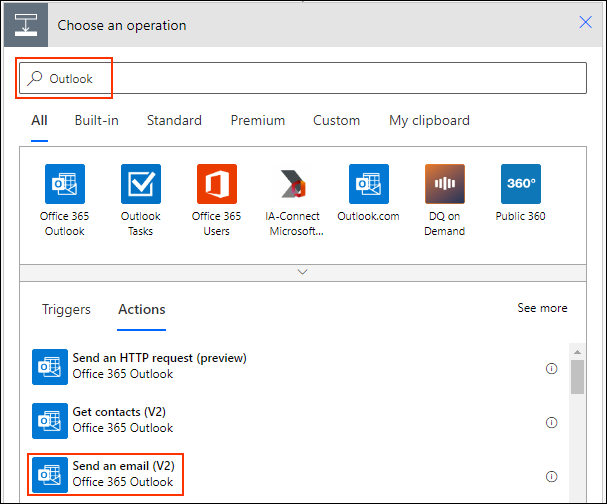
On the screen to choose an operation, search for "Outlook" and click Send an email.
-
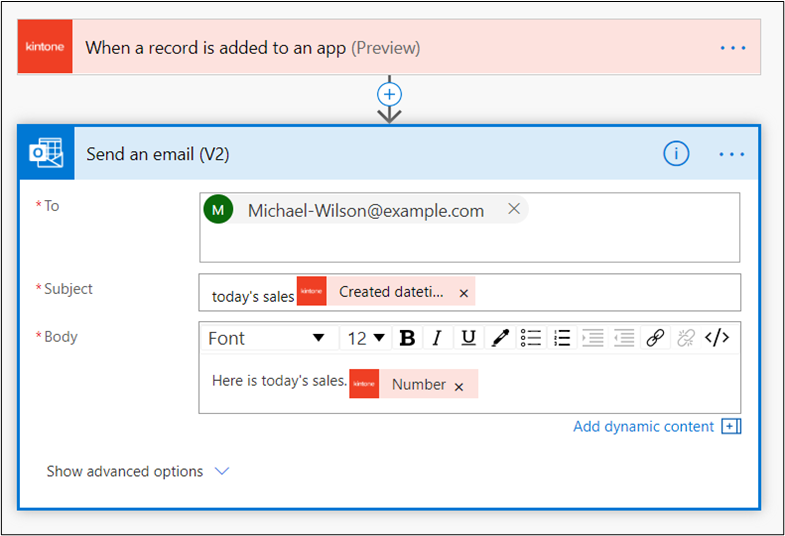
Set the information to be included in the e-mail.
You can flexibly set the information in the e-mail, combining data of the kintone app with specific strings. For example, you can set the information as follows:- To: Email address of a recipient
- Subject: Today's sales ["Date" field value]
- Body: Today's sales are as follows:
- ["Store" field value] ["Sales" field value]
-
Click Save.
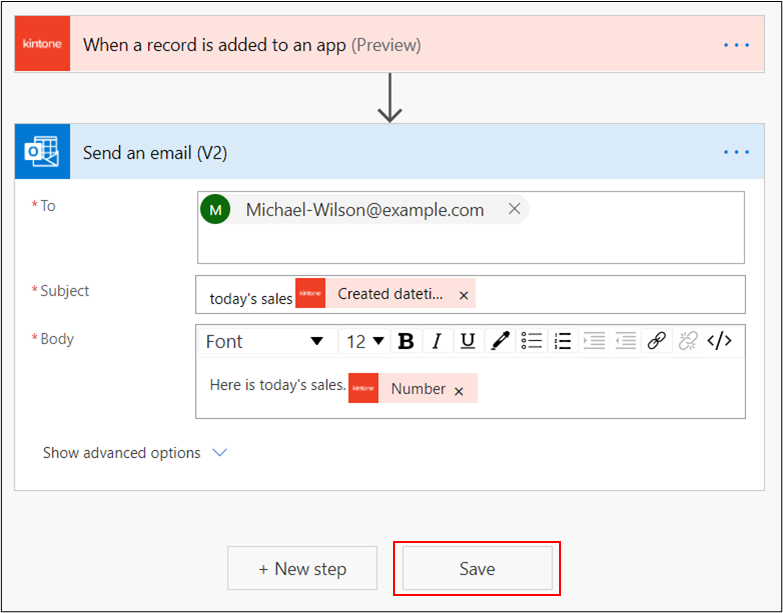
You have successfully set up the flow.
An e-mail will be automatically sent from Outlook each time a record is added on the kintone app.
The next section shows you how to create a flow that works in the opposite direction; that is, a flow that automatically adds a record on a kintone app each time an email is received.
Example setting: Adding a record on kintone each time an e-mail is received on Gmail
-
Create a kintone app.
Integration is not available for apps in guest spaces.
Prepare the fields to be used for entering the subject and body of the received e-mail.Field name Field type Subject "Text" field Body "Text area" field 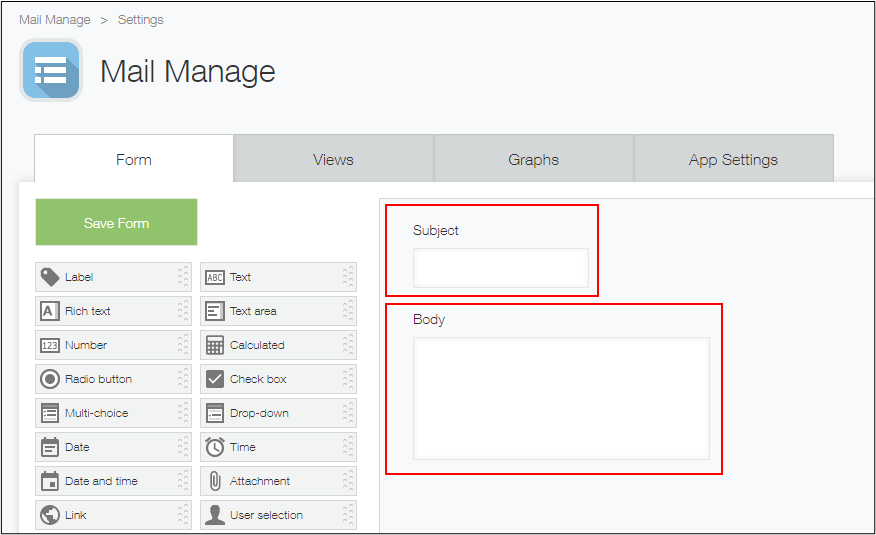
-
Sign in to Microsoft Power Automate and click My flows on the menu displayed on the left side.
Microsoft Power Automate (Microsoft Power Automate site)
In Microsoft Power Automate, an integration workflow is called a flow.

-
Click New flow and then Automated cloud flow.

-
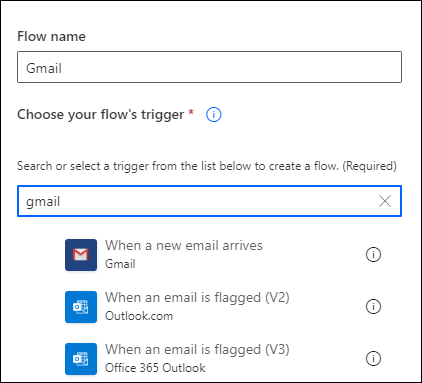
Enter any name for the flow. Then, enter "Gmail" in the Search all triggers search box to search for a trigger.
-
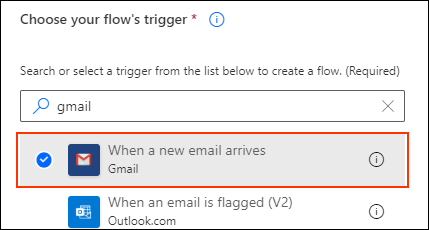
Click When a new email arrives, and then click Create.
-
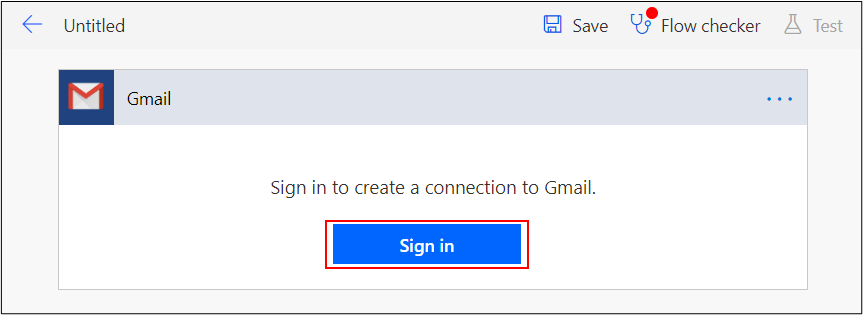
When you are prompted to connect to Gmail, click Sign in.
-
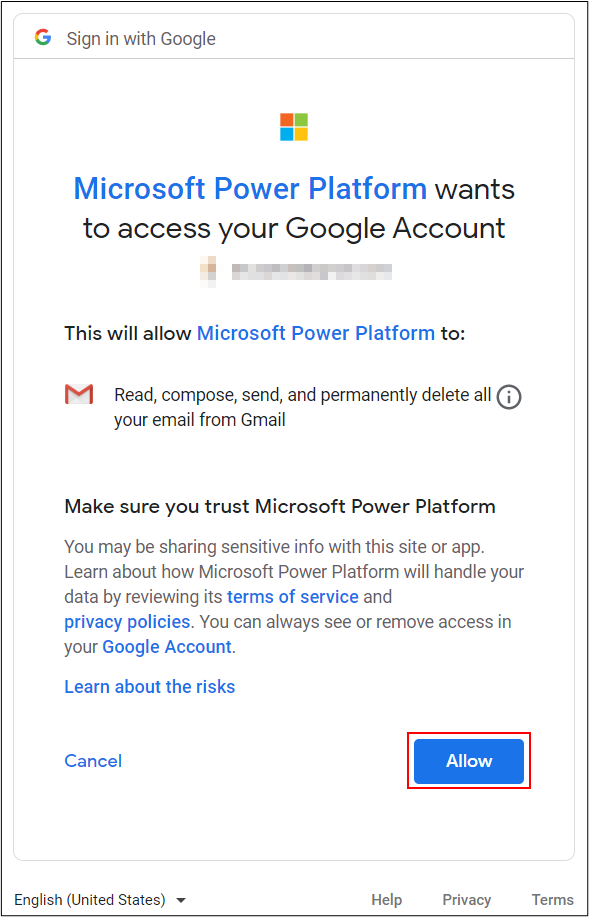
When a request to allow access to your Google account appears, click Allow.
-
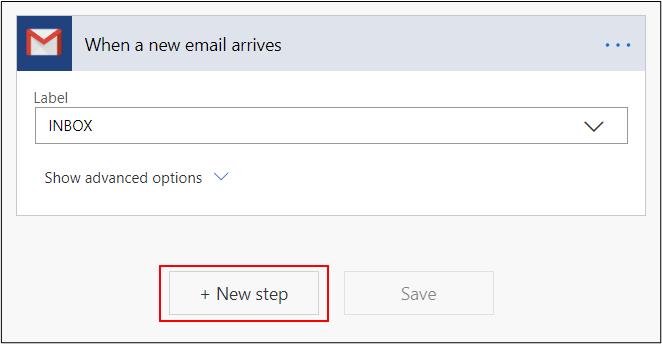
Click New step.
-
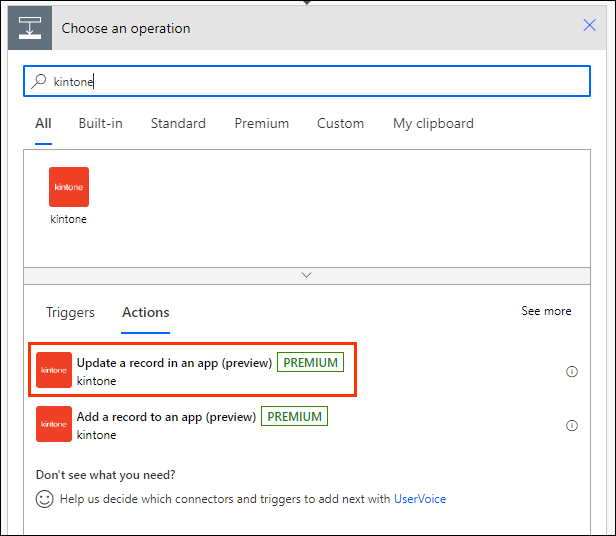
On the screen to choose an operation, search for "kintone" and select an action.
In this example, we will select Add a record to an app.
-
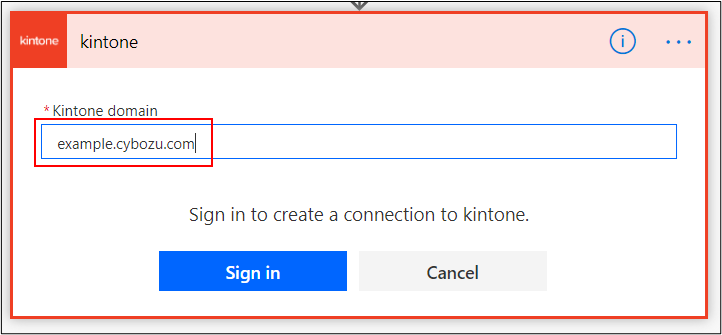
If the screen to sign in to kintone appears, enter your domain and click Sign in.
- A kintone domain refers to the following part of the kintone URL: subdomain name.cybozu.com
For example, if the URL is "https://example.cybozu.com/k/#/portal", the domain is "example.cybozu.com".
- A kintone domain refers to the following part of the kintone URL: subdomain name.cybozu.com
-
When you are prompted with a screen that asks whether to allow integration, click Allow.

-
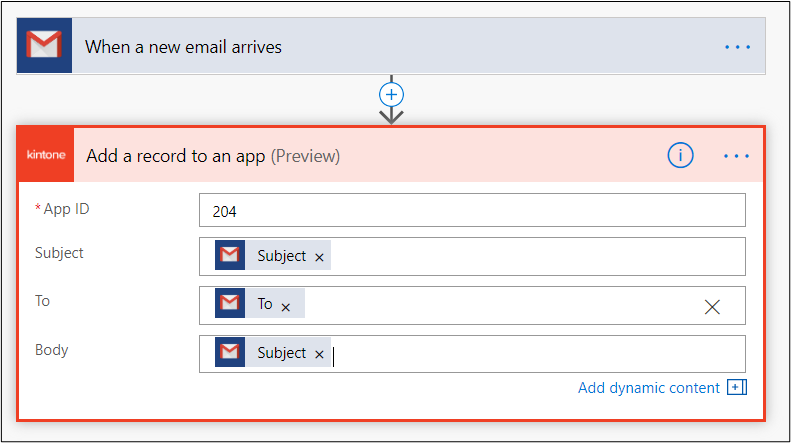
Set the information to be included in the record that will be newly added to the kintone app.
You can flexibly set the information to be included in the record, combining items in the e-mail with specific strings.
-
Click Save.
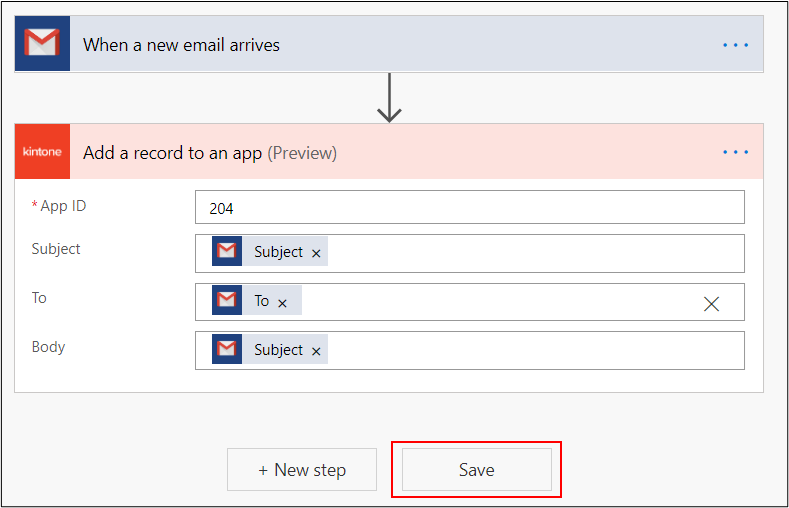
You have successfully set up the flow. A record will be automatically added on kintone every time an e-mail is received on Gmail.
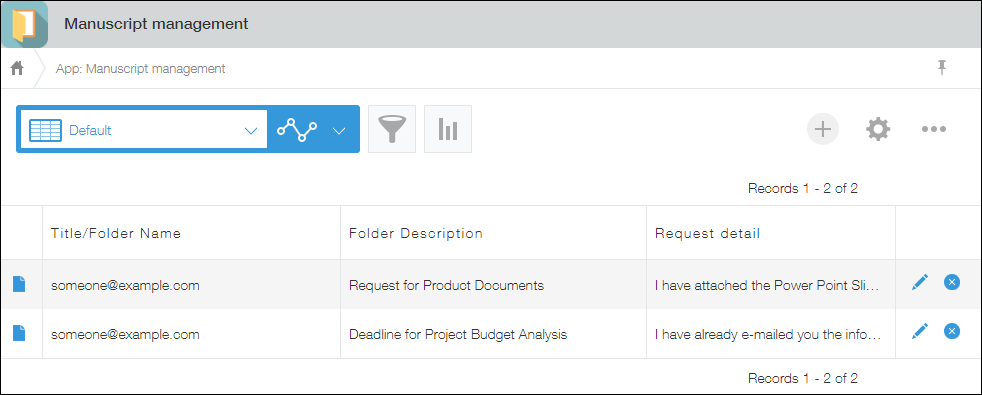 In addition to the ones described above, there are many more useful integration workflows you can set up. Feel free to give them a try.
